|
07.04.2008
Updated 23.04.2008
Vyatta VC4 - Advanced VPN Site-to-Site Connections - Part 5 - Basic Configuration of the Vyatta VC4 VMs(configure interfaces, set default routes, NAT rules, test connectivity) in Case of Scenario 1
- 1. Vyatta ISP Config
- 2. Vyatta HQ Basic Config
- 3. Vyatta Branch1 Basic Config
- 4. Vyatta Branch2 Basic Config
Now that our virtual lab is prepared let's test Scenario 1. If you do not recall what was Scenario 1 take a look here.
Let's take it step by step. First let's do a basic configuration (configure the interfaces, default gateways and NAT rules) on every Vyatta VC4 machine, just to make sure that connectivity is not a problem and things work the way we want to.
Since we are using a virtual environment we can easily capture traffic and actually view how packets are flowing. For this, I will enable VMware Network Adapter VMnet5 on the host machine, see Figure64. Since all Vyatta VC4 machines have an adapter connected to VMnet5 Virtual Network, we can easily have a central point of view over the traffic flow.
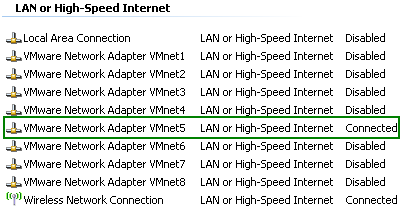
Figure64: VMware Network Adapter VMnet5 Enabled
Also, since VMware Network Adapter VMnet5 is enabled, I can use a SSH client from the host machine to configure all the routers without the need to enable other VMnet adapters.
Now becomes very clear why Scenario 1 is a very comfortable and easy to use one.
First let's configure Vyatta ISP.
1. Vyatta ISP Config
Configure the interfaces and enable SSH:
set interfaces ethernet eth0 address 192.168.22.234/24
set interfaces ethernet eth1 address 192.168.50.1/24
set service ssh protocol-version 2
commit
Now I can use a SSH client to quickly enter the rest of the configuration.
Set the name of the machine and a default route to the gateway of this lab.
set system host-name ISP
set protocols static route 0.0.0.0/0 next-hop 192.168.22.1
commit
I do not want to make any changes on the gateway (192.168.22.1), to make it aware of the 192.168.50.0/24 network. Thus I will add a NAT rule on the Vyatta ISP machine, so every packet from the 192.168.50.0/24 network destined to the 192.168.22./0 network or to an Internet destination will be sourced with the IP address of eth0 interface (192.168.22.234).
set service nat rule 10 type masquerade
set service nat rule 10 source address 192.168.50.0/24
set service nat rule 10 outbound-interface eth0
commit
save
And Vyatta ISP's configuration is done.
2. Vyatta HQ Basic Config
Now let's configure Vyatta HQ.
Configure the interfaces and enable SSH:
set interfaces ethernet eth0 address 192.168.50.2/24
set interfaces ethernet eth1 address 192.168.10.1/24
set service ssh protocol-version 2
commit
Now I can use a SSH client to quickly enter the rest of the configuration.
Set the name of the machine and a default route to the gateway.
set system host-name HQ
set protocols static route 0.0.0.0/0 next-hop 192.168.50.1
commit
Since the network behind the Vyatta HQ machine is from private IP address space, in practice we will need a NAT rule in place. In our lab, IP addresses from the 192.168.50.0/24 network act as public IP addresses. Thus I will add a NAT rule on the Vyatta HQ machine.
set service nat rule 10 type masquerade
set service nat rule 10 source address 192.168.10.0/24
set service nat rule 10 outbound-interface eth0
commit
save
Now I will check from a host behind Vyatta HQ machine if I can reach my lab's physical gateway and if I have Internet connectivity.

Figure65: Ping from a host behind Vyatta HQ machine
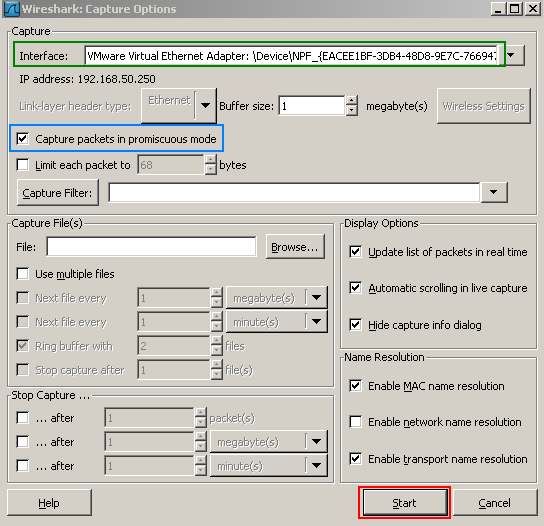
We can capture some packets to see how they are translated when they pass through the Vyatta VC4 machines. I will start a Wireshark capture on the VMnet5 interface on the host machine(see Figure66, make sure "Capture packets in promiscous mode " is selected), another one on my physical interface and another one on the VM behind Vyatta HQ.
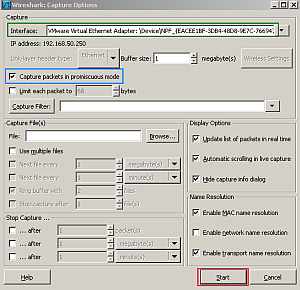
Figure66: Start a Wireshark capture on the VMnet5 interface on the host machine
In Figure67 we can see the original echo request packet sent by a VM behind Vyatta HQ to 192.168.22.1. As can be noticed an echo reply was received back. So connectivity is OK.

Figure67: Wireshark Capture on the VM Behind Vyatta HQ: Ping
In Figure68 we can spot that our NAT rule set on Vyatta HQ is working.

Figure68: Wireshark Capture - The Echo Request Packet Translated by Vyatta HQ
And in Figure69 we will see that the NAT rule set on Vyatta ISP is working too.

Figure69: Wireshark Capture - The Echo Request Packet Translated by Vyatta ISP
So if necessary, our physical network can be unaware of the virtual lab, thus no need for any modifications on the physical gateway.
3. Vyatta Branch1 Basic Config
Configure the interfaces and enable SSH:
set interfaces ethernet eth0 address 192.168.50.3/24
set interfaces ethernet eth1 address 192.168.30.1/24
set service ssh protocol-version 2
commit
Now I can use a SSH client to quickly enter the rest of the configuration.
Set the name of the machine and a default route to the gateway.
set system host-name Branch1
set protocols static route 0.0.0.0/0 next-hop 192.168.50.1
commit
As in case of Vyatta HQ, I will add a NAT rule on the Vyatta Branch1 machine.
set service nat rule 10 type masquerade
set service nat rule 10 source address 192.168.30.0/24
set service nat rule 10 outbound-interface eth0
commit
save
Now I can check from a host behind Vyatta Branch1 machine if I can reach my lab's physical gateway and if I have Internet connectivity.
4. Vyatta Branch2 Basic Config
Configure the interfaces and enable SSH:
set interfaces ethernet eth0 address 192.168.50.4/24
set interfaces ethernet eth1 address 192.168.40.1/24
set service ssh protocol-version 2
commit
Now I can use a SSH client to quickly enter the rest of the configuration.
Set the name of the machine and a default route to the gateway.
set system host-name Branch2
set protocols static route 0.0.0.0/0 next-hop 192.168.50.1
commit
As in case of Vyatta HQ, I will add a NAT rule on the Vyatta Branch2 machine.
set service nat rule 10 type masquerade
set service nat rule 10 source address 192.168.40.0/24
set service nat rule 10 outbound-interface eth0
commit
save
Now I can check from a host behind Vyatta Branch2 machine if I can reach my lab's physical gateway and if I have Internet connectivity.
Since all the Vyatta VC4 machines are up and running let's do some connectivity checks from the Vyatta HQ machine to the Vyatta Branch1 and Vyatta Branch2 machines. See Figure70.

Figure70: Connectivity Tests From Vyatta HQ
So things look good. Time to proceed and configure the GRE and IPIP tunnels.
In Part 6 we will start configuring GRE and IPIP tunnels on the Vyatta VC4 VMs for Scenario 1.
|