I wanted to be able to quickly obtain web server certificates(exportable along with their corresponding private keys) for internal use from an Enterprise CA(installed on Windows Server 2008 EE SP2) from a domain machine(Windows Server 2008 SP2 or Windows 7 RC).
Being in lazy mode, I’ve decided to use the mmc and enroll web server certificates just the way we enroll Computer certificates for domain member machines, except the fact that I will supply the needed CN for the Web Server template.
But, by default we cannot do that. Well, it takes just a few seconds to make that possible, get the needed certificate(s) and then put it back just the way it was(so no one will know, –:) ).
In the next lines I will exemplify this “trick” (for convenience, bellow the CA was installed on the DC).
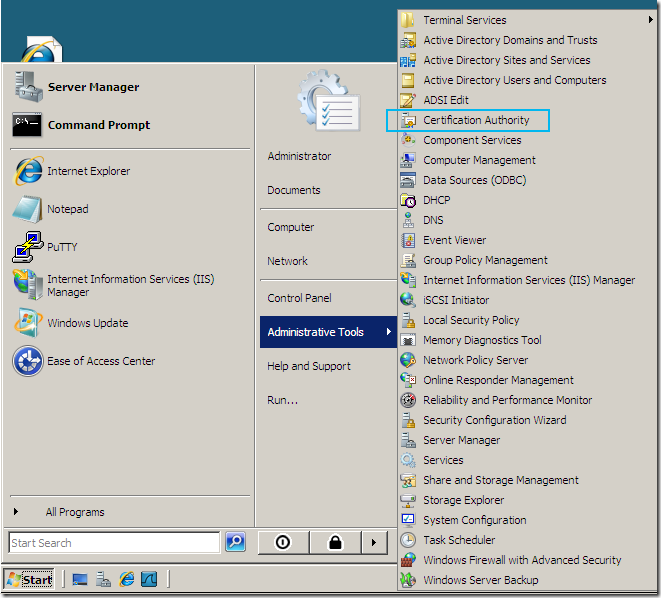
On the CA machine, click Start, head over to Administrative Tools and click Certification Authority:
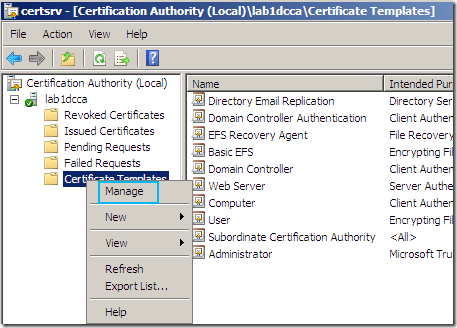
On the opened CA mmc, expand the CA name node, right-click the Certificate Template and click Manage:
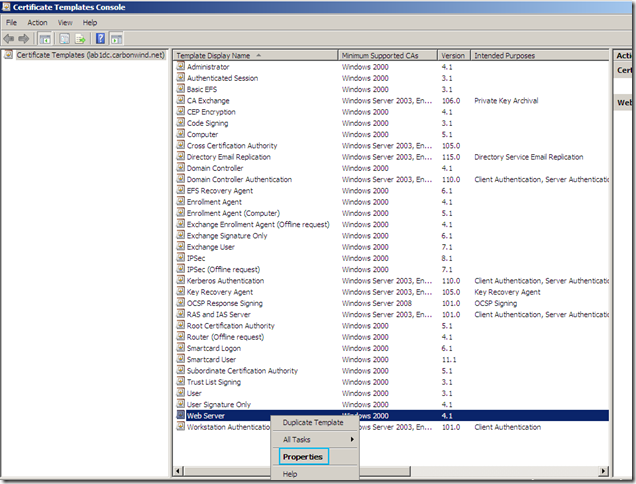
Within the Certificate Templates Console locate the Web Server template, right-click it and click Properties:
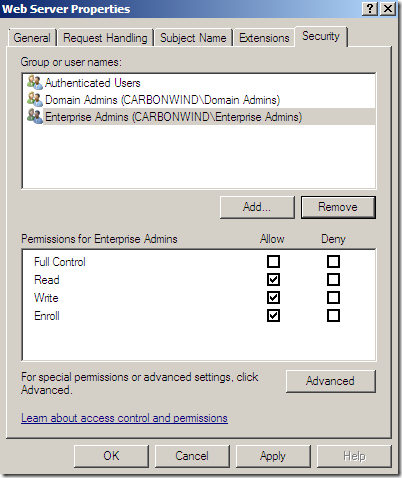
On the Web Server Properties window of this template, head over to the Security tab and click the Add… button:
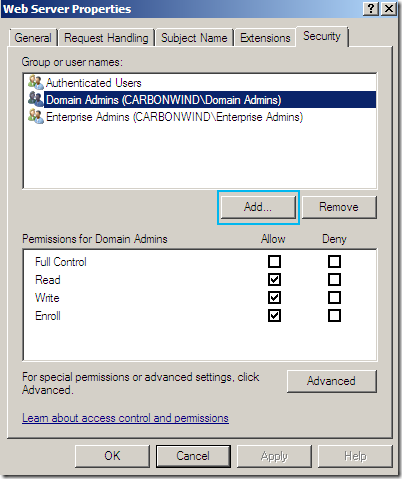
Now, we have a couple of possibilities, either we add the Domain Computers object(not recommended) or only add the domain computer from which we will make our request(recommended) –note that if we add the Domain Computers object we may introduce a temporary security risk(until we “revert” the Web Server certificate template to its original state), as the enterprise CA(by default) or this certificate template are not configured to require approval for the certificate enrollment and we can control the CN name within our requests(this certificate template is configured to have the subject name supplied in request)-:
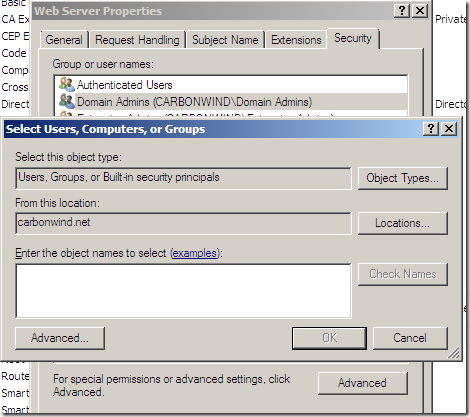
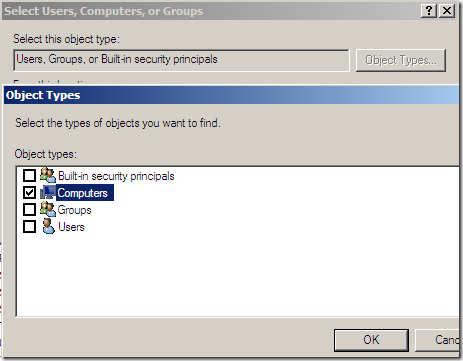
Say we add only the needed domain computer object(recommended), click Object Types and select only Computers:
I’m going to type a part of the needed computer name and click the Check Names button and then select the domain computer object I want, in this case LAB1TMGB3:
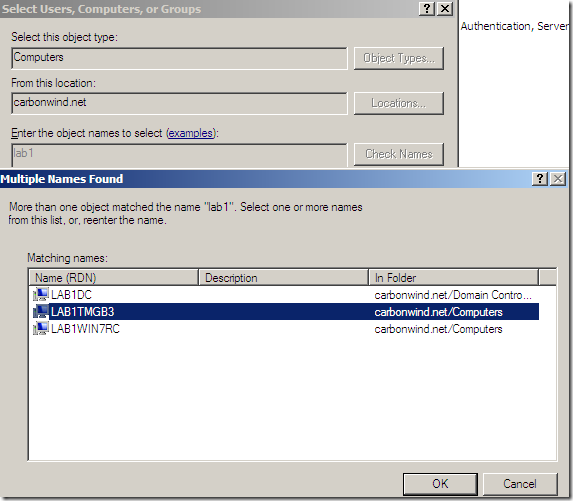
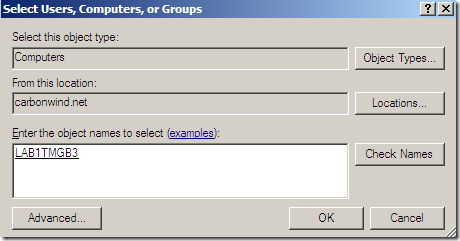
Click the OK button.
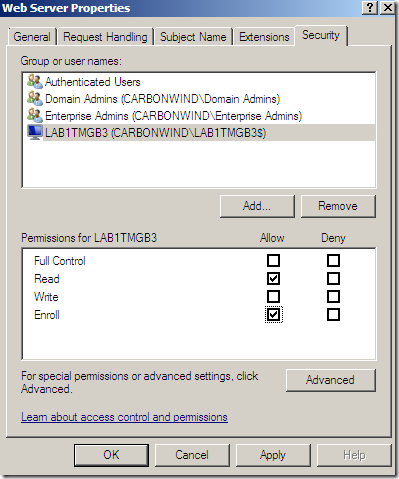
Now on the Web Server Properties window of this template, select the added computer object and select for the Enroll permission the checkbox under Allow and click the Apply button:
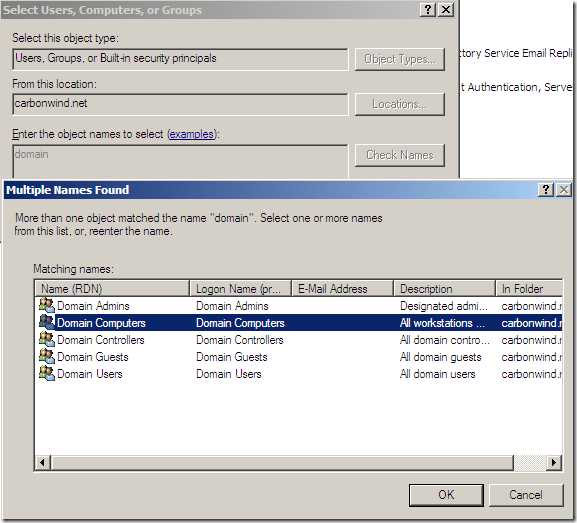
Or say we add the Domain Computers object(not recommended), I’m going to type domain and click the Check Names button and then select the Domain Computers object:
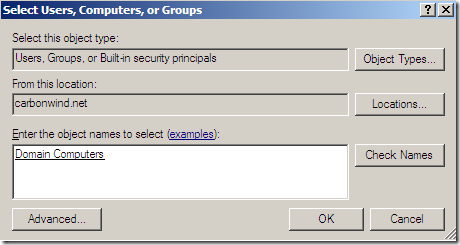
Click the OK button.
Now on the Web Server Properties window of this template, select the added Domain Computers and select for the Enroll permission the checkbox under Allow and click the Apply button:
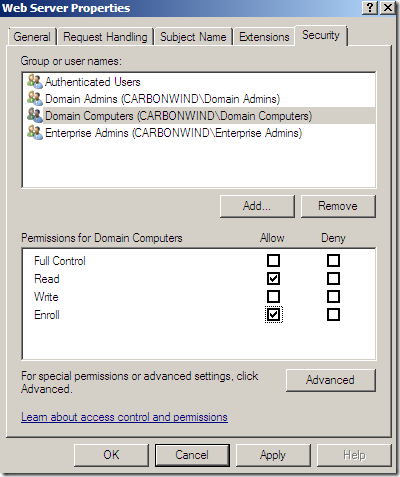
And we’re done for the moment with the CA(you can close the Certificate Template Console window if you want).
Head over to the domain computer from which you will request the certificate(just in case you try-if you have a reason for that-, it will not work from the DC if you’ve selected the Domain Computers object, but it will work if you’ve selected the DC computer object instead).
For convenience, I will picture the certificate enroll process side by side from a Windows Server 2008 SP2 machine and a Windows 7 RC machine(both domain members).
Click Start, run, type mmc and hit enter.
On the opened console window, click the File menu, select the Add/Remove Snap-in, add the Certificates snap-in, Computer account and Local Computer and click Finish.
Expand the Certificates(Local Computer) node, expand Personal, right-click Certificates and point to All Tasks and click Request New Certificate:
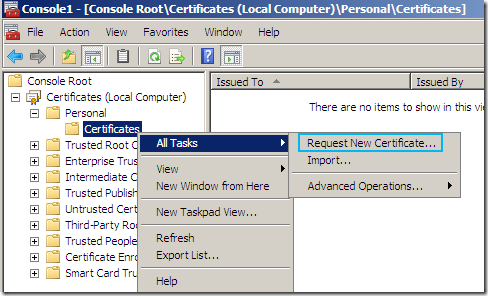
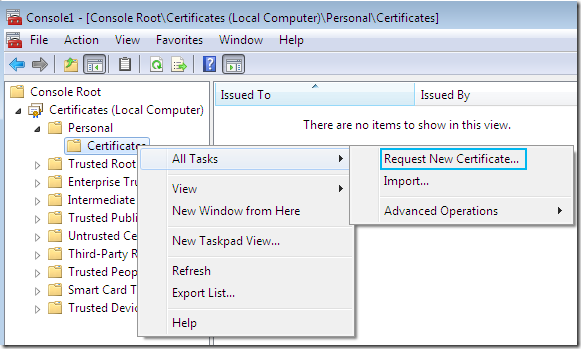
The Certificate Enrollment wizard appears, click Next:
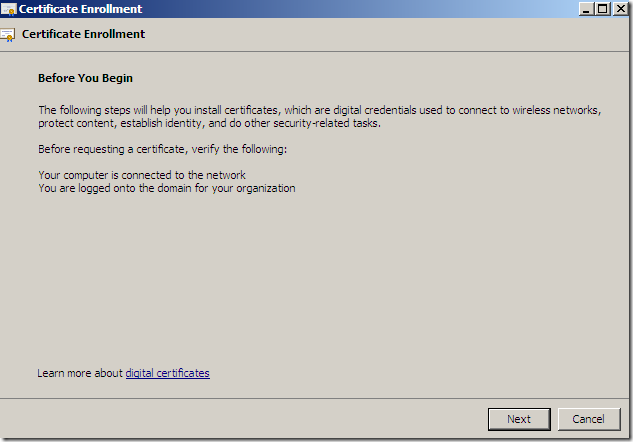
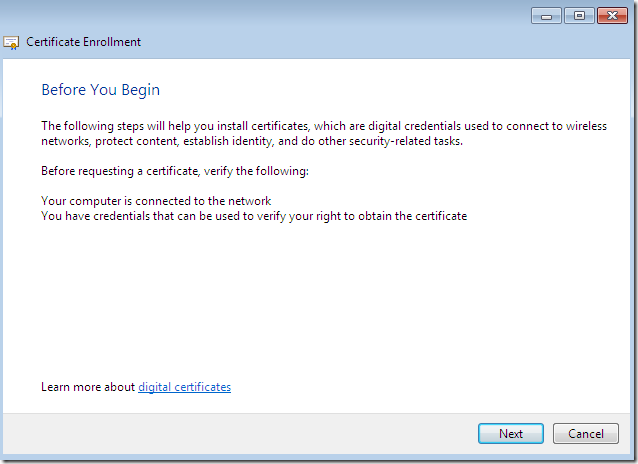
If you are on Windows 7 RC, click Next on the bellow screen:
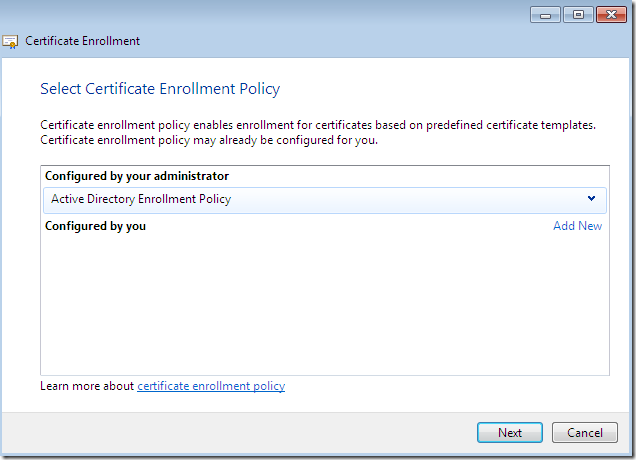
And as we can see, the Web Server template is available for request from the mmc, select it and click the blue More information is required to enroll for this certificate. Click here to configure settings link, as we need to supply info like the CN.
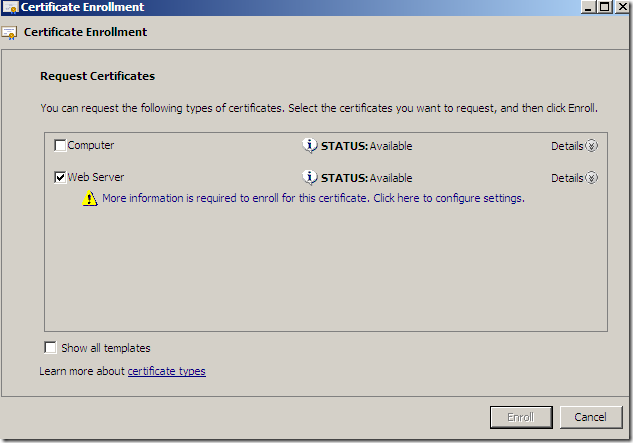
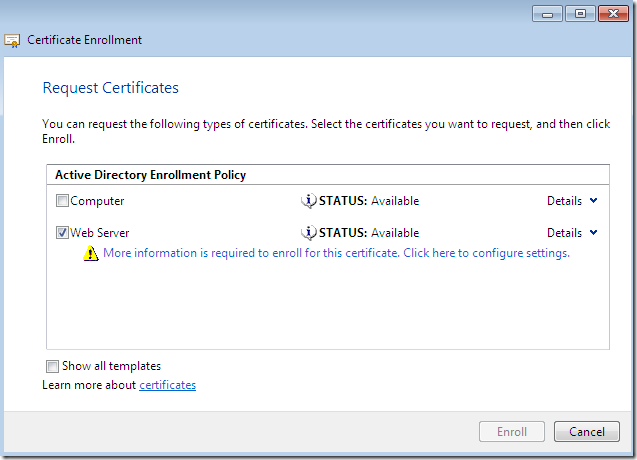
Time to provide the needed info.
I will add a CN.
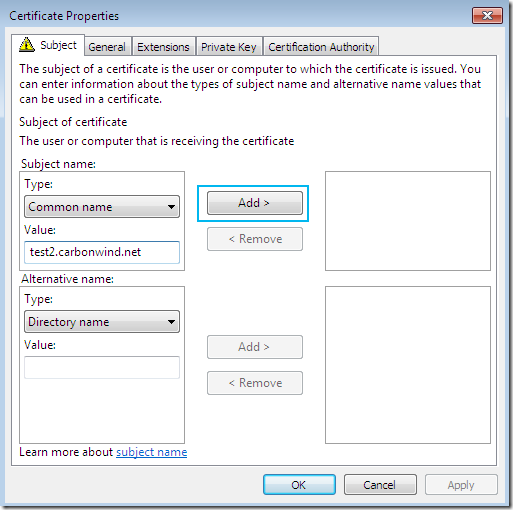
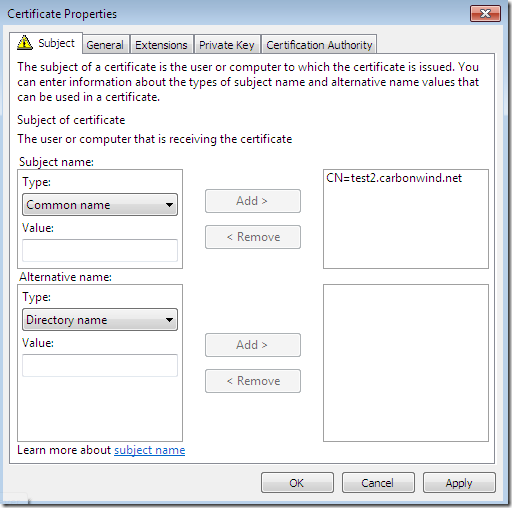
On the Subject tab, Subject name: area, from the Type drop-down list select Common name, type the desired CN and click the Add > button to add this CN to the certificate request:
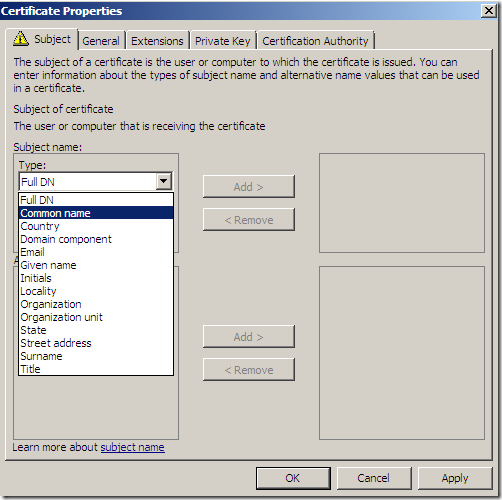
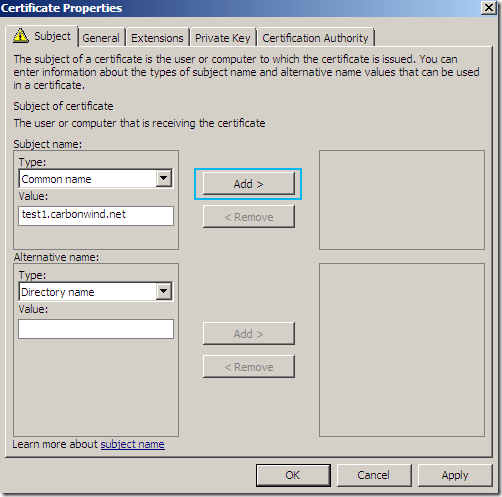
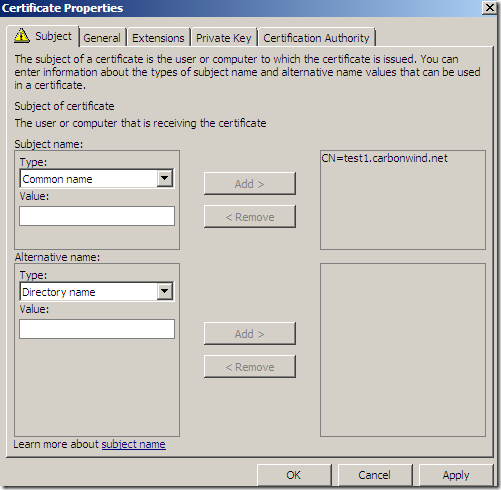
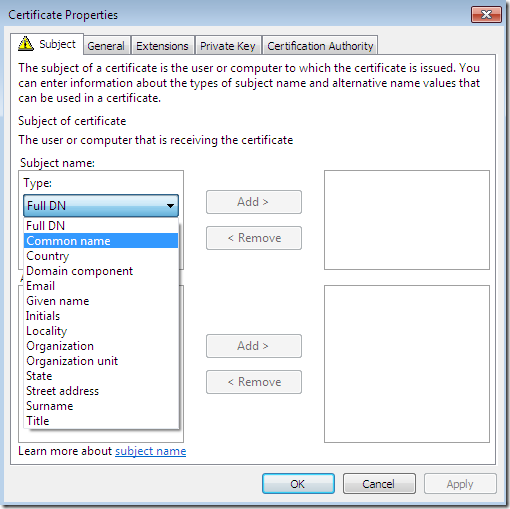
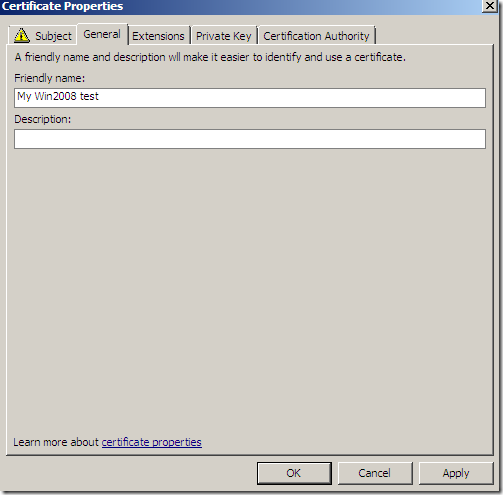
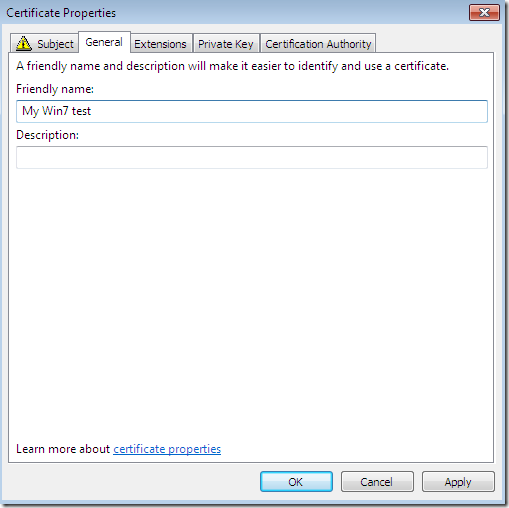
On the General tab, you may like to type a Friendly name for this certificate to be able to quickly indentify it:
If you want to make the private key exportable(although apparently the configured template does not allow us to do that), on the Private Key tab expand the Key options, and select the Make private key exportable(as you will see if we do that we will be able to export the cert along with its private key):
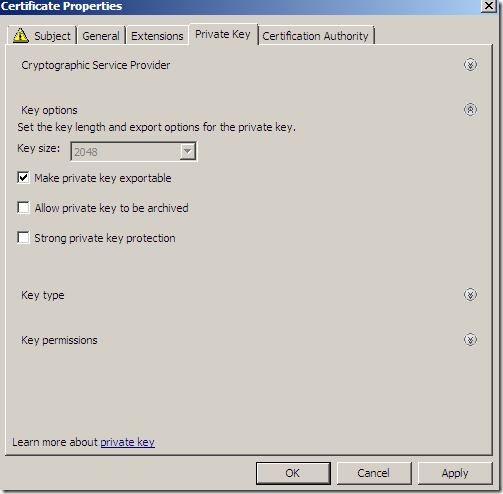
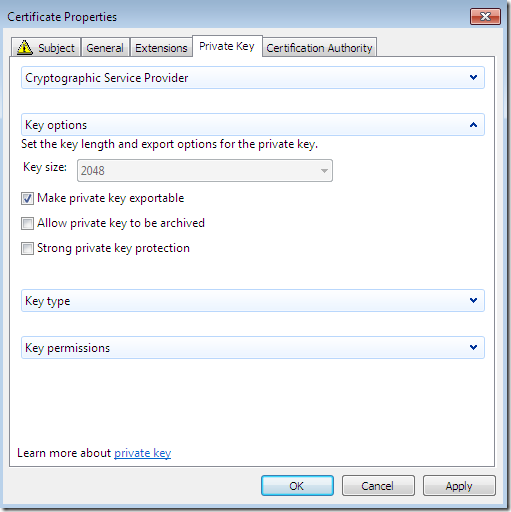
Click Apply and OK to close the Certificate Properties window.
And hit the Enroll button:
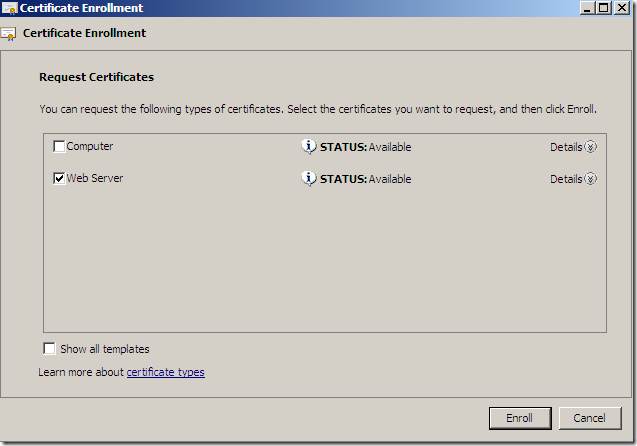
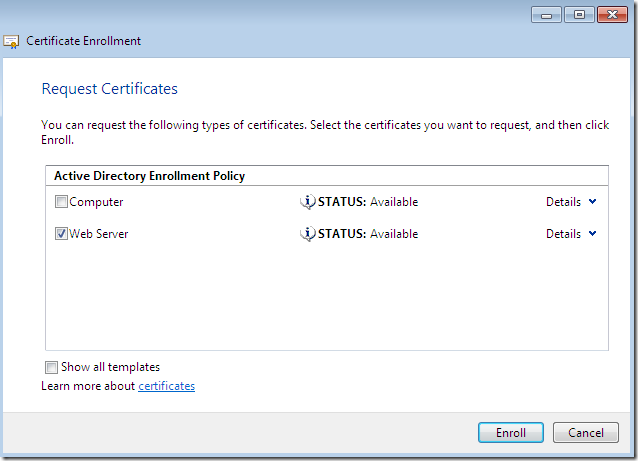
And we will successfully obtain our web server certificate(click Finish to close this window):
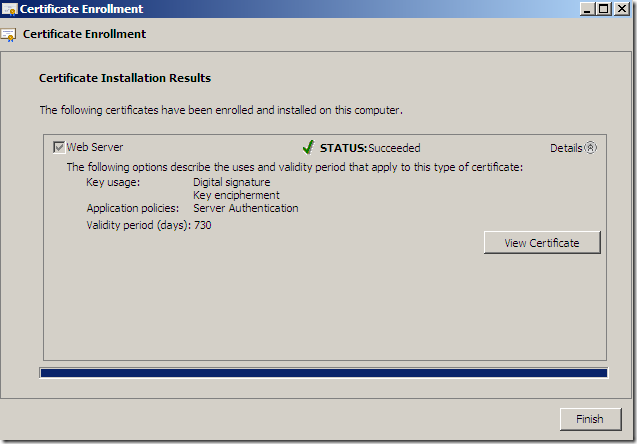
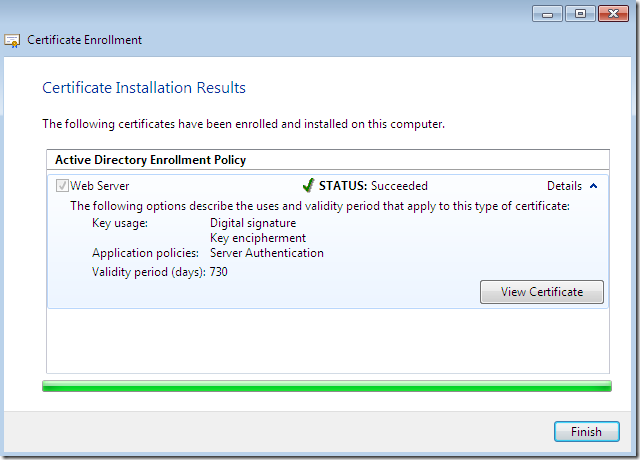
Let’s take a quick look at the obtained certificate:
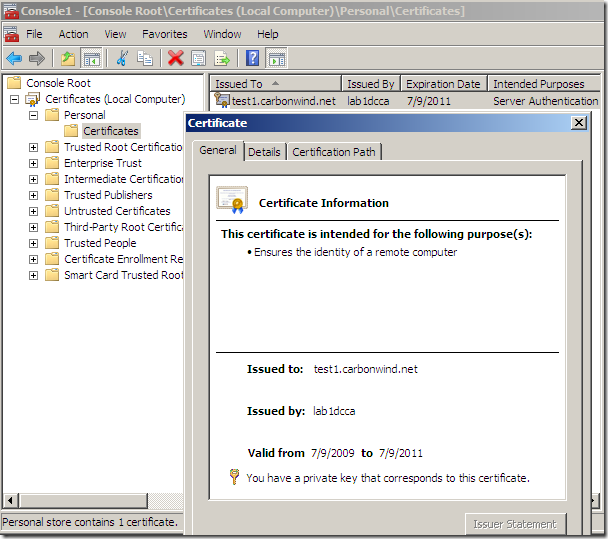
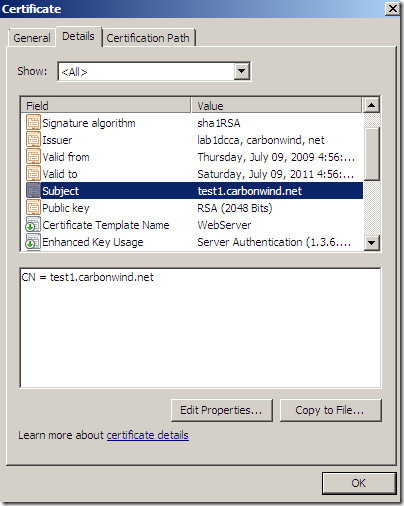
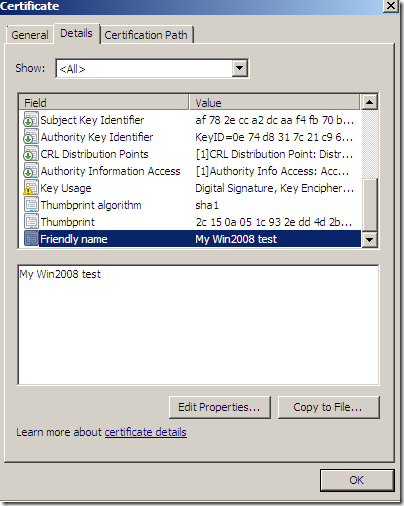
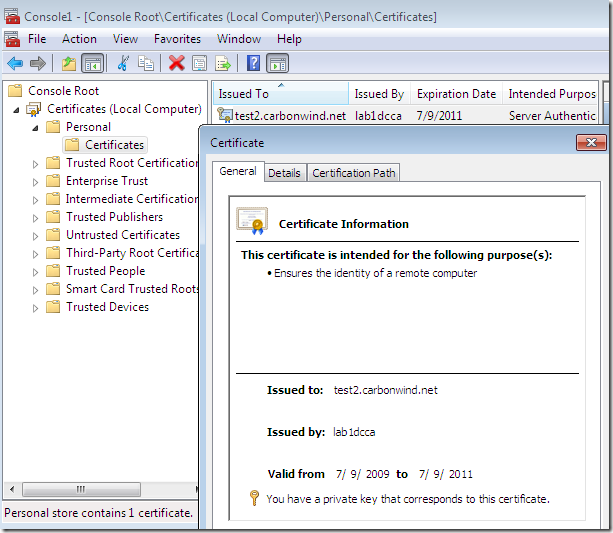
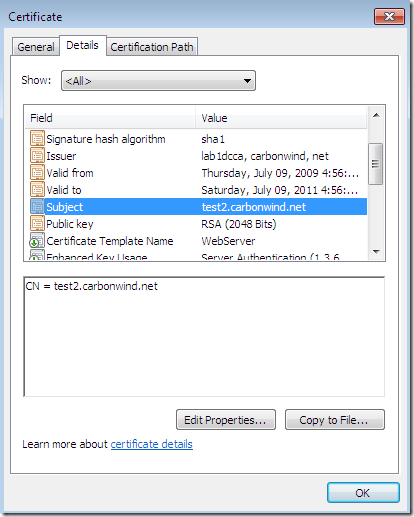
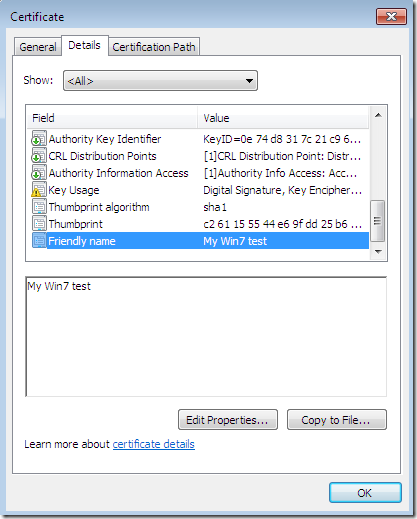
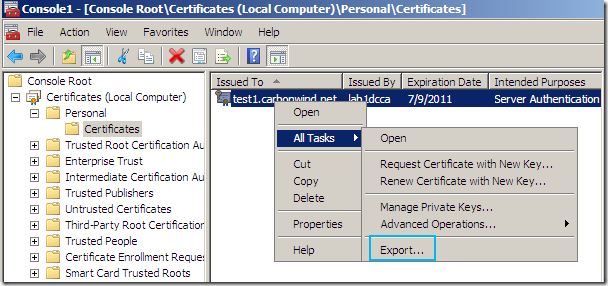
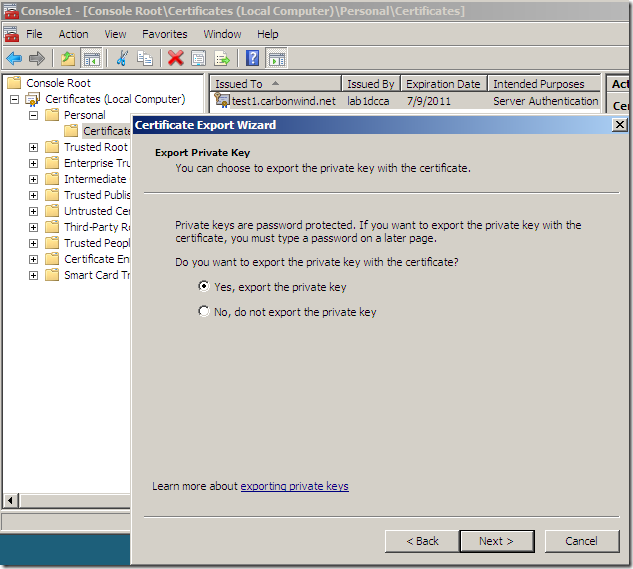
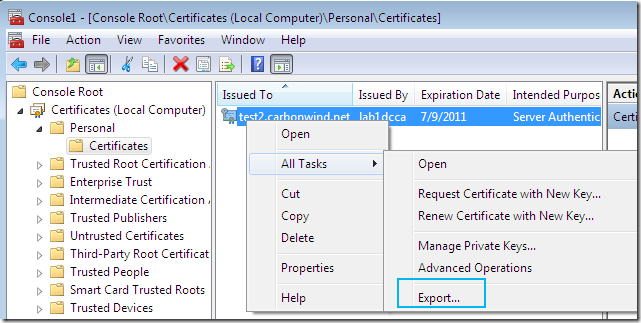
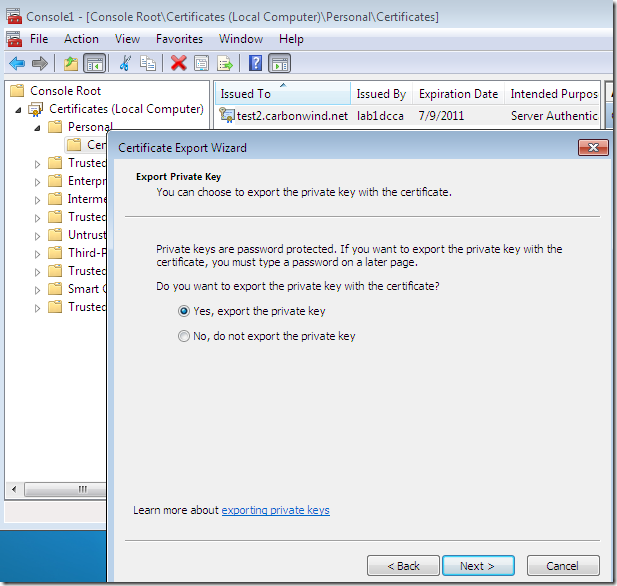
If you’ve selected on the certificate request the option to allow the private key to be exported, you will be able to export the cert along with its corresponding private key(I’ve did so and imported the cert on an IIS 7 web server):
And finally it’s time to put back the way it was the Web Server certificate template:
- On the CA machine, click Start, head over to Administrative Tools and click Certification Authority.
- On the opened CA mmc, expand the CA name node, right-click the Certificate Template and click Manage.
- Within the Certificate Templates Console locate the Web Server template, right-click it and click Properties.
- On the Web Server Properties window of this template, head over to the Security tab and select the computer object you’ve added:
- if you’ve added only the needed computer object(recommended), remove it(click the Remove button):
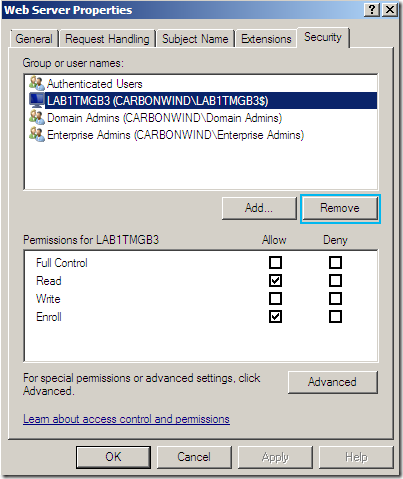
- if you’ve added the Domain Computers object, remove it(click the Remove button):
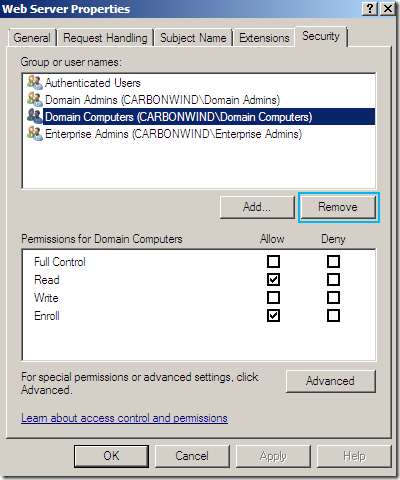
And then click Apply and OK to close the Web Server Properties window:
