|
21.01.2008
Describing an alternative method to FTP over TLS by the use of WebDav over TLS published through ISA 2006 Firewall - Part 3 - Configure ISA 2006 Firewall
Time to configure the ISA 2006 Firewall.
The first thing to do is to import the web site certificate on ISA into the "Computer Store".
Click "Start", "Run" and type "mmc". See Figure43.
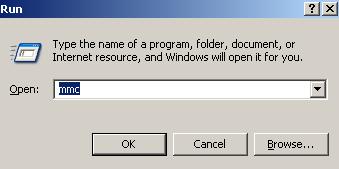
Figure43: Run: mmc
From "File" select "Add/Remove Snap-in".
Click the "Add" button on the "Add/Remove Snap-in" window.
From the "Add Standalone Snap-in", select "Certificates" and hit the "Add" button.
Choose "Computer Account" on the "Certificates Snap-in". Click "Next" .
Select "Local Computer: (the computer this console is running on)".
Click "Finish".
From the console expand "Certificates (Local Computer)", the "Personal" store, right-click "Certificates", point to "All Tasks" and click on "Import". See Figure44.
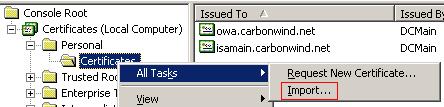
Figure44: Import Certificate
The "Certificate Import Wizard" will start. Click "Next".
Locate the web site .pxf file.
Click "Next". Provide the certificate password. You do not need to select the "Mark this key as exportable".
Click "Next".
Choose "Place all certificates in the following store".
Click "Next" and "Finish".
Now the web site certificate should appear in the "Local Computer" store. Since ISA is a domain member and we are using an Enterprise CA, we do not need to place the CA certificate into the "Trusted Root Certification Authorities" store("Local Computer" store). So the certificate will not show any red X. See Figure45.
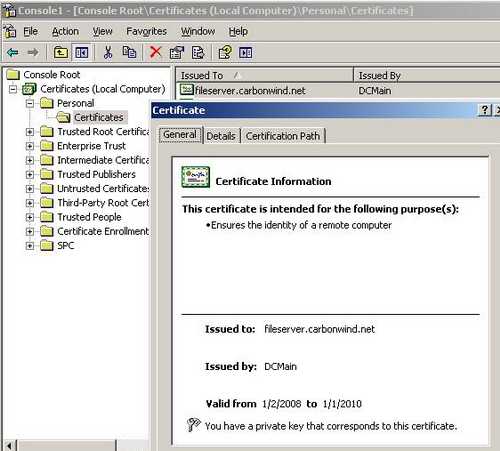
Figure45: Local Computer Store
Next we need to create the Web Publishing Rule.
Using the ISA console head to the "Firewall Policy". From the "Task" panel click "Publish Web Sites". See Figure46.
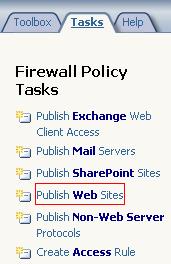
Figure46: Publish Web Site
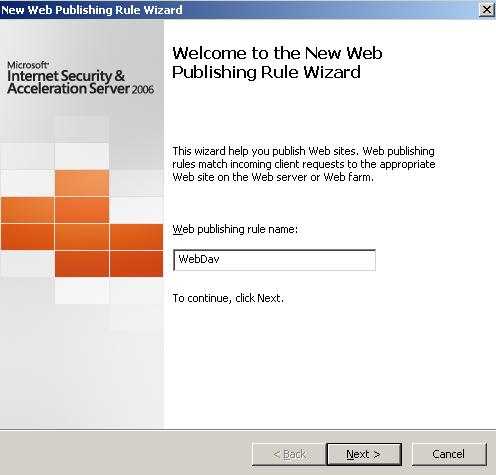
Enter a name for this rule. I'm going to call it "WebDav". See Figure47.

Figure47: Web Publishing Rule Name
Click "Next".
Select "Allow" for the "Action to take when rule conditions are met:". See Figure48.
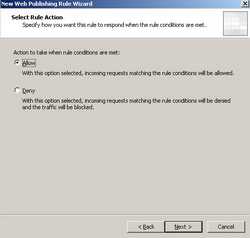
Figure48: Web Publishing Rule Condition
Click "Next".
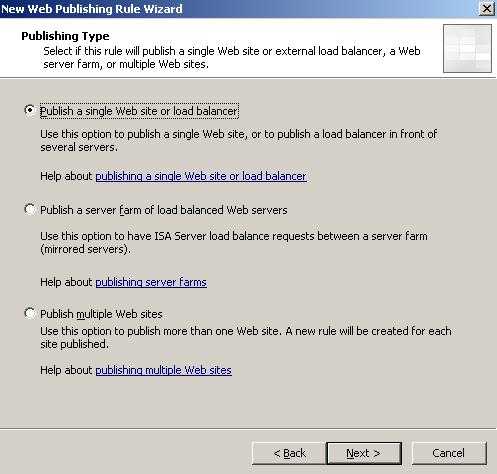
Select "Publish a single Web site or load balancer". See Figure49.
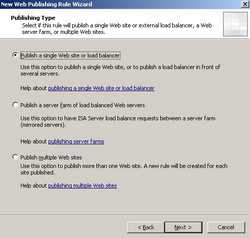
Figure49: Publishing Type
Click "Next".
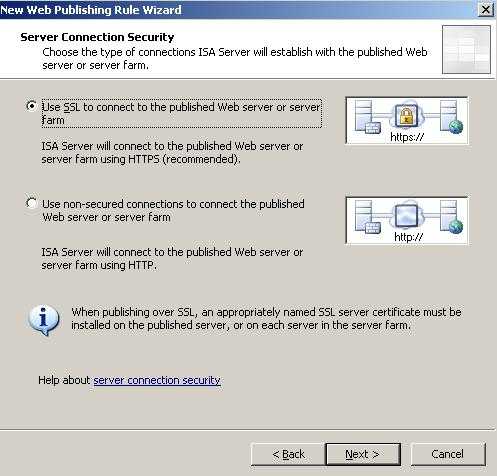
Select "Use SSL to connect to the published Web server or server farm". See Figure50.
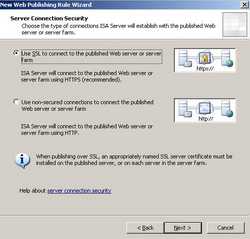
Figure50: Server Connection Security
Click "Next".
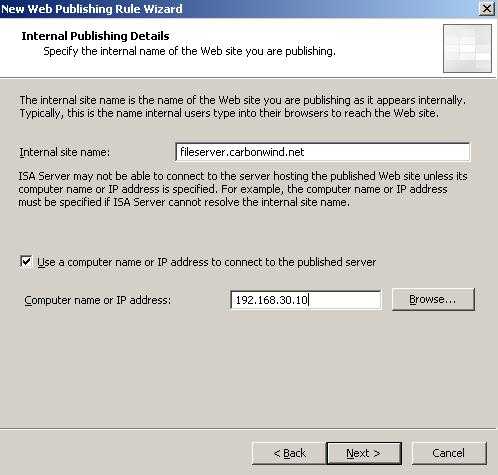
You need to enter the "Internal site name". Be very careful here since this is a critical setting. The name you enter *must* match the Common Name from the web site certificate. The Common Name from the web site certificate is fileserver.carbonwind.net. Also you can specify the IP address of the WebDav server because fileserver.carbonwind.net might not be resolved as 192.168.30.10. See Figure51.
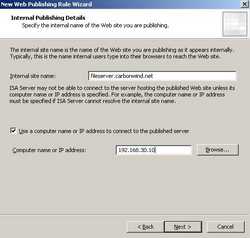
Figure51: Internal Publishing Details
Click "Next".
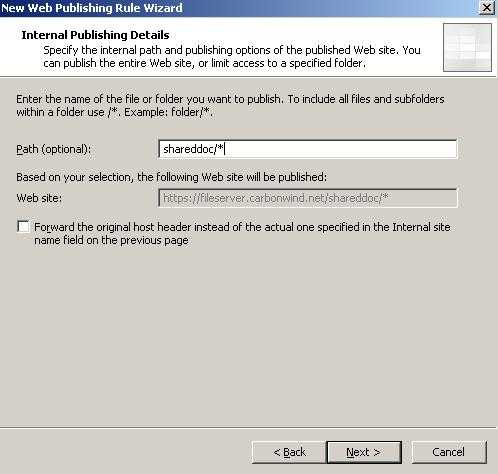
You can specify the path. In our case the path is https://fileserver.carbonwind.net/shareddoc/*. We need the * because we will access the subfolders too. See Figure52.
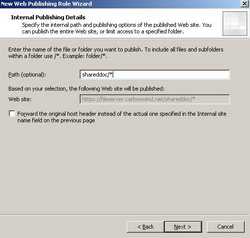
Figure52: Specify the path
Click "Next".
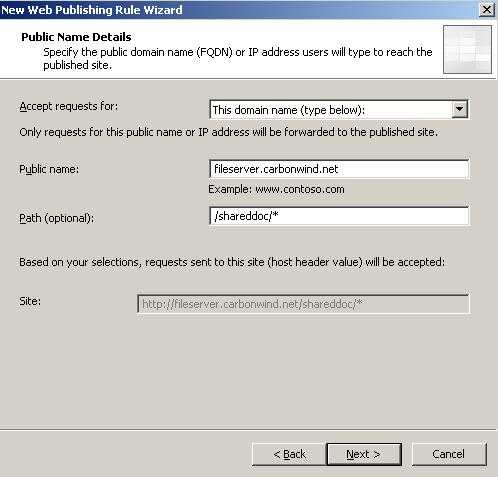
Enter the "Public Name". This will be th name users will use to connect to the WebDav server. This name must match the Common Name from the certificate installed on ISA. In our case the Common Name from certificate imported on ISA is fileserver.carbonwind.net. Also enter the path. See Figure53.
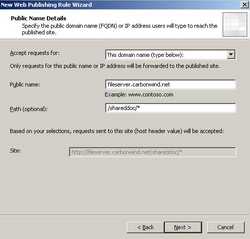
Figure53: Public Name Details
Click "Next".
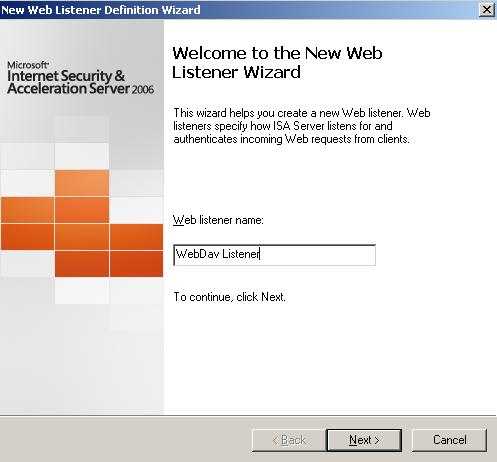
We need to define a new web listener. So click the "New" button on the "Select Web Listener Page".
Enter a name for this listener. I've called it WebDav Listener. See Figure54.
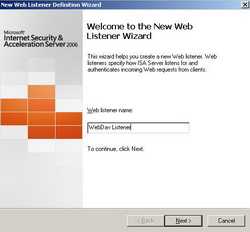
Figure54: Public Name Details
Click "Next".
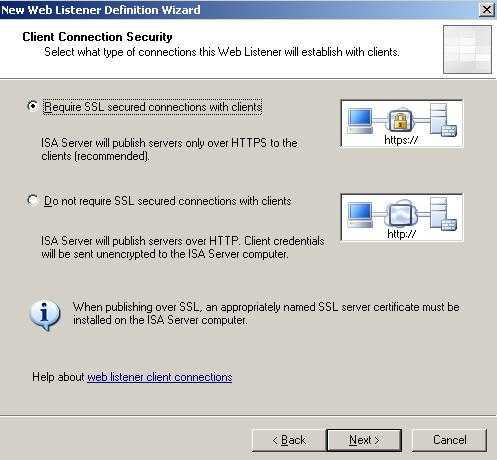
Choose "Require SSL secured connections with clients". See Figure55.
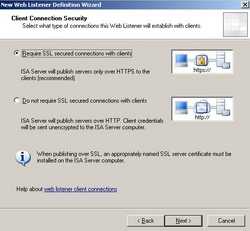
Figure55: Client Connection Security
Click "Next".
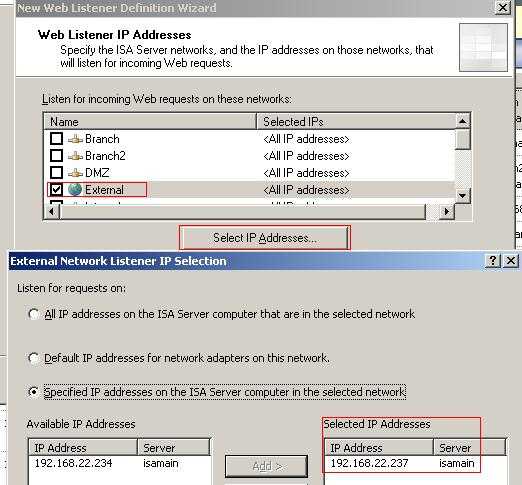
ISA will listen for connections coming from the External Network so put a checkmark for it. I have two IP addresses on ISA's External Interface, 192.168.22.234 was used to publish OWA and Outlook Anywhere, thus 192.168.22.237 will be used to publish the WebDav server. See Figure56.
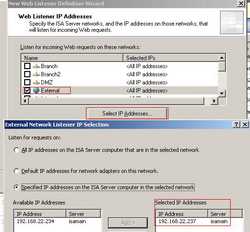
Figure56: Client Connection Security
Click "Next".
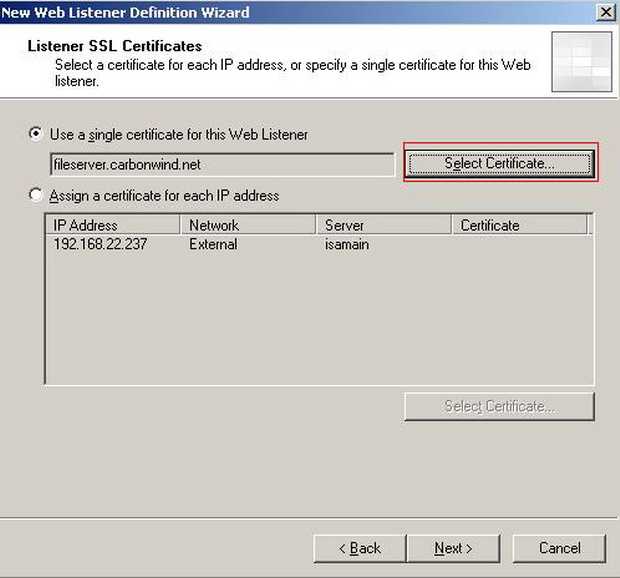
Specify a certificate for this Web Listener. I have used "Use a single certificate for this listener" (I have only one IP address and one certificate on this listener). See Figure57.
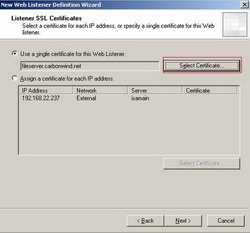
Figure57: Listener SSL Certificate
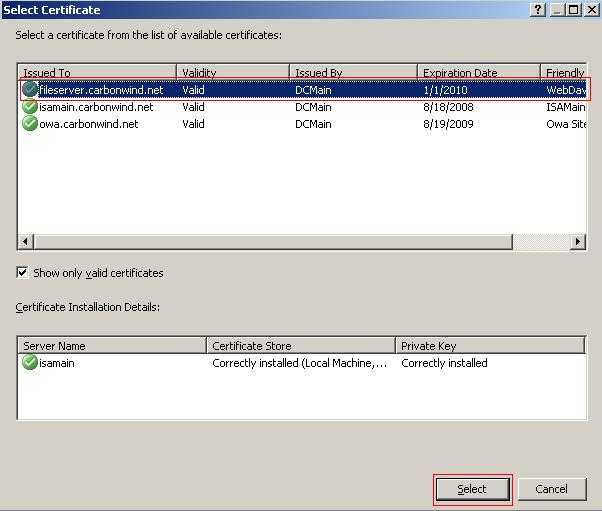
And select the fileserver.carbonwind.net certificate. See Figure58.
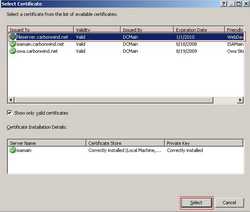
Figure58: Select The Certificate
Click "Next".
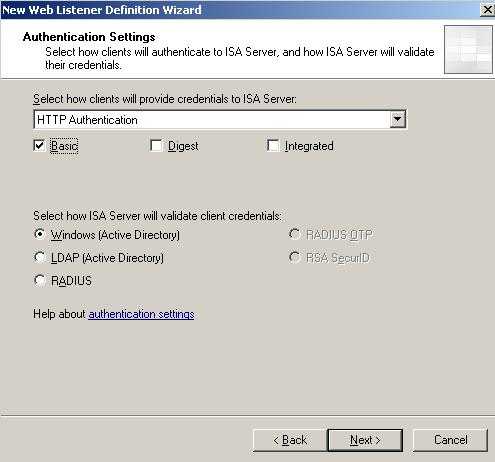
ISA will pre-authenicate the clients using "HTTP Authentication" and "Basic Authentication". ISA will validate credentials using "Windows (Active Directory)". See Figure59.
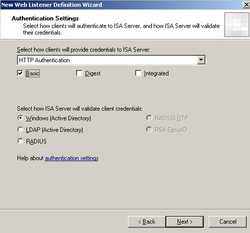
Figure59: Authentication Settings
Click "Next".
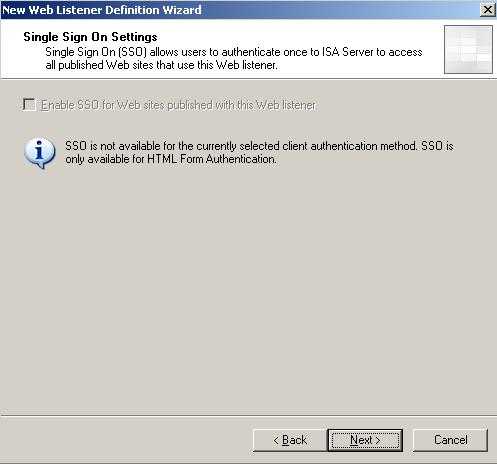
Click "Next" on the "Single Sign On Settings". See Figure60.
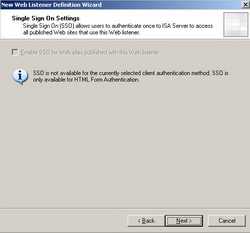
Figure60: Single Sign On Settings
Click "Next".
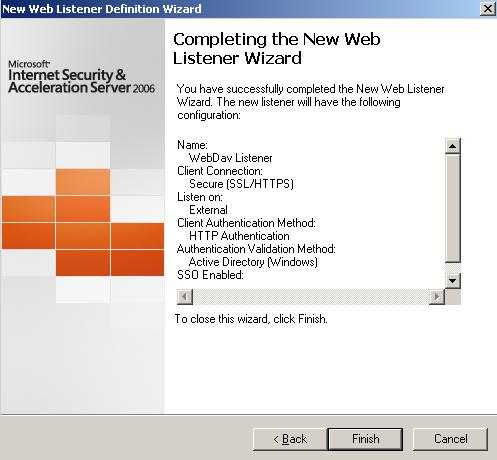
Review your settings and click "Finish" on the "Completing the New Web Listener Wizard" window. See Figure61
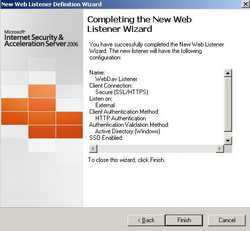
Figure61: Completing the New Web Listener Wizard
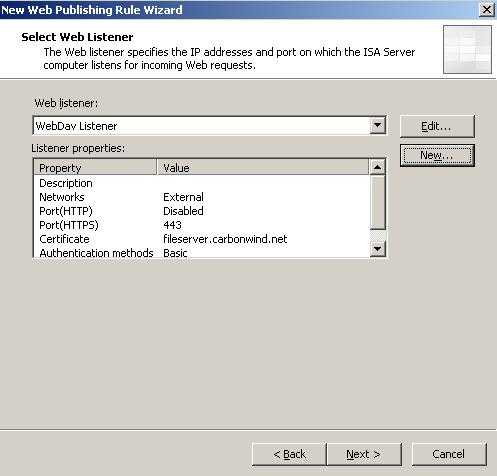
Back to the "Select Web Listener" the newly created WebDav Listener is selected. See Figure62
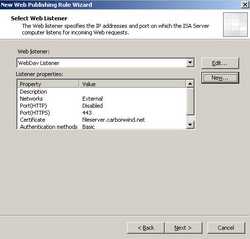
Figure62: Select The Web Listener
Click "Next".
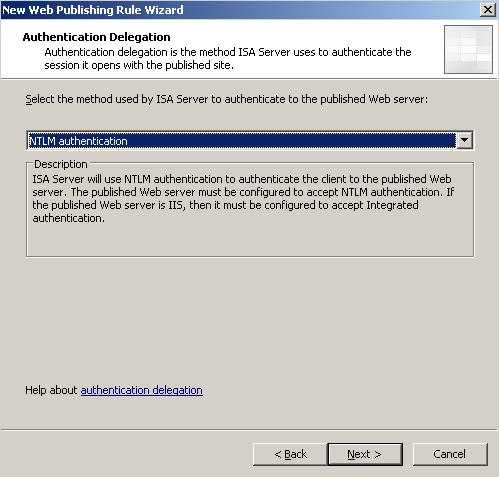
We need to specify how ISA will delegate credentials to the WebDav server. I have selected NTLM as it appears to work just fine(if not you can try Basic). The WebDav server was configured accordingly(go back to Part 2 for more details). See Figure63.
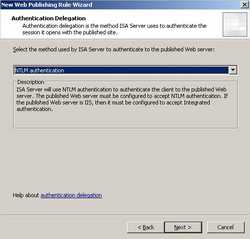
Figure63: Authentication Delegation
Click "Next".
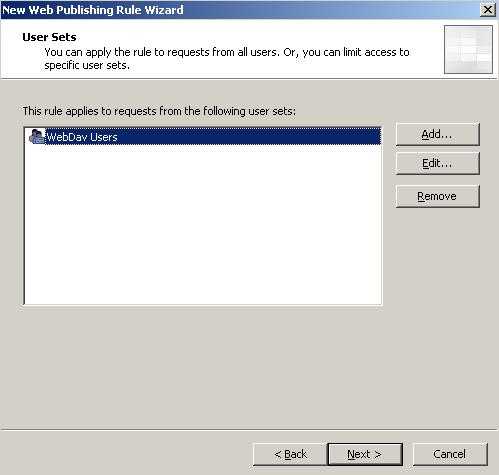
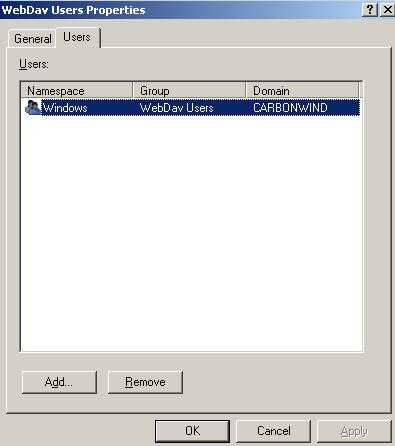
I have removed "All Authenticated Users" from the "User Sets" window. I have added instead the "WebDav Users" User Sets. See Figure64. The "WebDav Users" User Sets corresponds to the "WebDav Users" Domain Group. See Figure65.
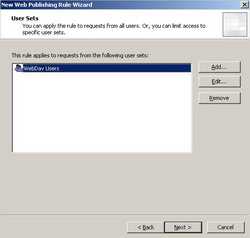
Figure64: User Sets
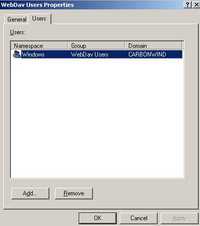
Figure65: WebDav User Sets
Click "Next".
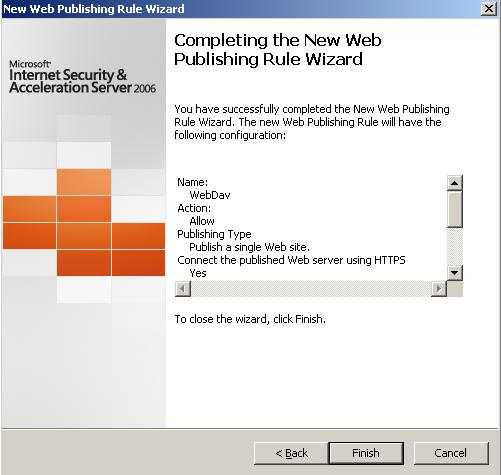
Review your settings and click "Finish" to complete the " New Web Publishing Rule Wizard". See Figure66.
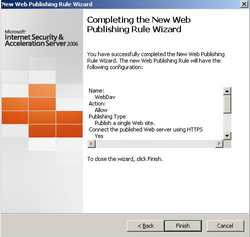
Figure66: WebDav User Sets
Apply the new configuration.
Figure67 shows the newly created Web Publishing Rule.

Figure67: WebDav User Sets
Time to see if it works.
In Part 4 we will analyze various WebDav Clients.
|