|
21.01.2008
Describing an alternative method to FTP over TLS by the use of WebDav over TLS published through ISA 2006 Firewall - Part 2 - Configure the IIS Server
Let's proceed with the configuration of the IIS 6.0 server.
First thing make sure WebDav is installed and enabled on your IIS server. See Figure16. Note that this is a global setting, not one per web site.
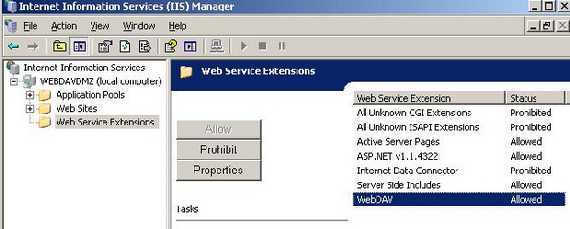
Figure16: WebDav Enabled
I have created a new web site on the IIS 6.0 server. It's called WebDavShare.
Next we need to create a new Virtual Directory. See Figure17.
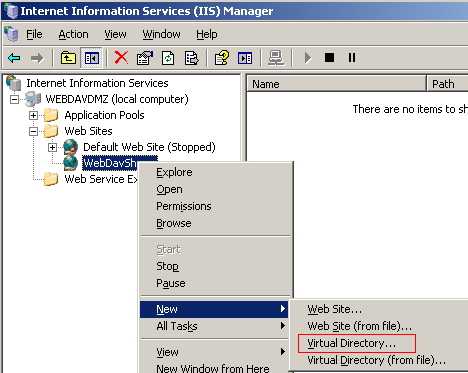
Figure17: IIS New Virtual Directory
Click "Next" on the "Welcome to the Virtual Directory Creation Wizard" screen.
Enter a "Virtual Directory Alias". This will be used within the URL to your site. SharedDoc was my option. See Figure18.
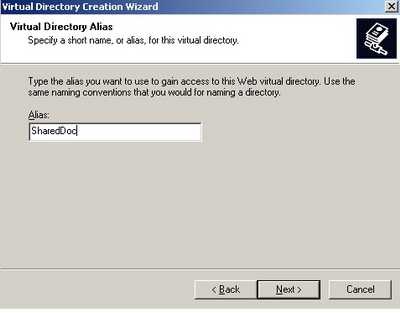
Figure18: Virtual Directory Alias
Click "Next".
Enter the path to the "Web Site Content Directory". I have created a folder named ShareMe on drive C:. See Figure19.
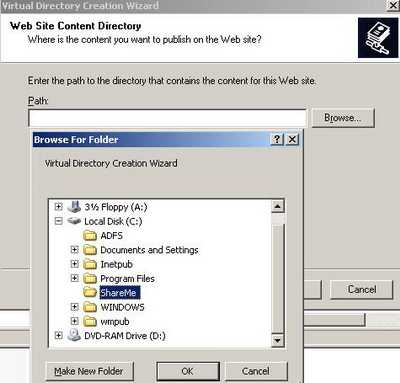
Figure19: Web Site Content Directory
Click "Next".
Set the Virtual Directory Access Permisions. I have allowed "Read", "Write" and "Browse". See Figure20.
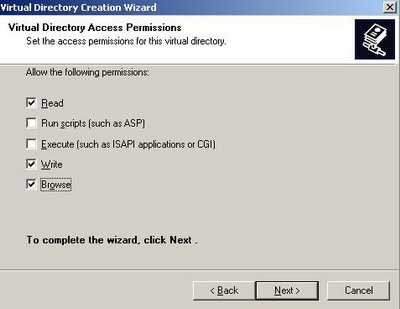
Figure20: Virtual Directory Access Permisions
And click "Next".
Then "Finish".
Time to mess with NTFS permissions. Right click on the SharedDoc Virtual Directory and click "Permissions". See Figure21.
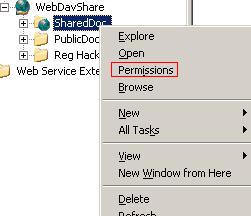
Figure21: SharedDoc Permissions
This will bring up the NTFS permissions for the ShareMe folder. See Figure22.
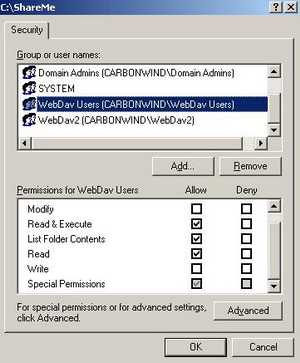
Figure22: ShareMe NTFS Permissions
Here you can do a lot. To not be caught up in an endless discussion, I will say that I have created two Domain Groups: WebDav Users and WebDav2 (it's out of the scope of this article to discuss NTFS permissions).
For example the WebDav Users Group has the following permissions over ShareMe: "Read & Execute", "List Folder Contents" and "Special Permissions".
You can view the effective permissions for this group by clicking the "Advanced" button from Figure22 and go to the "Effective Permissions" in the "Advanced Security Settings for ShareMe". Select the WebDav Users Group. See Figure23.
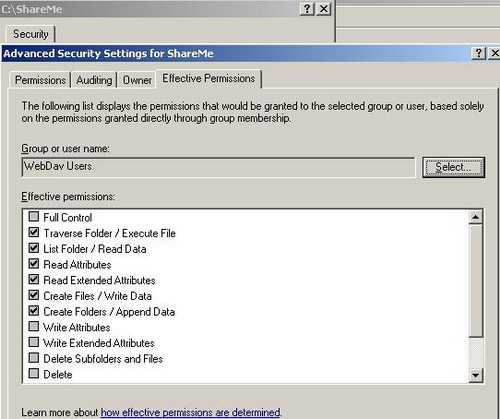
Figure23: Effective Permissions for WebDav Users
The Special Permissions are "Create Files/Write Data", "Create Folders/Append Data". See the Permissions for files and folders Microsoft Doc.
As you can notice these users cannot delete files. However the "Creator Owner" has "Special Permissions" too . See Figure24 .
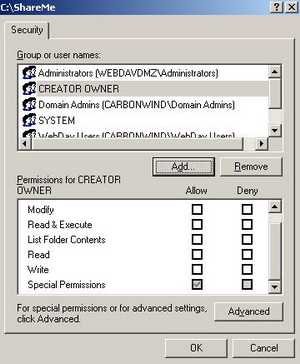
Figure24: Creator Owner
You can view this "Special Permissions" by clicking "Advanced" and on the "Permissions" tab in the "Advanced Security Settings for ShareMe" and select "Edit". See Figure25.
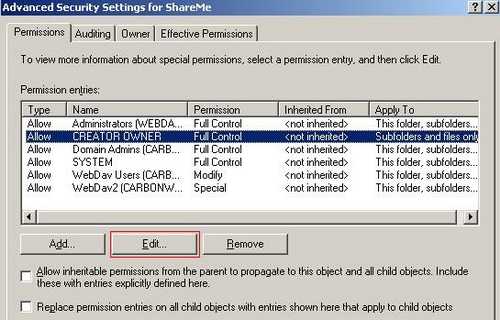
Figure25: Creator Owner Permissions
And this "Special Permissions" are in this case "Full Control" over "Subfolders and files only". Therefore if an user uploads a file onto the server he/she can delete it. See Figure26.
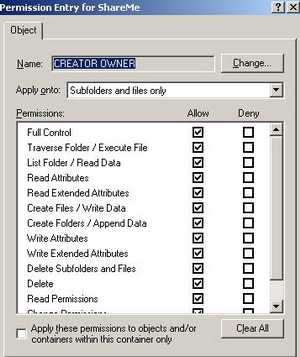
Figure26: Creator Owner Special Permissions
So the conclusion is very simple: you have a lot of power with the NTFS permissions on the WebDav server, so you should carefully review the permissions you will set.
Another example: I have created a special folder on the WebDav server called "Edit and Review Required". Within this folder I can place for example some Word docs which can be edited directly while they are on the WebDav server. With the help of the "LOCK" method other users can view the doc being edited but can't modify it (the "UNLOCK" method is used to unlock the doc). If the Word application is used the entire process is transparent for the end user(we will discuss later this aspect). The permissions for this folder can be seen in Figure27. Additionally the "Write Attributes" and the "Write Extended Attributes" are allowed for this folder. See more about permissions in the Permissions for files and folders Microsoft doc.
The users aren't allow to delete files/folders within the "Edit and Review Required" folder.
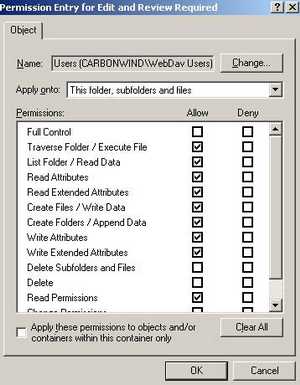
Figure27: Edit and Review Required Folder Permissions
As you probably know the permissions can be inhereted or not. The "Edit and Review Required" folder keeps some of the "ShareMe" folder permissions and also adds new ones.
A quick and general conclusion about NTFS permissions:
- You need "Read & Execute", "List Folder Content", "Read" along with the Special Permissions "Create Files/Write Data" and "Create Folders/Append Data" in order to view, download and upload your files. If you plan to use an application like Word to edit your docs you need additionally permissions like the "Write Attributes" and the "Write Extended Attributes".
Moving forward and leaving behind the NTFS permissions we need to configure the authentication methods on the Virtual Directory.
Right-click SharedDoc virtual directory and select "Properties". See Figure28.
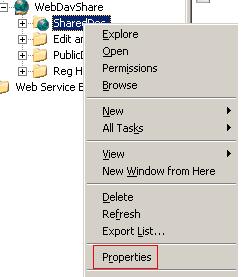
Figure28: Accessing SharedDoc Properties
Figure29 shows the "SharedDoc Properties" window.
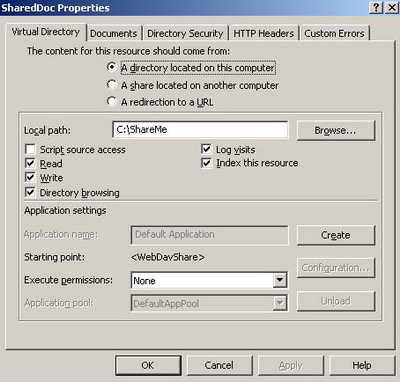
Figure29: ShareDoc Properties
Click on the "Directory Security" tab. Click on the "Edit" button within "Authentication and access control". See Figure30.
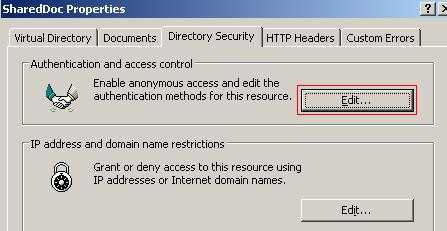
Figure30: ShareDoc Properties
The "Authentication Methods" window opens. See Figure31.
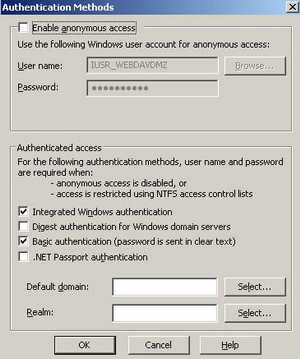
Figure31: The Authentication Methods
Anonymous access is disabled. I have selected "Integrated Windows authentication" and "Basic authentication". It's all about how you instruct ISA to delegate credentials. Both NTLM and Basic seem to work.
Click "OK" to save changes.
Next we need to obtain a SSL certificate for our web site.
Since the WebDav server is a domain member I can directly request a web site certificate from the Enterprise CA located on ISA's Internal Network. Since I traverse ISA for this operation, my request will fail. You can find out more about that reading the following Microsoft doc: http://support.microsoft.com/kb/833704
To request a web site certificate you need to open the web site properties(not the Virtual Directory Properties) and click the "Directory Security". See Figure32.

Figure32: Web Site Properties
Click the "Server Certificate". The "Web Server Certificate Wizard" will pop-up.
Click "Next" and select "Create a new certificate". See Figure33.

Figure33: Create a new certificate
Click "Next".
Select "Send the request immediately to an online certification authority". See Figure34.
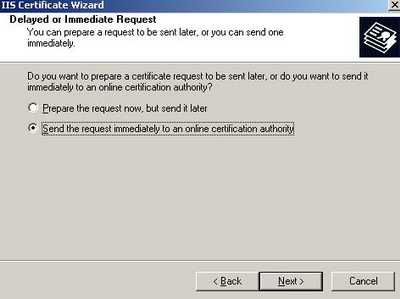
Figure34: Send the request immediately to an online certification authority
Click "Next".
Enter a name for you certificate(do not confuse this with the Common Name) and select key length. See Figure35.
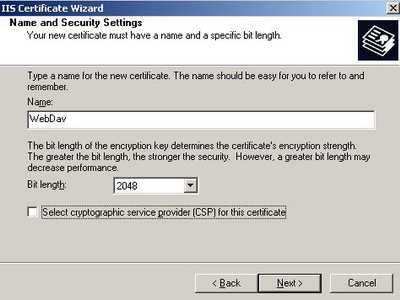
Figure35: A name for the new certificate
Click "Next" and enter your organization name and organizational name.
Click "Next".
Now you need to enter the Common Name for your web site. This name will be used by ISA to connect to the WebDav server. See Figure36.
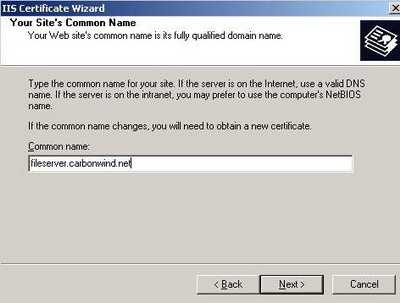
Figure36: Common Name
Click "Next".
Enter the geographical information.
Click "Next".
Leave the default SSL port(if you do not have other plans).
Click "Next".
Select the CA to process your request. See Figure37.
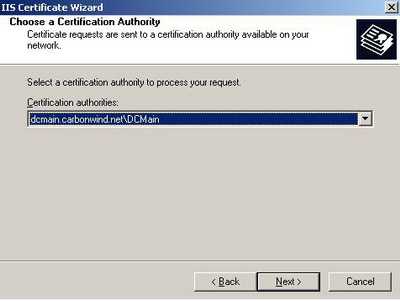
Figure37: Select the CA
Click "Next" and submit your request.
By now you should have a certificate installed on your web server.
Go to the your Virtual Directory properties, the "Directory Security" tab and click "View Certificate". See Figure38.
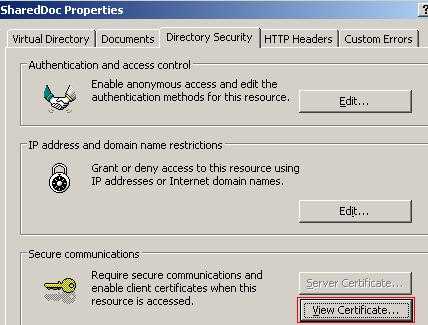
Figure38: View Certificate
Figure39 shows the web site certificate.
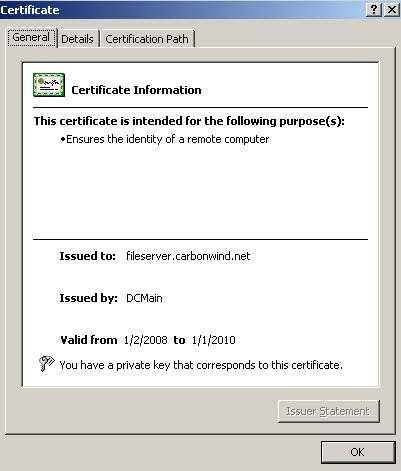
Figure39: The Certificate
While are in your Virtual Directory properties, the "Directory Security" tab, click the "Edit" button from "Secure Communication" area. See Figure40.
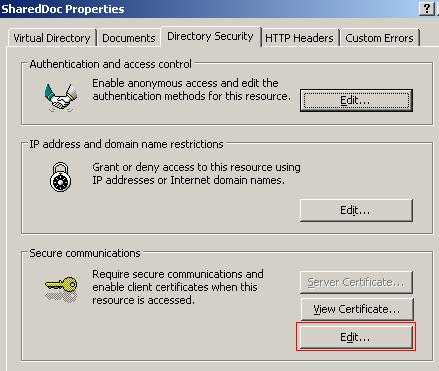
Figure40: Edit
Put a checkmark into the "Require secure channel (SSL)". See Figure41.
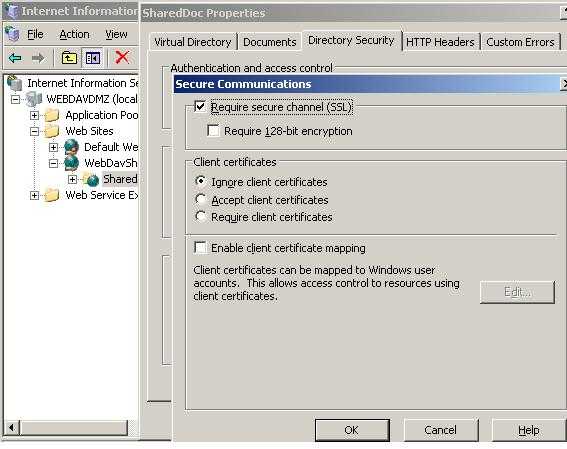
Figure41: Require SSL
As you probaly noticed, we did not enabled "Require secure channel (SSL)" at the web site level, only on the Virtual Directory.
Click "OK" to save the changes.
We need one more touch and we are done with the IIS server.
Open the web site properties(not the Virtual Directory Properties) and click the "Directory Security". Open again the "Web Server Certificate Wizard" by clicking the "Server Certificate".
Click "Next" at the welcome screen.
Select "Export the current certificate to a .pfx file". See Figure42. We need to export the web site certificate along with its private key because we must import it on ISA in order to enable SSL bridging on ISA.
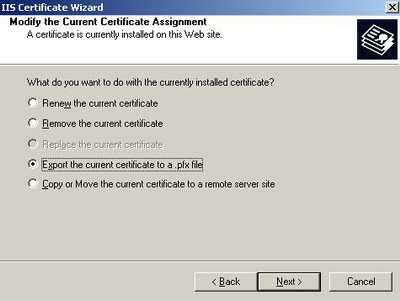
Figure42: Export the current certificate to a .pfx file
Click "Next" and select a filename and location where to save the certificate.
Click "Next" and enter a password for your certificate.
Click "Next" and again"Next" and "Finish".
Now you need to copy the .pfx file on the ISA Firewall machine.
In Part 3 we will configure the ISA 2006 Firewall.
|