|
27.01.2008
The Hunt For HTTP Signatures - ISA 2006 Firewall HTTP Filter - Part 1: Playing With Wireshark
You've bought an ISA 2006 Firewall and you want to use it to block applications like Yahoo Messenger or Windows Live Messenger just to name a few.
Currently you cannot afford investing in an advanced web filtering solution like the one offered by WebSense or GFI. So you must manually block such applications(not the most nice job in the world).
You are aware of the fact that these applications have a "signature". Thus you must try and identify this signature and then configure the HTTP filter in ISA to block it.
Note that the HTTP signatures you can apply on ISA are found in the Request URL or in the HTTP Headers or Bodies. Both Request or Response Headers or Bodies can be inspected.
Be careful with the Request or Response body, if you enable ISA to search "deep" into them(increase the maximum number of bytes inspected by ISA) you will suffer from performance degradation.
We will search for signatures within the Request URL or within the HTTP Headers or Bodies.
A great tool for the hunt of signatures is our favourite network protocol analyzer, Wireshark.
For the ones not used with Wireshark, the use of it combined with the need to identify signatures can be intimidating. Therefore let's spend a few minutes playing with Wireshark first.
You can skip this part if you are familiar with Wireshark and jump to Part 2.
Open Wireshark.
Click "Edit" and then click "Preferences". See Figure1.
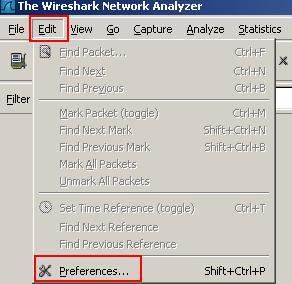
Figure1: Wireshark Preferences
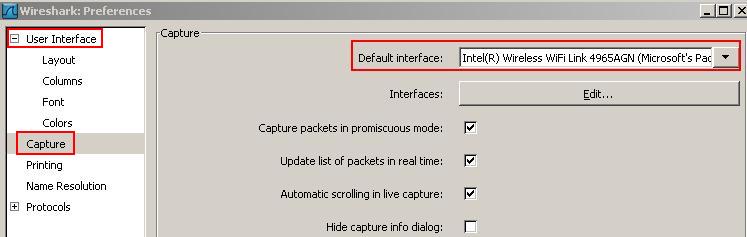
On the "User Interface" click "Capture". See Figure2.
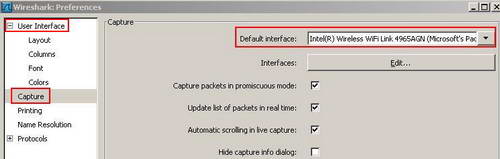
Figure2: Wireshark Capture Preferences
Here you can set the default interface so you do not have to specify every time which interface you want to use for capturing packets. Also you can capture packets in promiscuous mode(the adapter will capture all frames, not just frames addressed to that adapter) or scroll the live capture or hide the capture info dialog(Figure8 shows the capture info dialog) or decide if the update list of packets in real time is checked or not. If you not take an "Update list of packets in real time" capture, Wireshark should not consume memory as it captures packets. However Wireshark will consume memory when you stop the capture and it reads it.
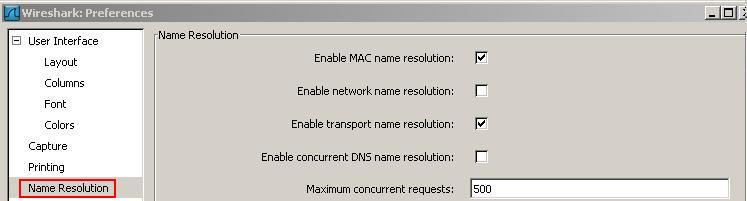
On the"User Interface" click "Name Resolution". See Figure3.

Figure3: Wireshark Name Resolution Preferences
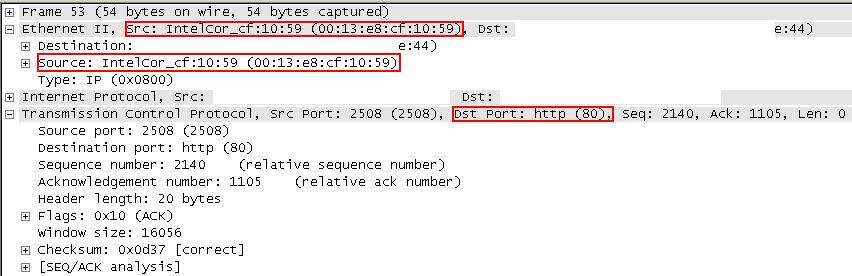
Wireshark is able to perform name resolution. MAC name resolution attempts to provide a more human readable MAC address. Network name resolution will convert an IP address to the hostname associated with it. Transport name resolution will transform TCP/UDP ports to something more "human readable(say TCP Port 80 to HTTP). See Figure4.
Figure4: Wireshark Name Resolution
Enabling network name resolution may slow down Wireshark.
On the Menu click "Capture". See Figure5.
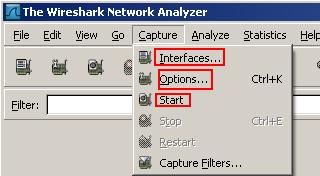
Figure5: Wireshark Capture
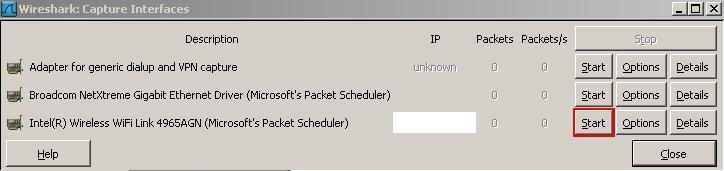
If you click on "Interfaces" you have the chance to select on which interface you want to start the capture. See Figure6.
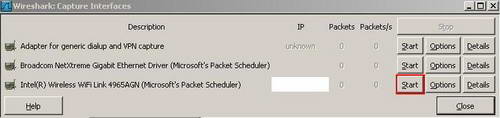
Figure6: Wireshark Capture Interfaces
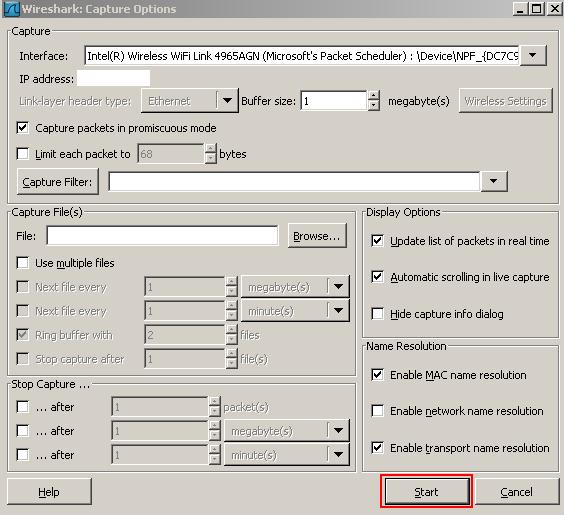
If you click on "Options" you can specify some settings for the capture. See Figure7.
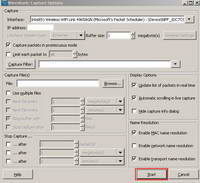
Figure7: Wireshark Capture Options
If you click "Start", Wireshark will begin capturing packets. See Figure8.
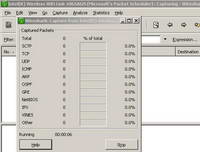
Figure8: Wireshark Capture Started
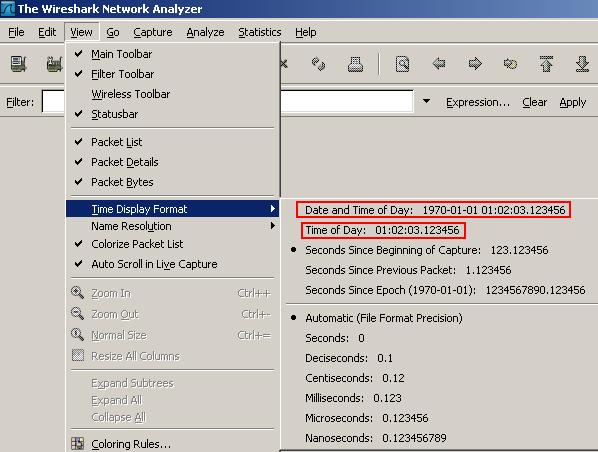
From Wireshark Menu, click "View" and "Time Display Format". From here you can select the time format. For example you may want to see the date and the time of the day when a packet was captured. See Figure9 and Figure10.
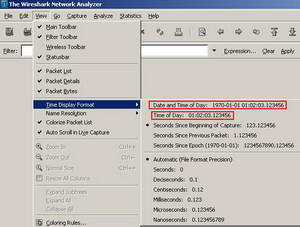
Figure9: Wireshark Select Time Format

Figure10: Wireshark Time Format
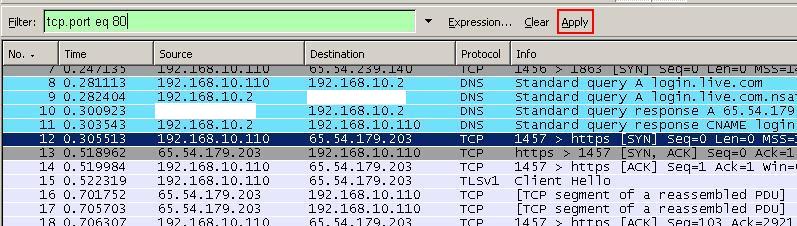
After you have captured some traffic you may want to analyze only certain things. For example you are insterested in HTTP traffic only(TCP port 80). You can apply a filter. You can enter an expression into the Filter. See Figure11.
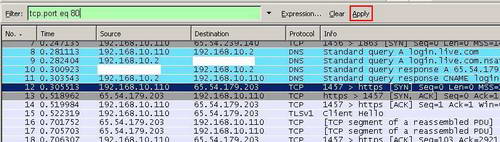
Figure11: Wireshark Filter
And then Apply this filter. See Figure12.
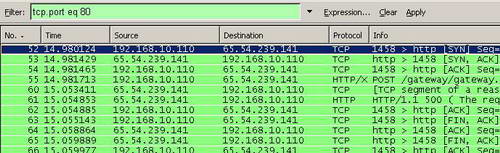
Figure12: Wireshark "tcp.port eq 80" Filter
The "eq" expression is also equal with "==" (Equality).
The "and" expression is also equal with "&&" (Concatenation).
The "or" expression is also equal with "||" (Alternation).
The "not" expression is also equal with "!" (Negation).
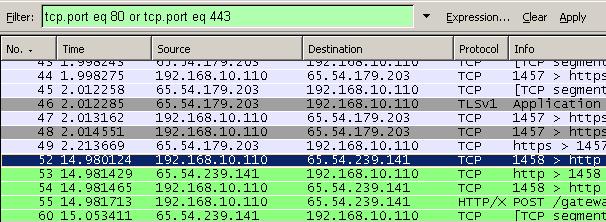
You may want to see HTTP and HTTPS traffic only. Note that we do not use the "and" expression, "or" is used instead. See Figure13.
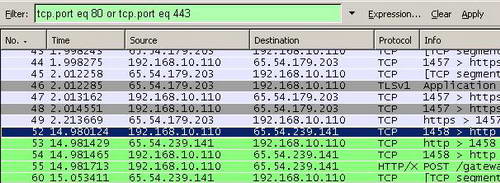
Figure13: Wireshark "tcp.port eq 80 or tcp.port eq 443" Filter
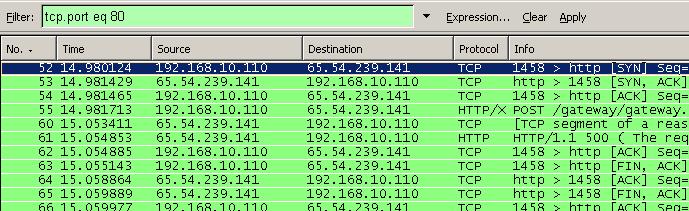
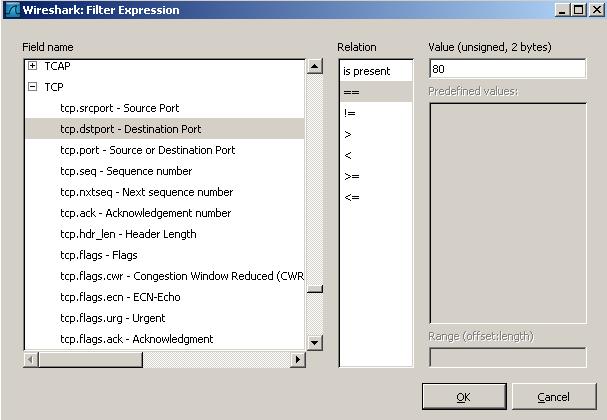
Since probably there are plenty of HTTP packets, it would be useful to view only interesting HTTP traffic, like packets destined to TCP Port 80 (HTTP requests). Click the "Expression" button and in the "Field Name" scroll for "TCP", select "tcp.dstport == 80". See Figure14.
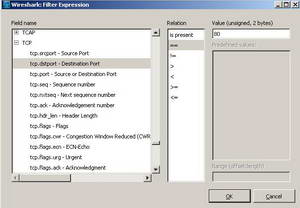
Figure14: Wireshark Building a TCP filter
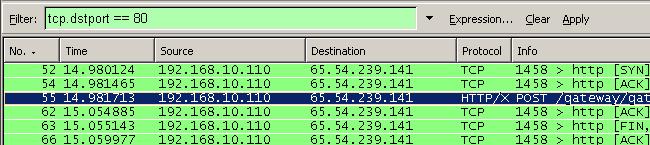
And then apply this expression. See Figure15.
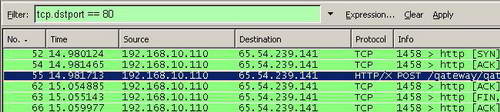
Figure15: Wireshark "tcp.dstport == 80" Filter
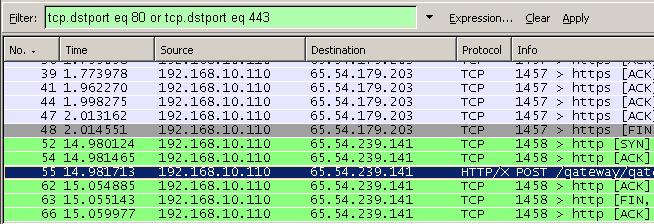
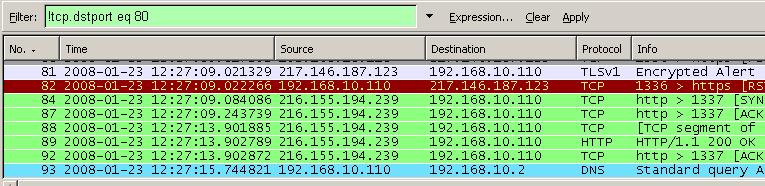
You can view only packets destined to TCP Port 80 (HTTP requests) or to TCP Port 443 (HTTPS requests). See Figure16.
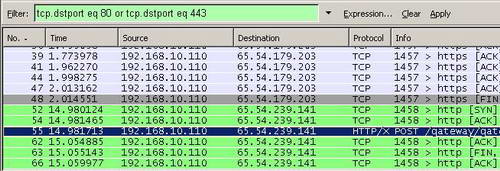
Figure16: Wireshark "tcp.dstport eq 80 or tcp.dstport eq 443" Filter
You can filter TCP traffic based on source port or on flags too for example. Wireshark has plenty of firepower.
You may be interested in cleaning up the capture a little bit by excluding certain ports for example. You can do that with the "!" expressions. In Figure17 Wireshark will not display packets destined to TCP port 80.
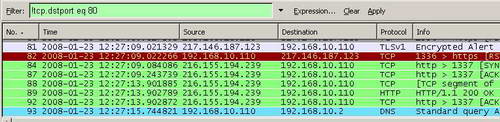
Figure17: Wireshark "!tcp.dstport eq 80" Filter
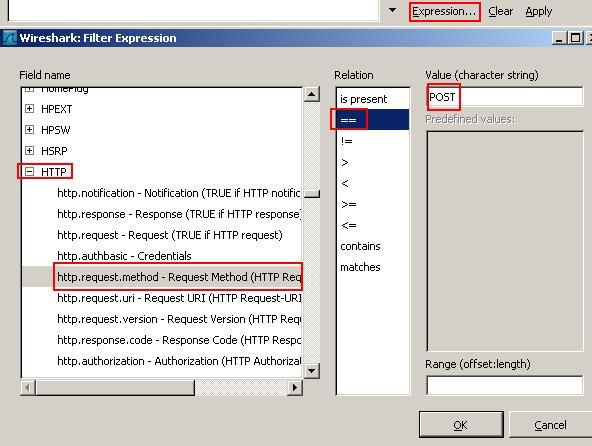
While is useful to filter traffic based on ports, in certain situations you need to view only HTTP requests containing methods like "POST" for example. Click the "Expression" button and in the "Field Name" scroll for "HTTP", select "http.request.method == POST". See Figure18.

Figure18: Wireshark Building an HTTP filter
And then apply this expression. See Figure19.

Figure19: Wireshark "http.request.method == "POST" " Filter
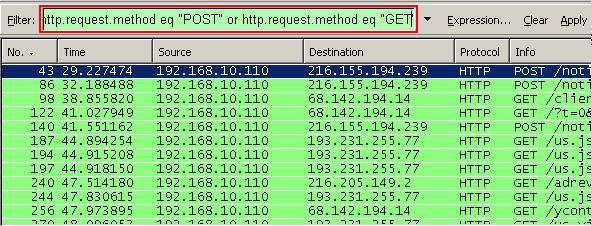
Or you can include other methods like "GET", thus to view HTTP requests containing the "POST" or "GET" methods. See Figure20.
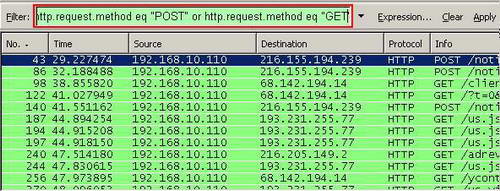
Figure20: "http.request.method eq "POST" or http.request.method eq "GET" " Filter
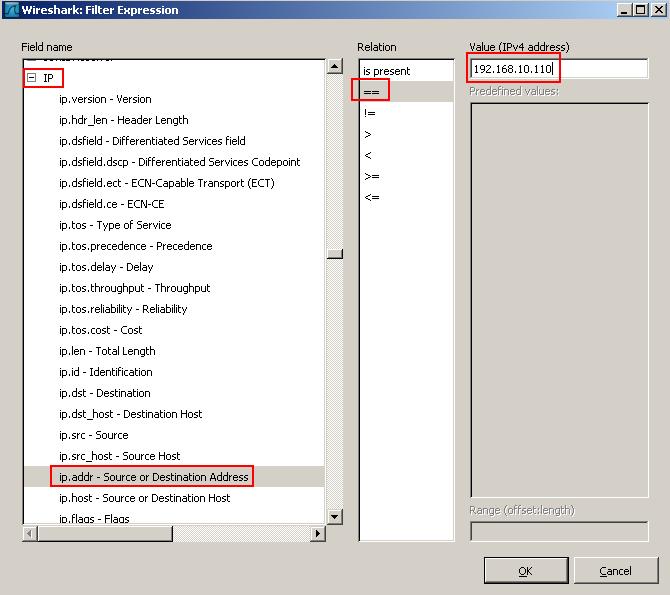
Also you can filter based on IP protocol(IP address, IP Protocol, IP flags and so on). SeeFigure21 and Figure22.
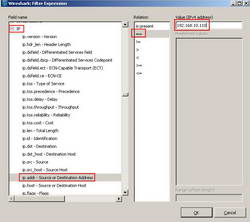
Figure21: Wireshark IP Expression
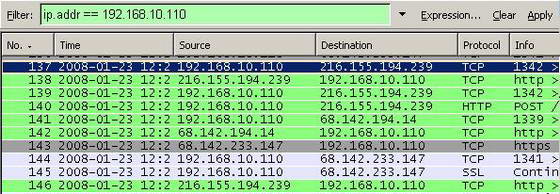
Figure22: Wireshark "ip.addr == 192.168.10.110" Filter
Wireshark has plenty of options. If you want to find out more about Wireshark make sure you do not miss its excellent Wiki.
In Part 2 we will hunt for IM signatures.
|