|
17.08.2008
Using the VPN-Q 2006 Active Directory Group Policy Template
- 1. Importing The VPN-Q 2006 Policy Template
- 2. Automatically Updating the Group Policy on VPN Users' Machines
- 3. Improve the VPN Users' Experience
- 4. Custom Client Remediation Capabilities
- 5. Display a Legal Notice on The Client Before The Security Checks Are Run
- 6. Customize The System Overview Checks
- 7. Customize The Personal Firewall Checks
- 8. Customize The ICS Checks
- 9. Customize The Anti-Virus Checks
- 10. Customize The Security Update Checks
- 11. A Quick Test Example of a Disabled Security Check
If the VPN clients' machines are domain members, then you can manage them using the Active Directory policy template provided by Winfrasoft. This policy is located in the GPO folder on the installation CD, see Figure1.
Currently, with VPN-Q 2006 you can only customize the default security checks only for domain member computers through the use of an Active Directory group policy.
With VPN-Q 2008 you will be able to customize the default settings for non-domain member machines, directly from ISA.
As we have seen, by default VPN-Q 2006 Enterprise Edition performs numerous checks, however you may want to improve VPN users' experience, to provide a custom remediation web page or just to tighten the screw a little bit.
Figure1: VPN-Q.adm
1. Importing The VPN-Q 2006 Policy Template
Let's visualize how this group policy works and what we can do with it.
I've placed the VPN clients' machines in a separate OU in Active Directory. The VPN Computers OU contains right now a single computer, see Figure2.
If you want, you can create multiple OUs if you need to apply different group policies to diferent machines. A group of computers can be placed in an OU and a certain group policy can be applied to this group, while another group of computers can be placed in another OU and a different group policy can be applied to this second group.
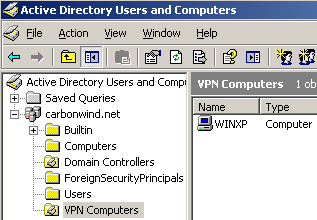
Figure2: VPN Computers OU
I want to customize the group policy for the VPN Computers, see Figure3.
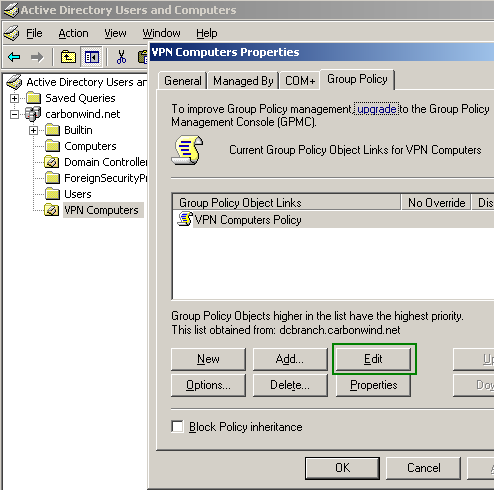
Figure3: VPN Computers - Edit Group Policy
I will import the VPN-Q 2006 GPO template into the VPN Computers policy.
Right-click the Administrative Templates within Computer Configuration, and click Add/Remove Templates, see Figure4.
Note that the Group Policy objects for VPN-Q 2006 can only be applied to the Computer Configuration and not to the User Configuration.
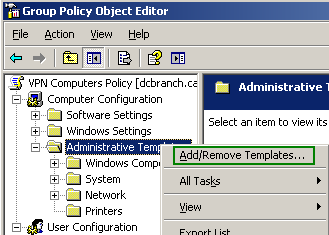
Figure4: VPN Computers Policy - Computer Configuration: Administrative Templates - Add/Remove Templates
On the Add/Remove Templates window click the Add button, see Figure5.
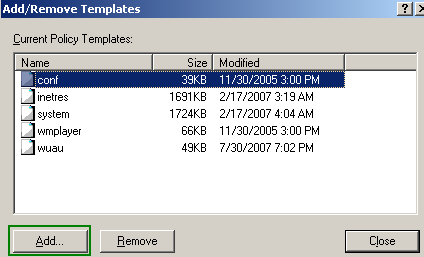
Figure5: VPN Computers Policy - Computer Configuration: Administrative Templates - Add Template
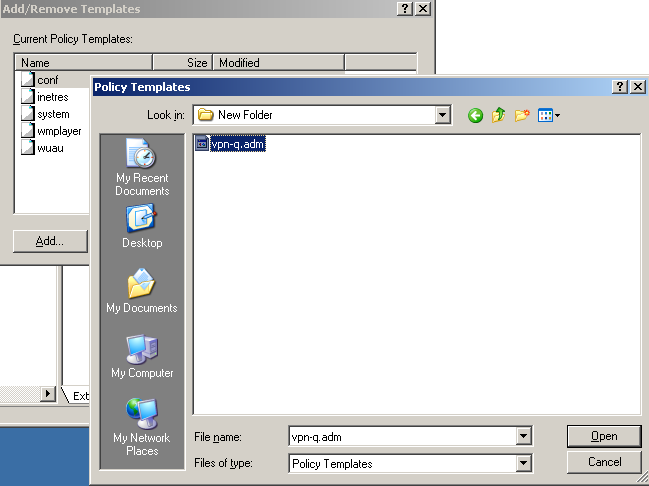
Add the vpn-q.adm template, see Figure6.

Figure6: VPN Computers Policy - Computer Configuration: Administrative Templates - Add the vpn-q.adm Template
And now the vpn-q template is listed on the Add/Remove Templates window, see Figure7. Click the Close button to close this window.
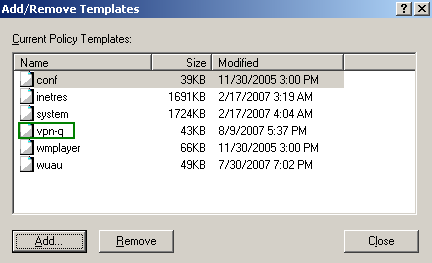
Figure7: VPN Computers Policy - Computer Configuration: Administrative Templates - Current Policy Template: Added Template
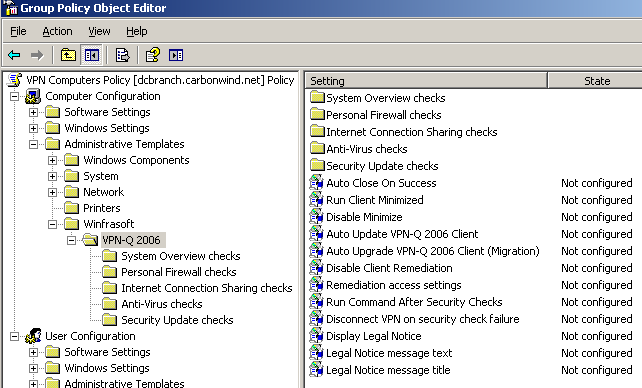
So we've successfully imported the Winfrasoft VPN-Q 2006 Template, see Figure8.
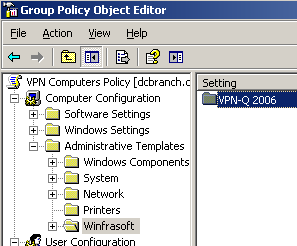
Figure8: VPN Computers Policy - Computer Configuration: Administrative Templates - Winfrasoft VPN-Q 2006 Template
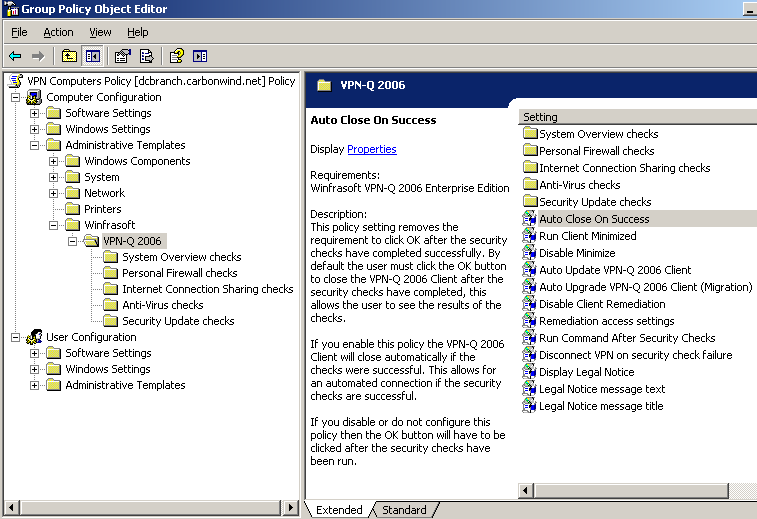
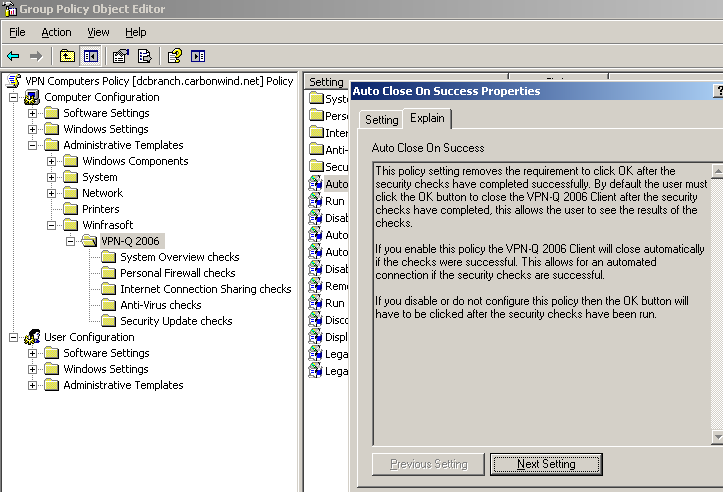
Let's take a closer look at it, see Figure9, Figure10 and Figure11.
As can be noted, Winfrasoft provided a detailed explanation of every setting, explanation which is very useful because we can quickly understand what a specific setting does.
Also the Security Checks settings are grouped in a nice way, so it's easy to manage them.

Figure9: VPN Computers Policy - Computer Configuration: Administrative Templates - Winfrasoft VPN-Q 2006 Template Default Settings
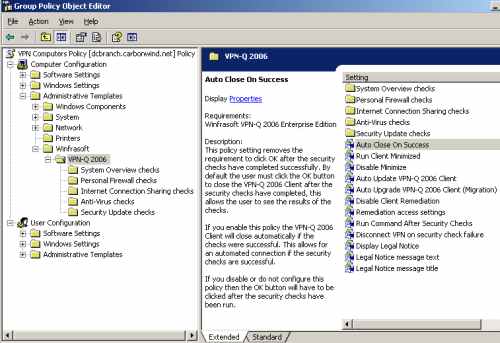
Figure10: VPN Computers Policy - Computer Configuration: Administrative Templates - Winfrasoft VPN-Q 2006 Template Default Settings Extended
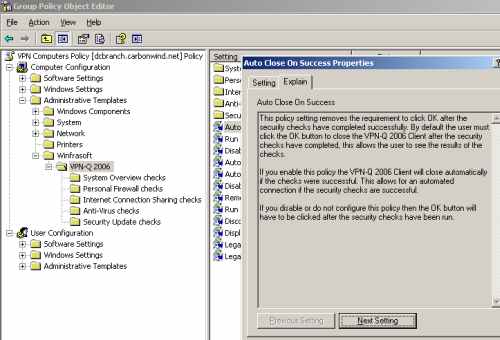
Figure11: VPN Computers Policy - Computer Configuration: Administrative Templates - Winfrasoft VPN-Q 2006 Template: Explanation of a Setting
2. Automatically Updating the Group Policy on VPN Users' Machines
A certain problem appears in this scenario, how to keep the group policy up to date on clients' machines.
For example, you may customize the VPN-2006 group policy for the domain member machines, make sure the customize group policy has been updated on these machines before you give them to your VPN users.
Then these machines leave your network. If you make a modification in Active Directory to the current VPN-Q 2006 group policy, the clients will not use this new group policy, unless they update the group policy.
We need an automated way of doing this when users establish a VPN connection.
If you have created a custom CMAK profile to work with the VPN-Q 2006 Client, it is very simple to add a custom action which will update the group policy on the VPN client's machines, see Figure12 and Figure13.
Note that the gopupdate command will be run while the clients are in the Quarantine Network.
I have observed that the VPN user will connect, the GP update is run, the "old" custom configured checks are performed by the VPN-Q 2006 Client, and only the next time the VPN user connects the updated checks are run. So the VPN client will "get away" if the old checks are successfully completed.
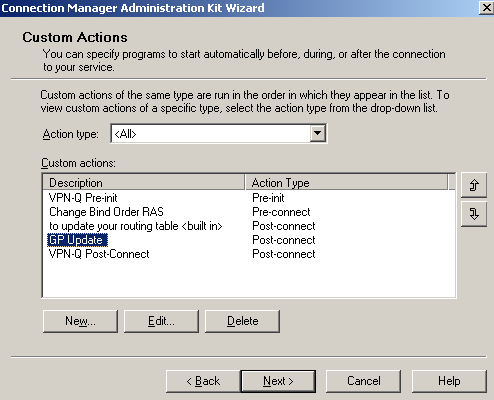
Figure12: CMAK Wizard - Custom Actions
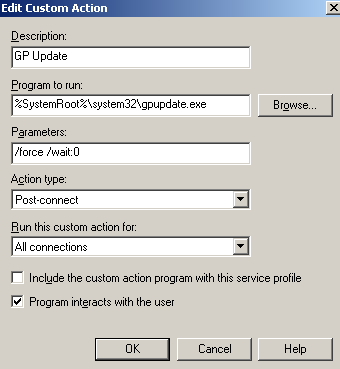
Figure13: CMAK Wizard - Custom Actions: GP Update
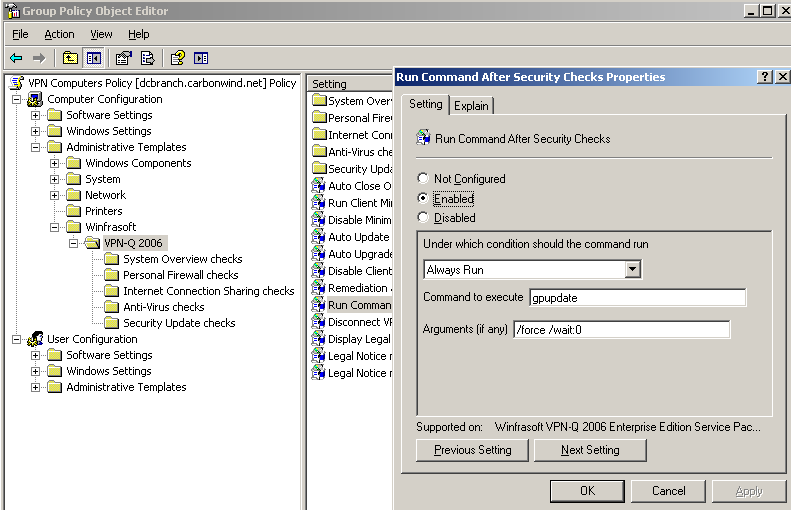
Another way to force a GP update on the VPN clients, is to use the Run Command After Security Checks setting provided by Winfrasoft within the VPN-Q template, see Figure14.
After the Security Checks are completed, even if the user does not pass all these checks, we can specify a command to be ran, for example the gpupdate command.
Personal I prefer the CMAK solution though.
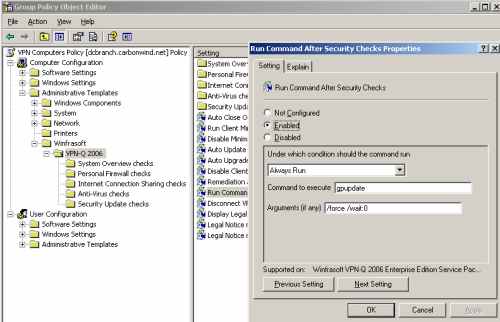
Figure14: VPN-Q 2006 Policy - Enable "Run Command After Security Checks"
3. Improve the VPN Users' Experience
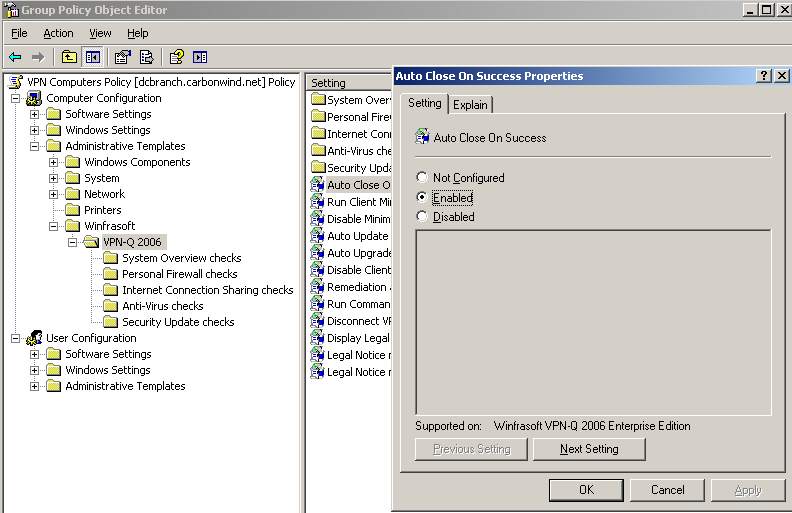
By default, when the security checks are successfully completed, and the VPN client is released from Quarantine, the user must manually click the OK button to close the VPN-Q 2006 Client window.
We can configure the Auto Close on Success setting to automatically close the VPN-Q 2006 Client window if the user was successfully released from Qurantine, see Figure15.
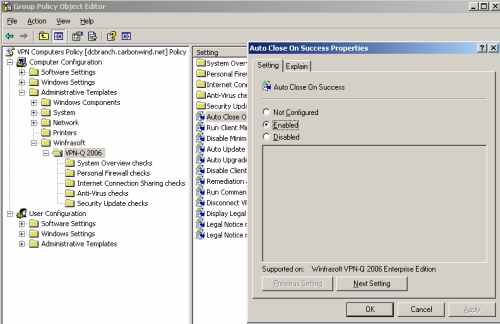
Figure15: VPN-Q 2006 Policy - Enable "Auto Close On Success"
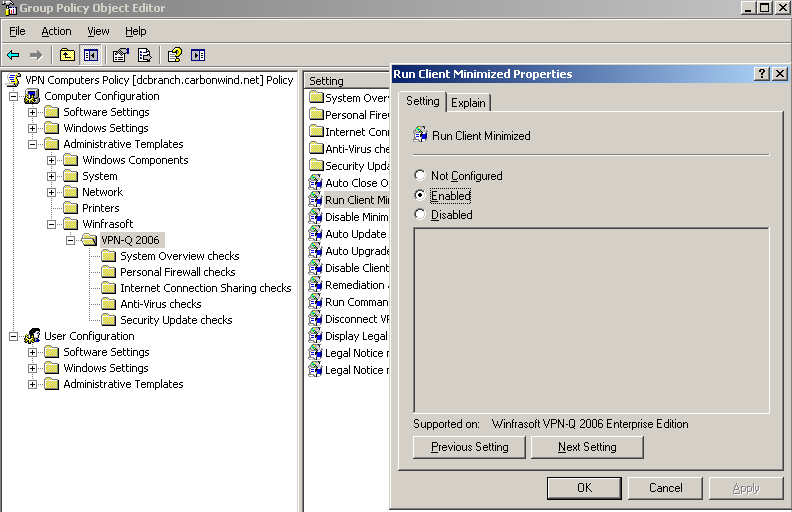
Also by default, the VPN-Q 2006 Client window pops-up and the security checks are run.
You may want that the VPN-Q 2006 client to run minimized. If so, enable the Run Client Minimized setting, see Figure16.
If you combine this setting with the Auto Close on Success one, and the user passes all the checks, this user will have a quiet experience with minimum input required from he or she.
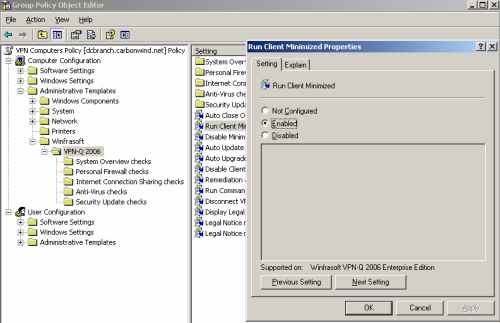
Figure16: VPN-Q 2006 Policy - Enable "Run Client Minimized"
4. Custom Client Remediation Capabilities
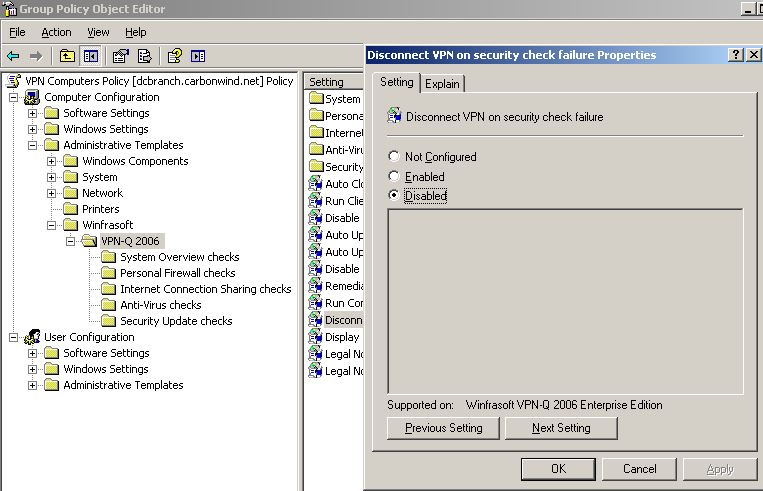
With the default configuration in place, in case the VPN clients fail some security checks, once they click the OK button the VPN-Q 2006 Client window, the VPN connection will be disconnected, and they will be redirected to a web page from Winfrasoft's web site, web page that contains some general instructions about what to do to bring the client in compliance with the health policy.
However, you may want to keep the VPN client in the Quarantine Network, and provide a custom web page with your company's instructions and remediations posibilities.
This probably will improve the VPN users experience, since they will benefit from straight directions in case they do not pass some security checks, and also may simplify management for the network administrators.
Since the remediation server is an internal server, it can be greatly customized, so the network administrators will have a lot of flexibility in implementing a remediation strategy.
First disable the Disconnect VPN on security check failure setting, see Figure17.
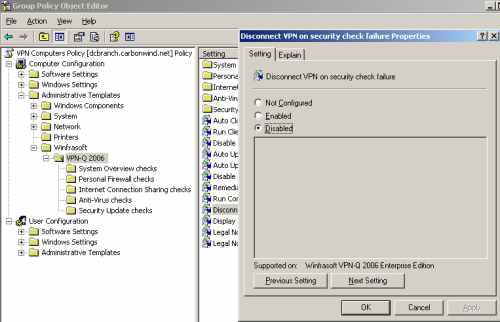
Figure17: VPN-Q 2006 Policy - Disable "Disconnect VPN on security check failure"
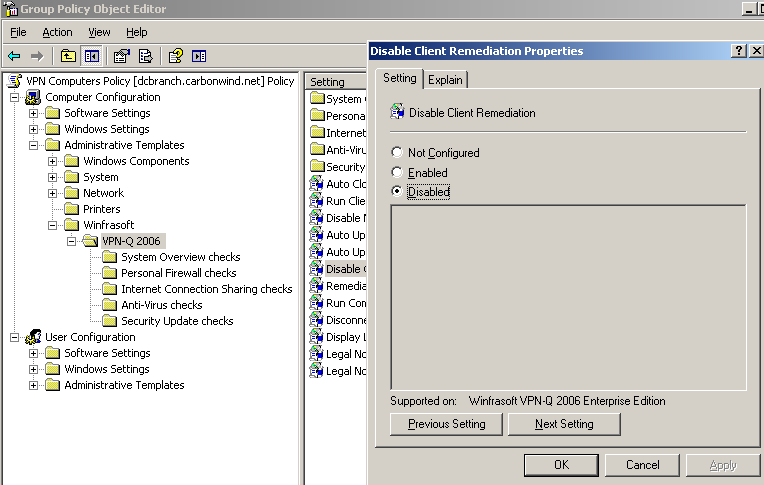
Also disable the Disable Client Remediation setting, see Figure18.
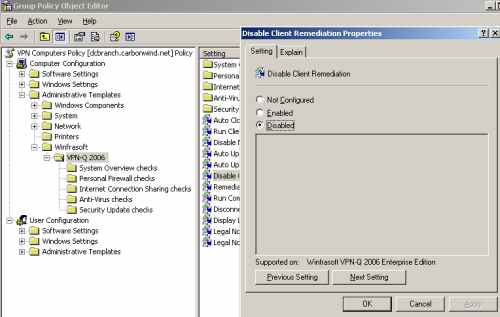
Figure18: VPN-Q 2006 Policy - Disable "Disable Client Remediation"
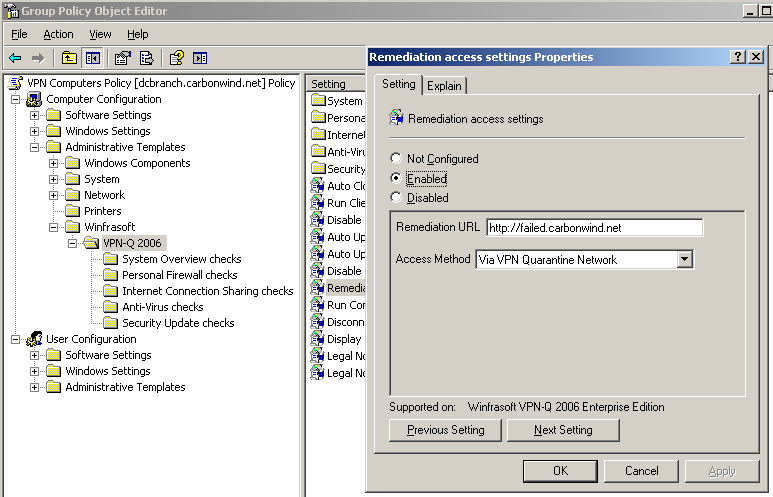
And enable and configure the Remediation access settings setting, see Figure19. I've entered a URL to an internal web site where users will get instructions about how to bring the client in compliance with the health policy. The Access Method is Via VPN Quarantine Network.
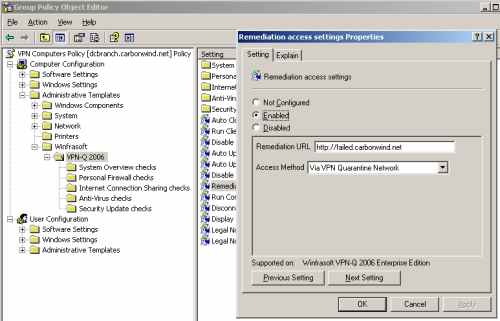
Figure19: VPN-Q 2006 Policy - Enable "Remediation access settings"
Next we need to configure ISA to allow access to the remediation server.
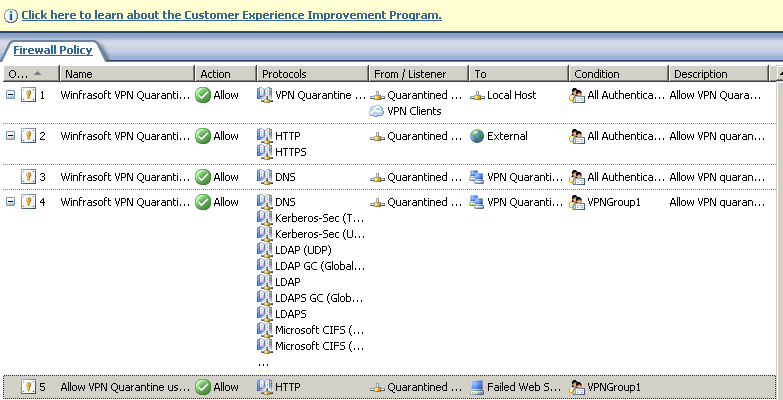
Firewall rules 1, 2 and 3 from Figure20 were automatically created by the VPN-Q 2006 Config Wizard.
Also rule 4 was automatically created by the same wizard. However I've edited the Users condition, and changed from All Authenticated Users to VPNGroup1. Doing so, only required VPN users which are in the Quarantine Network will have access to Active Directory resources(say for a group policy update).
For example, I have two Active Directory VPN groups, VPNGroup1 and VPNGroup2. Only VPNGroup1 is using a custom VPN-Q 2006 group policy, while VPNGroup2 is using the default settings(let's say that the VPNGroup2 users are using machines that are not yet domain members).
The group policy update for VPNGroup1 is run with a CMAK profile, so it will be performed while the users are still in the quarantine network. I want to make sure the gpupdate will take place whatever the results of the security checks will be, immediatelly after the VPN connection was establish.
Rule 5 was manually created by me to allow access for the VPNGroup1 users to the remediation web server.
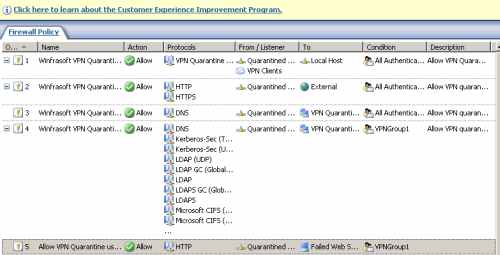
Figure20: ISA Firewall Policy - Access Rules 1-5
On ISA, within the VPN Clients configuration area, I've specified the two Active Directory groups of users for which remote access is allowed, Global Security groups, see Figure21. The VPN users have the Remote Access Permissions (Dial-in or VPN) set to Control access through Remote Access Policy, see Figure23, otherwise the setting on ISA will be ignored.
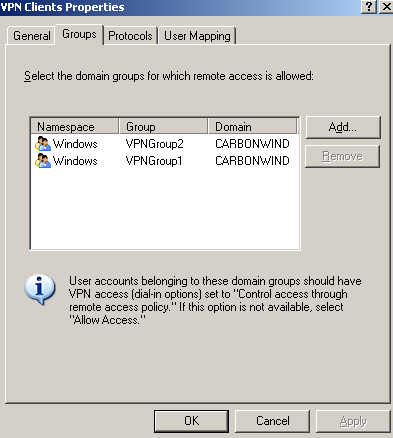
Figure21: ISA - VPN Settings: Domain Groups For Which Remote Access Is Allowed
Also, on ISA I've enabled User Mapping (ISA is a domain member), see Figure22, because the VPN users use EAP-TLS for PPP (user) authentication, and I've created the access rules group-based on ISA. Please refer to Dr. Tom Shinder's ISA Server 2006 Migration Guide.
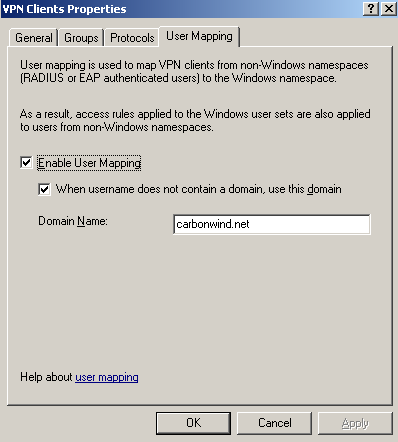
Figure22: ISA - VPN Settings: Enable User Mapping
As said above, the VPN users have the Remote Access Permissions (Dial-in or VPN) set to Control access through Remote Access Policy, see Figure23, otherwise the setting on ISA will be ignored.
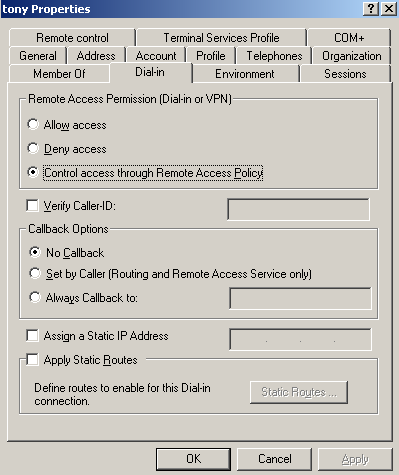
Figure23: User Properties - Dial-in: Control access through Remote Access Policy
For example user tony is a member of the VPNGroup1, see Figure24.
Now when tony will connect, and fail some security checks, the web page to the internal remediation server will automatically open.
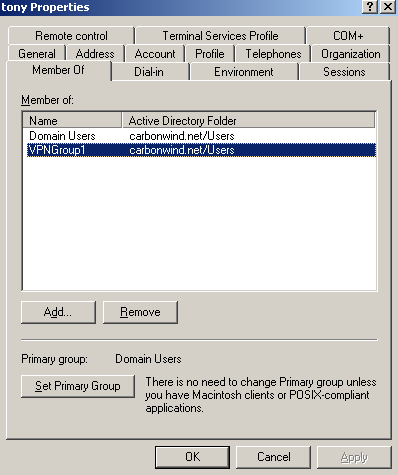
Figure24: User Properties - Member Of
5. Display a Legal Notice on The Client Before The Security Checks Are Run
You may want to display a Legal Notice on the VPN client, before the security checks are run, to inform the user that certain security checks are about to be performed on his or her computer to see if the health status of his or her machine meets the company's policies, that the connection is closely monitored and so on.
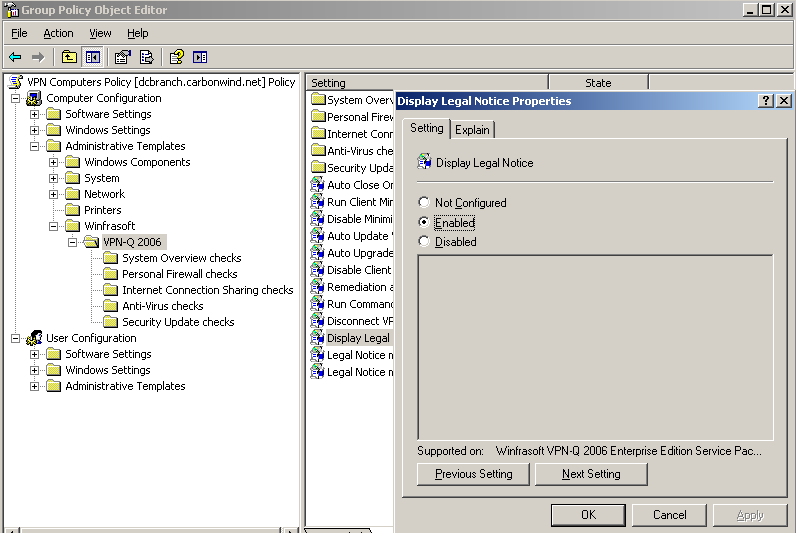
First you need to enable the Display Legal Notice setting, see Figure25.
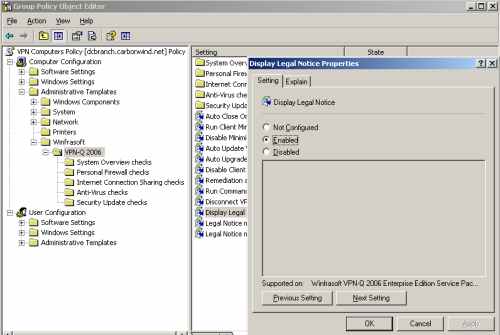
Figure25: VPN-Q 2006 Policy - Enable "Display Legal Notice Properties"
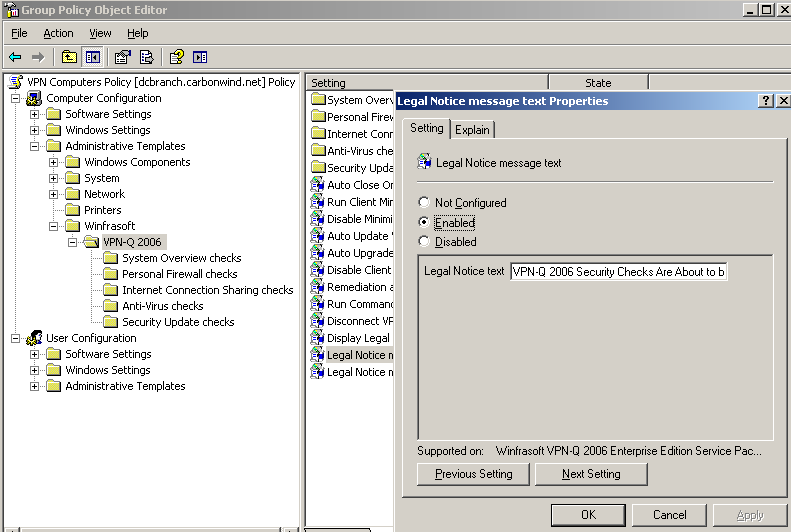
Next, enable the Legal Notice message text setting and enter the text you want the Legal Notice to display, see Figure26.
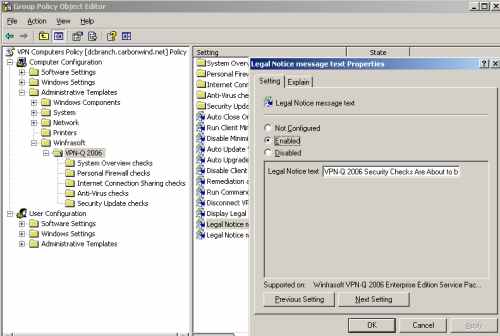
Figure26: VPN-Q 2006 Policy - Enable "Legal Notice message text"
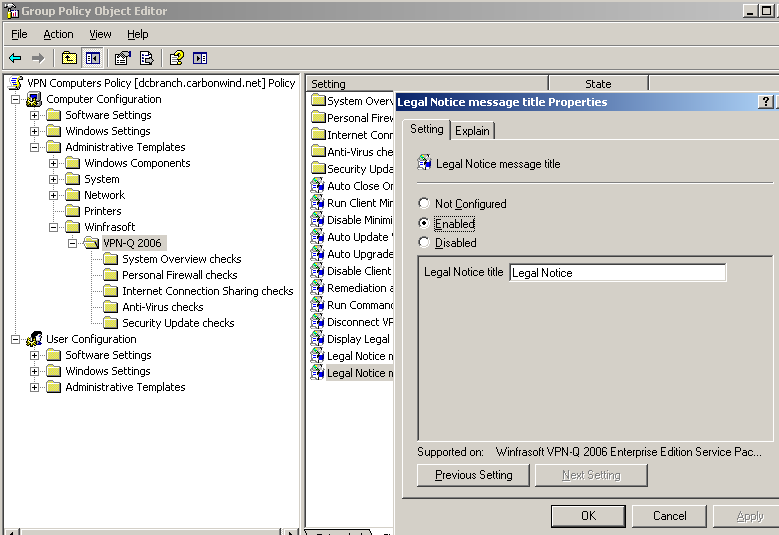
And finally, enable the Legal Notice message title setting and specify the title of the Legal Notice, see Figure27.
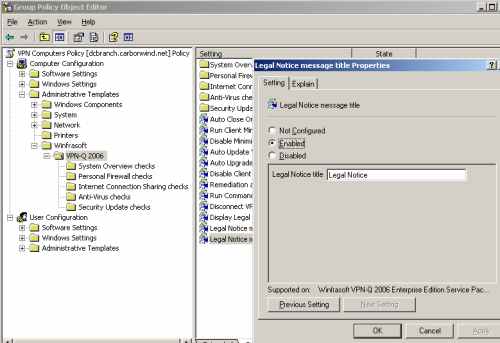
Figure27: VPN-Q 2006 Policy - Enable "Legal Notice message title"
After the VPN connection was established, before the Security Checks are run, the user must click I Agree or I DO NOT Agree to continue, see Figure28.
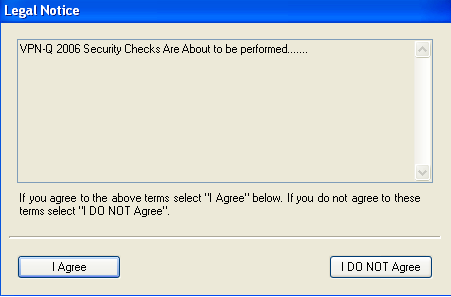
Figure28: VPN Client - Legal Notice
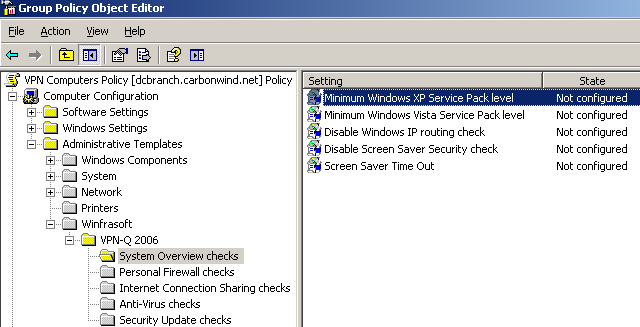
6. Customize The System Overview Checks
You have the option to customize or simply to disable certain System Overview checks, see Figure29.
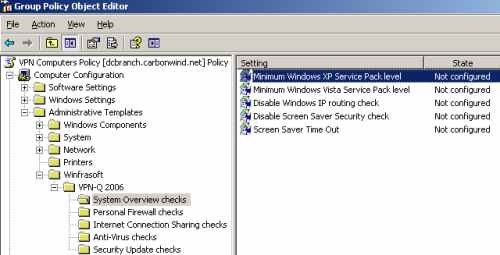
Figure29: VPN-Q 2006 Policy - System Overview Checks
For example the default minimum allowed Service Pack Level for Windows XP is SP2.
However you may want to set this minimum to SP3.
You can do that from the Minimum Windows XP Service Pack Level setting, see Figure30.
Also you can set the minimum service pack level for Vista too.
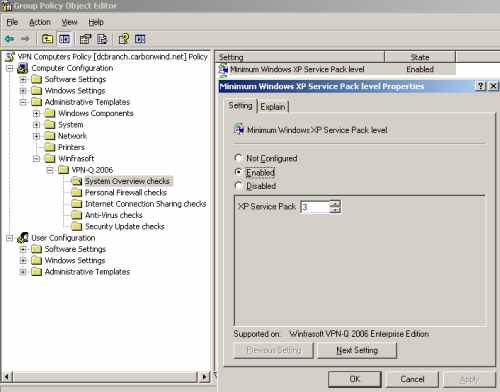
Figure30: VPN-Q 2006 Policy - System Overview Checks: Set the " Minimum Windows XP Service Pack Level"
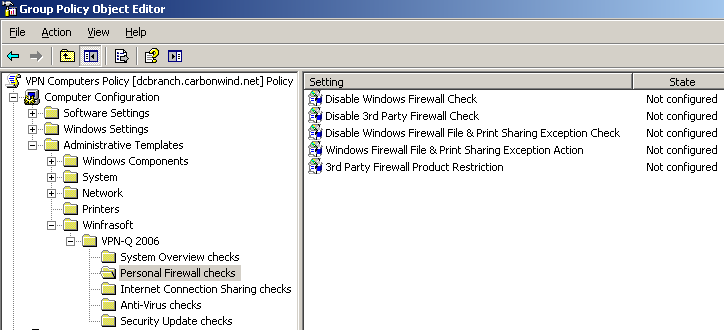
7. Customize The Personal Firewall Checks
In Figure31 we can see the Personal Firewall Checks settings you can customize.
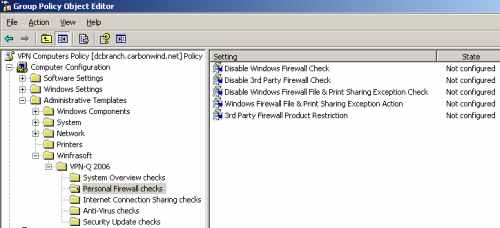
Figure31: VPN-Q 2006 Policy - Personal Firewall Checks
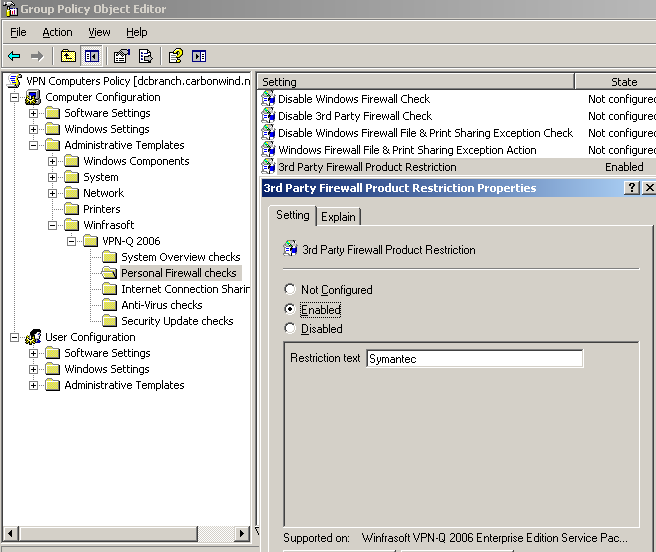
For example you can specify that only a certain third-party firewall is allowed from the 3rd Party Firewall Product Restriction setting, see Figure32. You need to enter the full name of the product, or just a part of it.
For example, I've entered Symantec, thus a client with a host firewall product from Kaspersky failed the security checks, see Figure33. If I would enter instead of Symantec, Kaspersky or the full name of the product, Kaspersky Internet Security, then the client will pass this security check, since it meets the company's restriction.

Figure32: VPN-Q 2006 Policy - Personal Firewall Checks: Configure the " 3rd Party Firewall Product Restriction"

Figure33: VPN-Q 2006 Client - The Installed Firewall Is Not Permitted
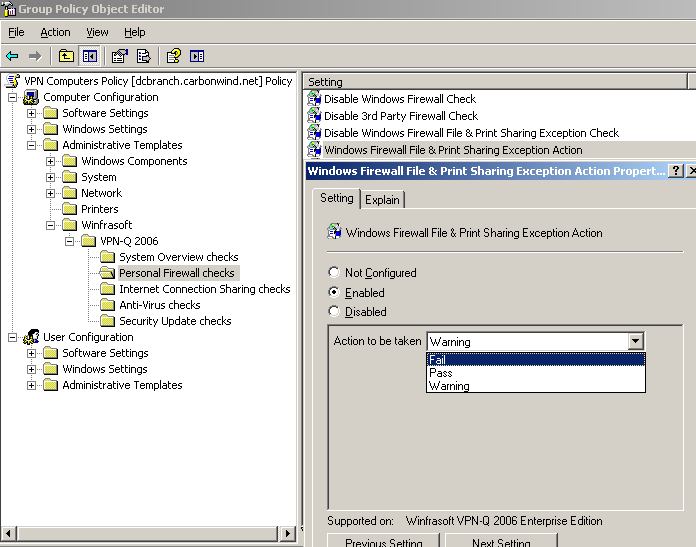
If you are using the Windows Firewall on the client, you can modify the setting Windows Firewall File & Print Sharing Exception Action, which by default is set to issue a warning if the mentioned exception was added on the client, see Figure34. For example you may set it to Fail, so the client will fail this security check if he or she enabled the File & Print Sharing Exception on the Windows Firewall.
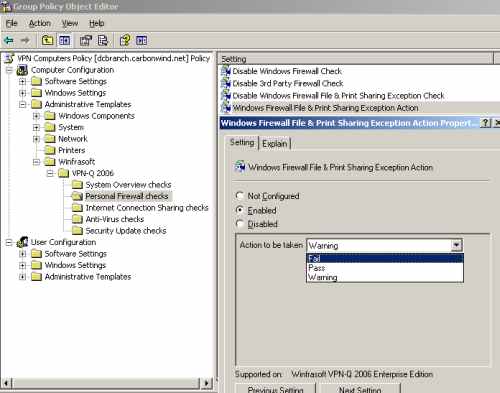
Figure34: VPN-Q 2006 Policy - Personal Firewall Checks: Configure the " Windows File & Print Sharing Exception Action"
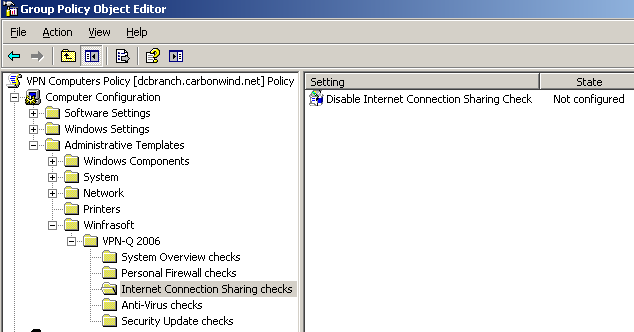
8. Customize The ICS Checks
There isn't much you can do with the Disable Internet Connection Sharing Check setting, see Figure35, it's either on or off, by default on, and it's not a good idea to disable this check.

Figure35: VPN-Q 2006 Policy - Internet Connection Sharing Checks
9. Customize The Anti-Virus Checks
There are a couple of settings to customize in the Anti-Virus Checks area, see Figure36.
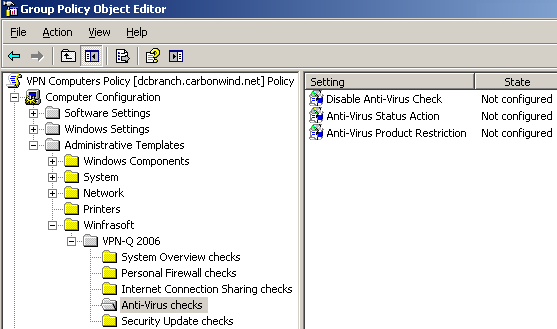
Figure36: VPN-Q 2006 Policy - Anti-Virus Checks
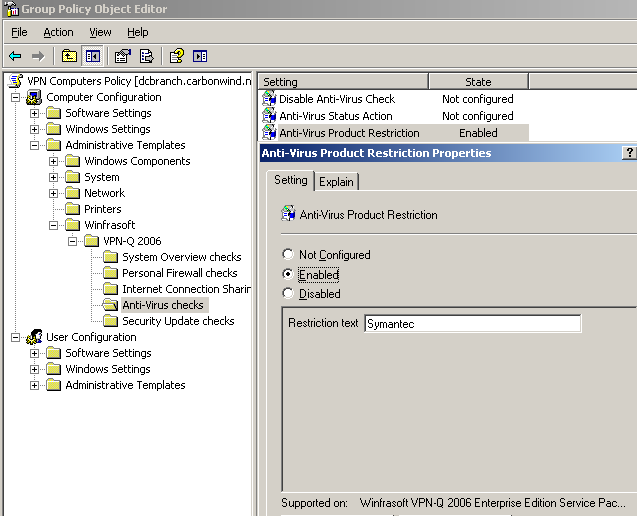
As with the Host Firewall restriction, you can specify that only a certain anti-virus product is allowed by the company's policies from the Anti-Virus Product Restriction setting, see Figure37. You need to enter the full name of the product, or just a part of it.
For example, I've entered Symantec, thus a client with a anti-virus product from Kaspersky failed the security checks, see Figure38. If I would enter instead of Symantec, Kaspersky or the full name of the product, Kaspersky Internet Security, then the client will pass this security check, since it meets the company's restriction.
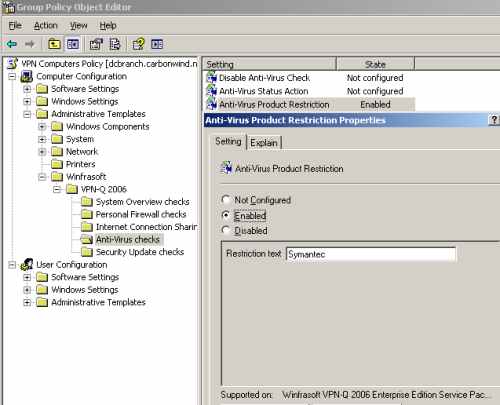
Figure37: VPN-Q 2006 Policy - Anti-Virus Checks: Configure the "Anti-Virus Product Restriction"
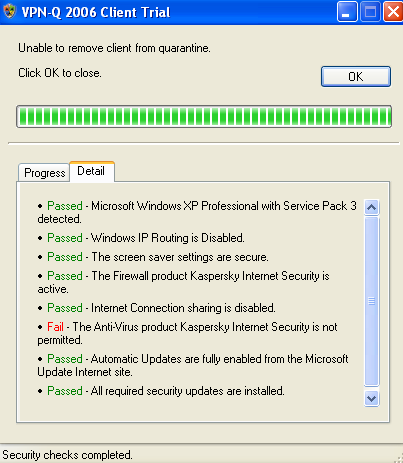
Figure38: VPN-Q 2006 Client - The Installed Anti-Virus Software Is Not Permitted
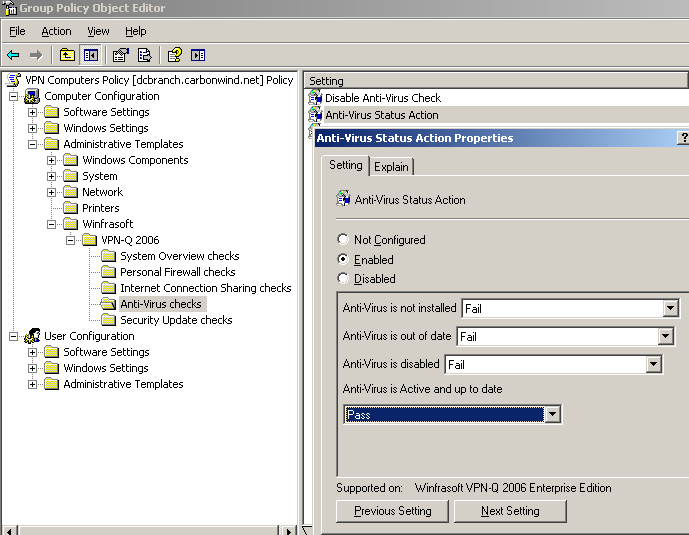
The default checks regarding the status of the anti-virus solution found on the client's machine or what happens when an anti-virus software is not found on the client's machine, are pretty good, and they are important security checks, but if you want, you may modify them, see Figure39.
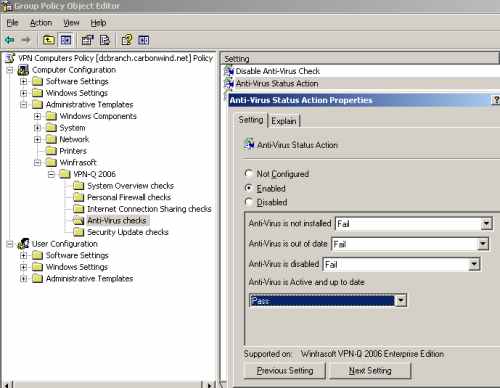
Figure39: VPN-Q 2006 Policy - Anti-Virus Checks: Configure the "Anti-Virus Status Action"
10. Customize The Security Update Checks
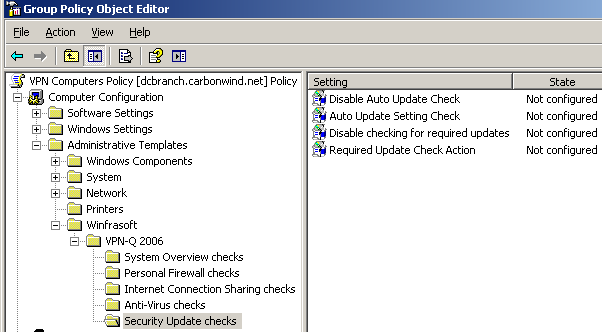
You have many posibilities to customize the Security Update checks, see Figure40.
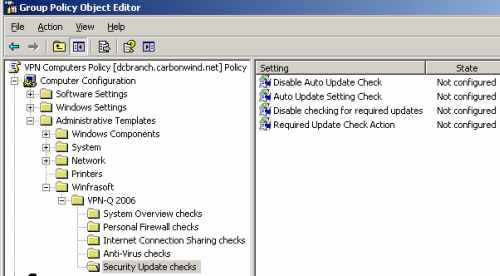
Figure40: VPN-Q 2006 Policy - Security Update Checks
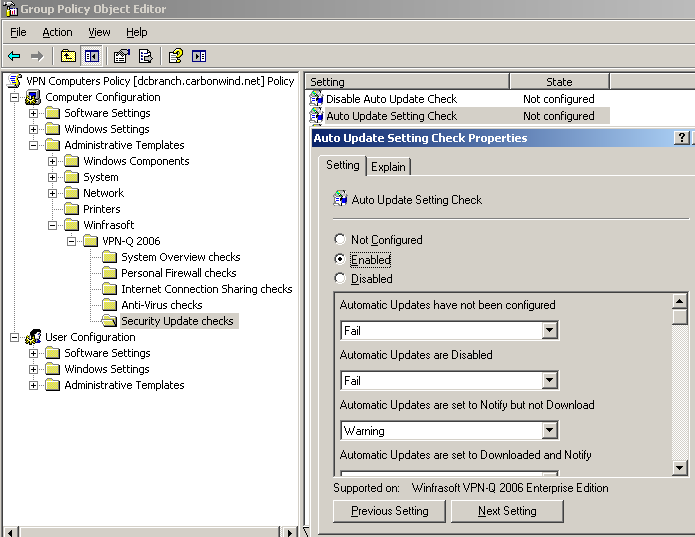
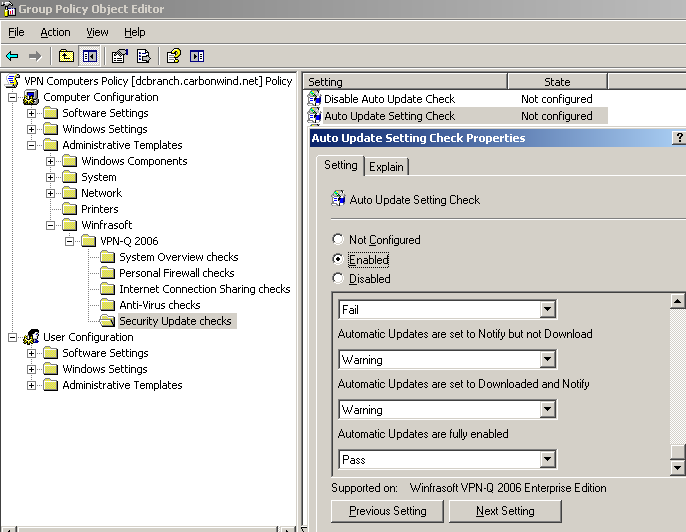
You can modify the default checks regarding the status of the Auto Update setting on the client from the Auto Update Setting Check setting, see Figure41 and Figure42.
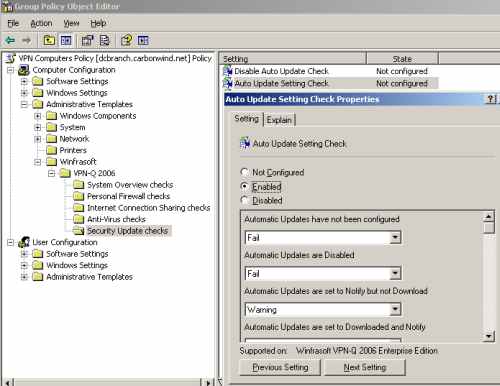
Figure41: VPN-Q 2006 Policy - Security Update Checks: Configure the "Auto Update Setting Check" 1
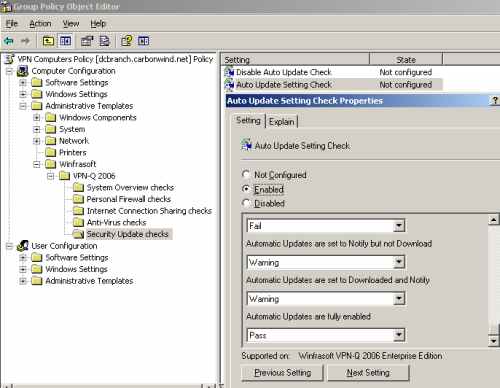
Figure42: VPN-Q 2006 Policy - Security Update Checks: Configure the "Auto Update Setting Check" 2
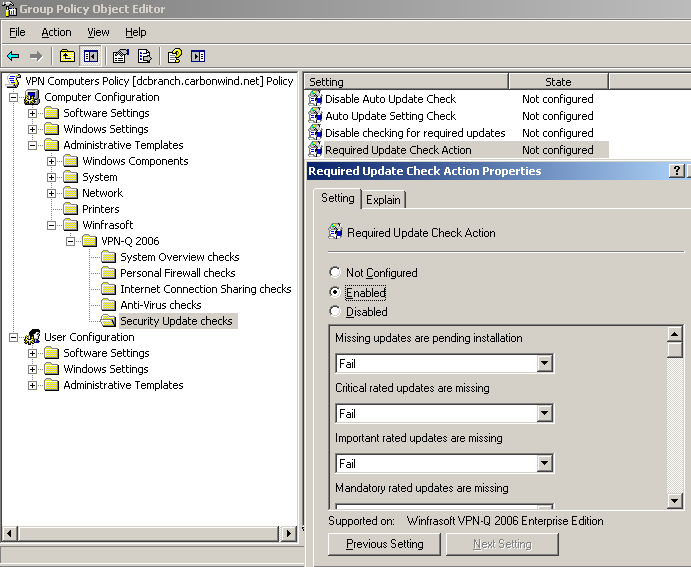
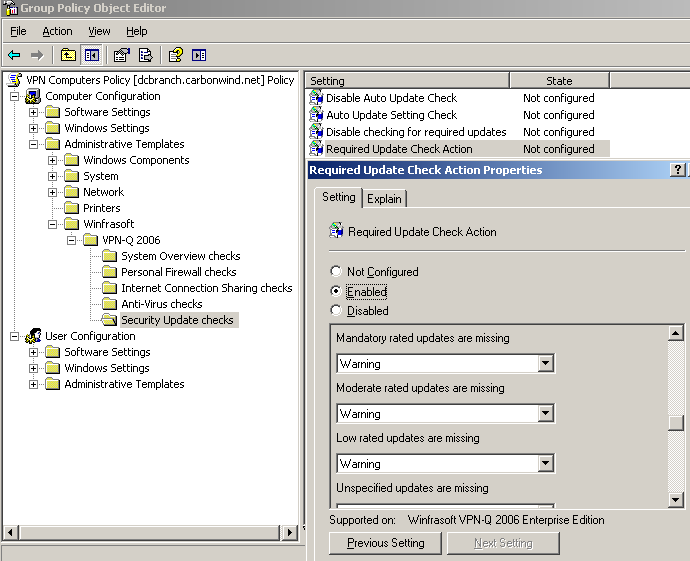
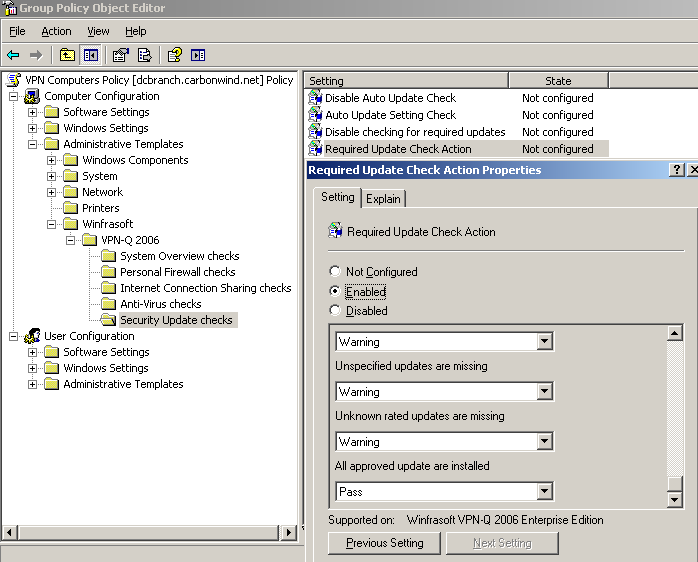
Also you may want to customize the action taken when a missing update is found, based on the rating of that update from the Required Update Check Action setting, see Figure43, Figure44 and Figure45.
The default values are fair enough though.
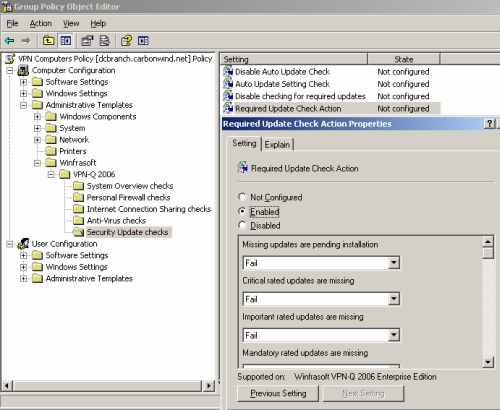
Figure43: VPN-Q 2006 Policy - Security Update Checks: Configure the "Require Update Check Action" 1
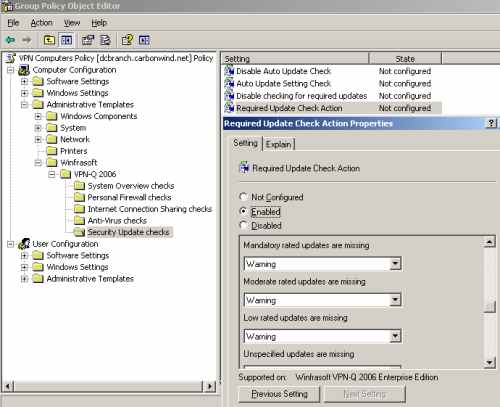
Figure44: VPN-Q 2006 Policy - Security Update Checks: Configure the "Require Update Check Action" 2
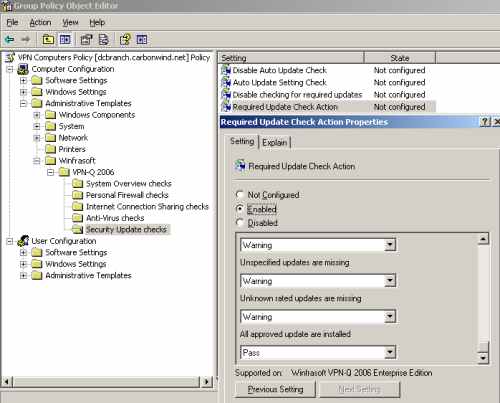
Figure45: VPN-Q 2006 Policy - Security Update Checks: Configure the "Require Update Check Action"3
11. A Quick Test Example of a Disabled Security Check
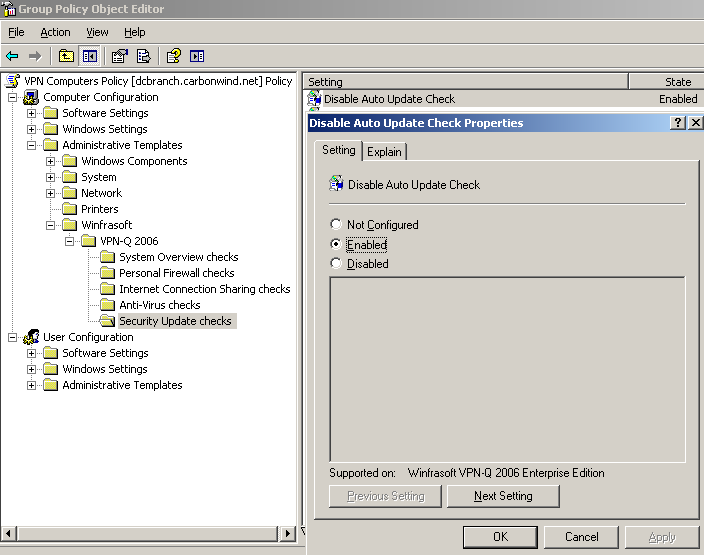
Let's say you want to make a quick test to see if your modified group policy is applied on the client side.
For example, I've disabled the Auto Update check, by enabling the Disable Auto Update Check setting, see Figure46.
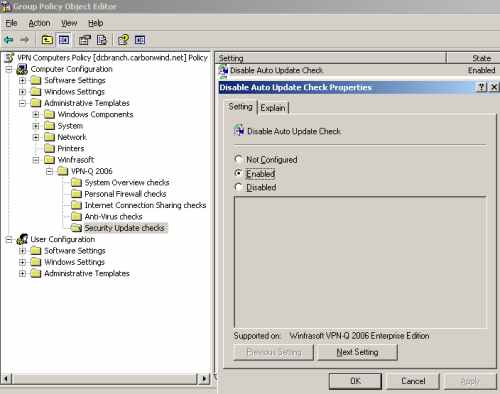
Figure46: VPN-Q 2006 Policy - Test: Disable a Default Security Check
I've then updated the group policy of the VPN client's machine while it was on the internal network, and after that I've initiated the VPN connection from this machine.
Looking on the Detail tab on the VPN-Q 2006 Client, we can notice that the Auto Update check has been disabled via Group Policy, see Figure47, so the group policy was successfully updated and our modification was applied.
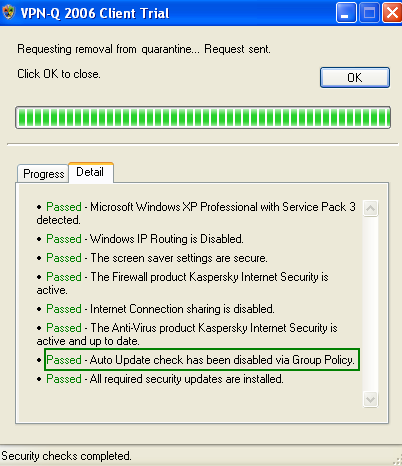
Figure47: VPN-Q 2006 Client - Test: The Check has been disabled via Group Policy
|