|
24.06.2008
ISA Server 2006 as an L2TP/IPsec VPN server and Mac OS X 10.4.x as L2TP/IPsec VPN clients - Part 1: IKE Authentication with Certificates - Using an Internal Windows 2003 Enterprise CA
- 1. Configure the ISA L2TP/IPsec VPN server - sort of
- 2. Configure the Mac OS X L2TP/IPsec VPN client
- 3. Test the connection
- 4. Re-configure the ISA L2TP/IPsec VPN server - sort of
- 5. Re-test the connection
- 6. Miscellaneous
I'm not a Mac user. However, recently I had the chance to test the Mac OS X 10.4.8 and Mac OS X 10.4.10 as L2TP/IPsec VPN clients with ISA Server 2006 as L2TP/IPsec VPN server. I've decided to put a couple of notes regarding what I have observed.
In this part we will talk about using certificates for IKE authentication and an internal Windwos 2003 Enterprise CA.
In a future part, we will talk about using pre-shared keys. Pre-shared keys are a weak authentication method, but they can be useful for testing.
Also in a future part we will talk about using an OpenSSL CA.
I do not have currently access to a Mac OS X 10.5.x machine. When/if I will have access to such a machine, I will test to see what happens.
I've started configuring and connecting with a Mac OS X 10.4.8 machine. I thought I got it working, but when I attempted to connect with a Mac OS X 10.4.10 machine, I could not. So I needed to make some changes in order to make it work.
1. Configure ISA - sort of
I've first prepared ISA.
I'm using an Enteprise CA(Windows 2003 Standard R2 SP2).
I requested a Computer certificate using the mmc from ISA(domain member).
As said above, this approach worked only with Mac OS X 10.4.8 as L2TP/IPsec VPN client. With Mac OS X 10.4.10 it didn't.
Open the mmc and add the Certificates (Local Computer) Snap-in. Right-clickPersonal/Certificates, point to All Taks and click Request New Certificate, seeFigure1. Note that your request will fail. To make it work please read Stefaan Pouseele's article Certificate Enrollment Requires a Custom Protocol.
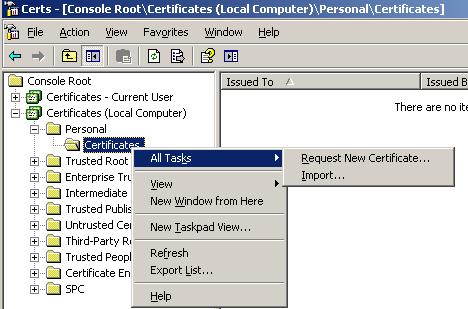
Figure1: Certificates (Local Computer) Personal/Certificates,Request New Certificate
Click Next on the Welcome to the Certificate Request Wizard window.
In the Certificates Type window, Computer is available, check the Advanced checkbox, see Figure2.
Click Next.
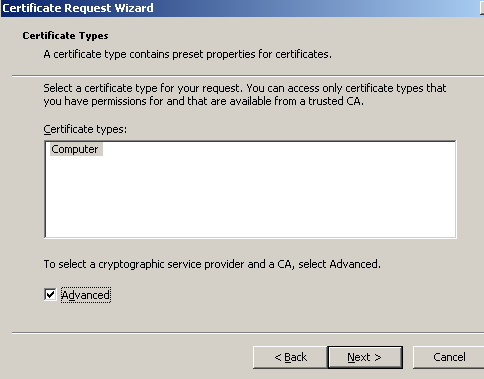
Figure2: Certificates Type Computer
I've specified the Key Length, see Figure3.
Click Next.
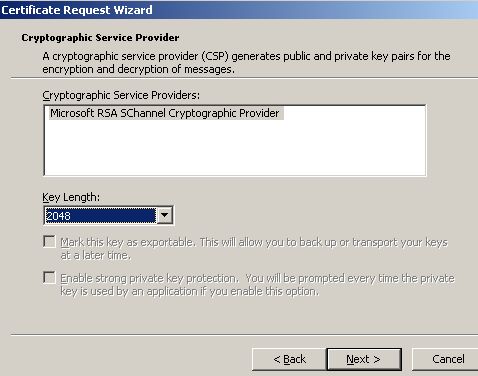
Figure3: Key Length
Click Next on the Certification Authority window, see Figure4.
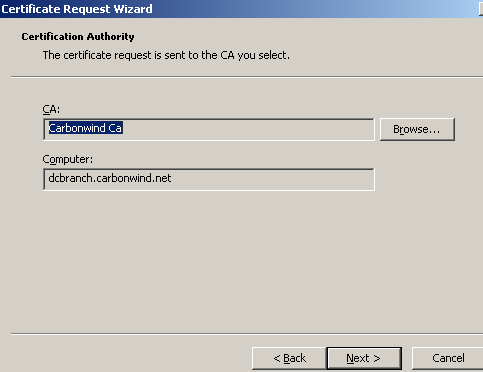
Figure4: Certification Authority
Provide a Certificate Friendly Name and Description. Click Next.
And Finish, see Figure5.
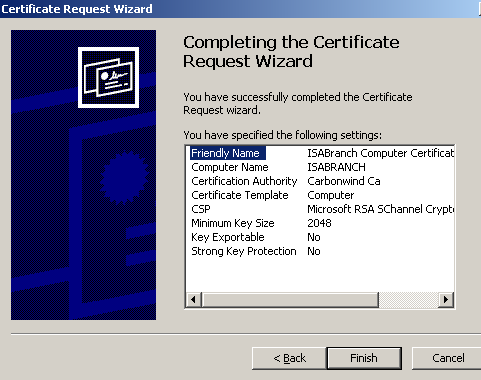
Figure5: Completing the Certificate Request Wizard
Click OK in the The certificate request was successful window, see Figure6.

Figure6: The certificate request was successful
Let's take a look at the certificate we've just installed, see Figure7. Note that I do not have to manually add the CA certificate in the Trusted Root Certification Authorities in theCertificates (Local Computer) Store, since ISA is a domain member and we are using an Enterprise CA, the CA certificate was automatically installed.
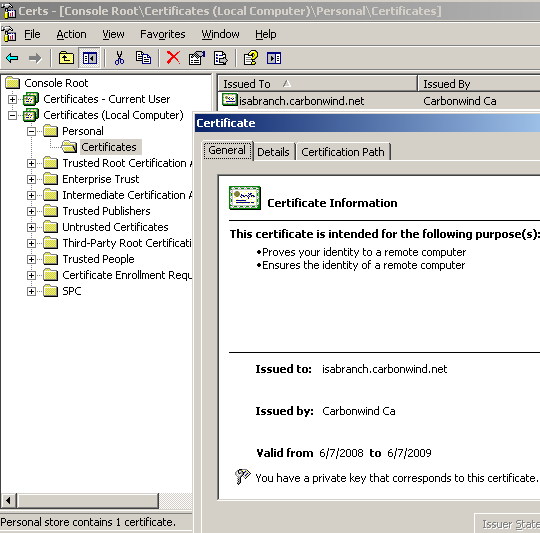
Figure7: ISA Computer Certificate - General Tab
If we click the Details tab, we can see the EKU field, Figure8.
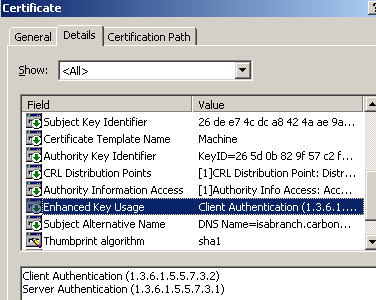
Figure8: ISA Computer Certificate - Details Tab: EKU
Also in the Details tab, we can see the SAN field which is very important, Figure9. The DNS Name from this field must match the one from the Server address field we will enter in the VPN connection settings on the Mac machine. We'll talk about that later.
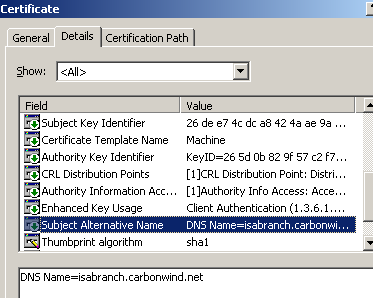
Figure9: ISA Computer Certificate - Details Tab: SAN
I've enabled the System Policy on ISA allowing it to download the CRL, see Figure10.

Figure10: ISA System Policy - Allow CRL Download
The authentication methods enabled on ISA are shown in Figure11 .

Figure11: ISA - VPN Authentication Methods
2. Configure the Mac OS X L2TP/IPsec VPN client
We need to request a certificate for the Mac OS X machine.
I will use an XP SP3 machine for this operation. I will export then the certificate with the private key as a .pfx file. After that I will delete it from the XP machine and import it on the Mac machine.
I will request an Administrator certificate, so you need to login with administrator privileges if you want to do that.
You can create a domain user for which to request a User certificate and then use this certificate on the Mac machine for IKE authentication if for some reasons you don't want to use the Administrator certificate template.
Open Internet Explorer and enter the URL for your CA web enrollment site.
I will simply enter the administrator name and password, see Figure12.
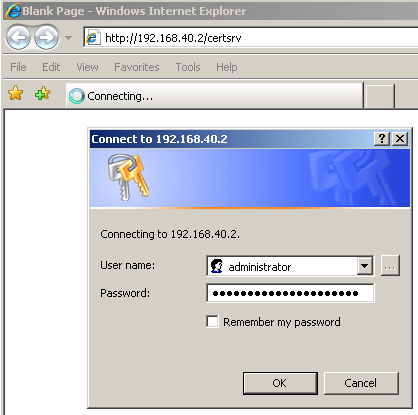
Figure12: CA Web Enrollment Site - Enter Credentials
Click Request a Certificate.
Select advanced certificate request, see Figure13.
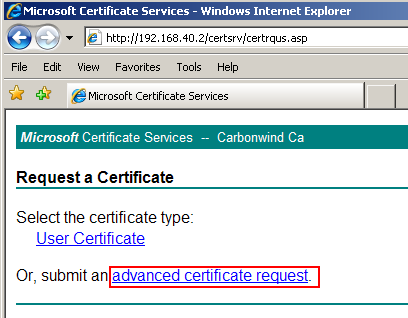
Figure13: CA Web Enrollment Site - Advanced Certificate Request
Then click Create and submit a request to this CA, see Figure14.
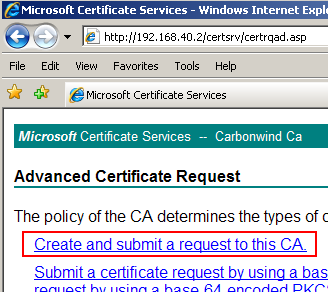
Figure14: CA Web Enrollment Site - Create and submit a request to this CA
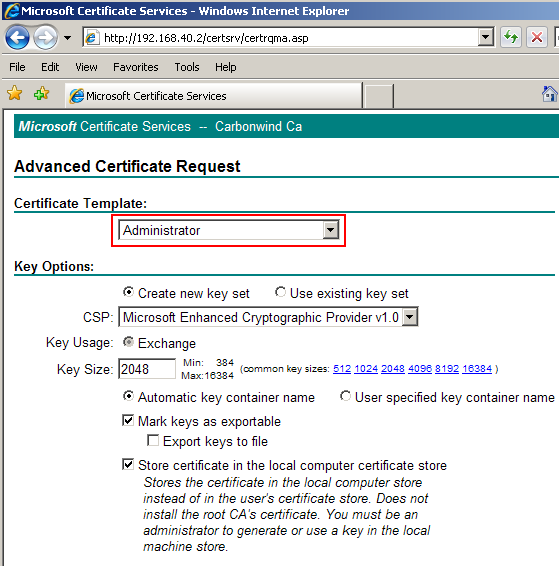
Choose the Administrator certificate template, make sure the Mark keys as exportable checkbox is selected, see Figure15. It does not matter where you will store the certificate, because we will export it and delete it from this machine. Click Submit. And click Yes in the dialog box informing you that the web site is requesting a new certificate on your behalf.
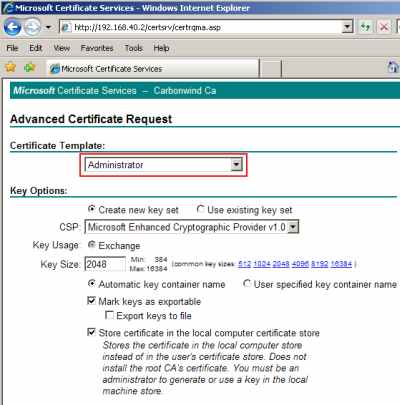
Figure15: CA Web Enrollment Site - Administrator Template
Click Install this certificate, see Figure16. And click Yes in the dialog box informing you that the web site is adding a certificate.
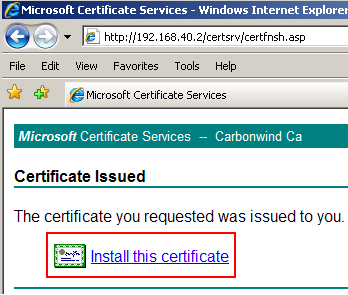
Figure16: CA Web Enrollment Site - Install this certificate
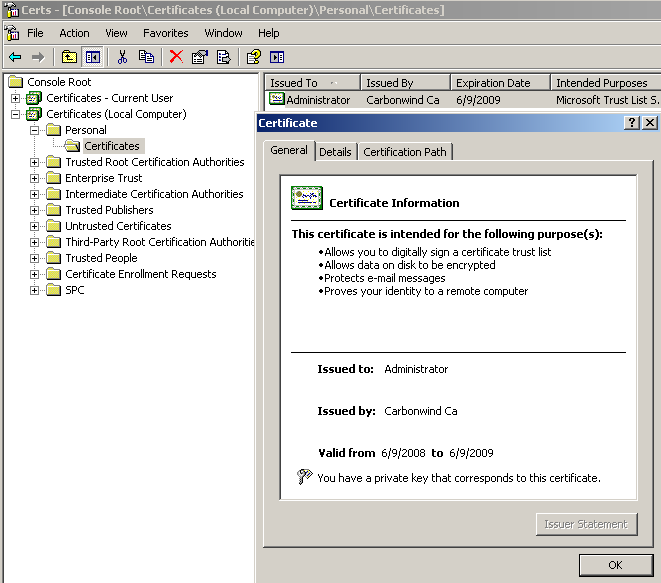
And now we have a certificate that we need to export. Let's take a look at it, see Figure17.
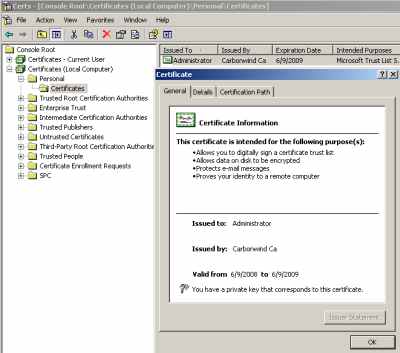
Figure17: Administrator Certificate
Right-click the certificate, point to All Tasks and click Export, see Figure18.
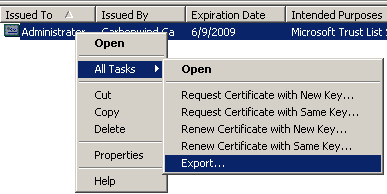
Figure18: Export the Certificate
Select Yes, export the private key, see Figure19.
Click Next.

Figure19: Export the Certificate - Yes, export the private key
Check the Include all certificates in the certification path if possible, see Figure20. The CA certificate will be included into the .pfx file.
Click Next.
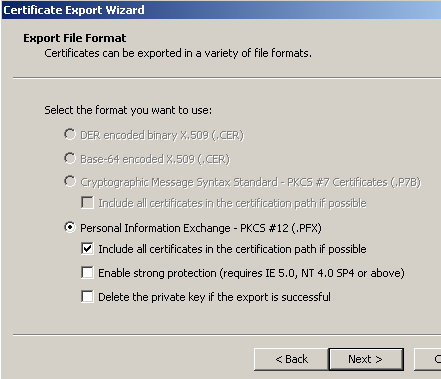
Figure20: Export the Certificate - Export File Format
Enter the password used to protect the private key, see Figure21.
Click Next.
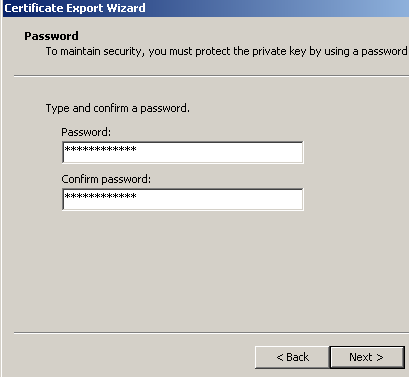
Figure21: Export the Certificate - Enter a Password
Specify the name of the file and the location where you will export it, see Figure22.
Click Next.

Figure22: Export the Certificate - Specify the File Name and Location
And click Finish. You can now delete the certificate from the XP machine Certificate Store.
As said before you can request instead a User certificate which you can use on the Mac for IKE authentication if you do not want to use the Administrator template , see Figure23,Figure24 and Figure25.
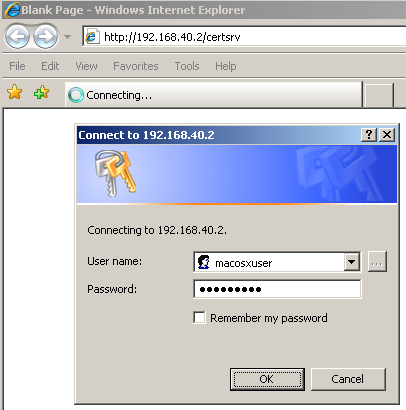
Figure23: CA Web Enrollment Site - Enter Credentials
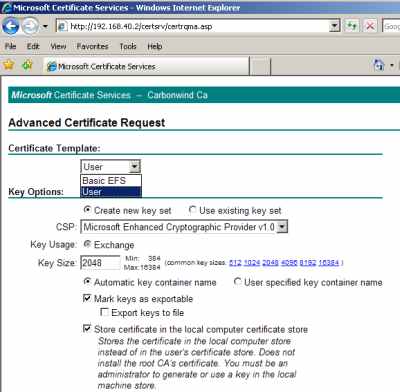
Figure24: CA Web Enrollment Site - User Template
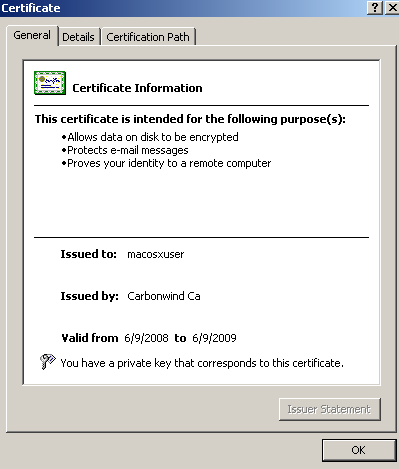
Figure25: User Certificate
Now we need to import our certificate used for IKE authentication on the Mac.
I've copied it on a CD, see Figure26.
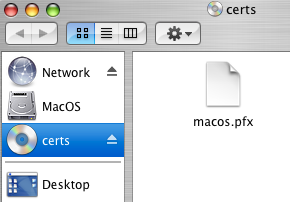
Figure26: Certificate on the CD
What we need to do ?
We actually have two certificates to import:
- the certificate used for IKE authentication
- and the CA certificate.
These certificates, along with the private key corresponding to the certificate used for IKE authentication are contained within our .pfx file.
On a Windows machine, the certificate used for IKE authentication goes into the Certificates (Local Computer) Store.
On the Mac 10.4.x machine, this certificate along with the corresponding private key go into the System keychain.
On a Windows machine, we need to place the CA certificate into the Trusted Root Certification Authorities in the Certificates (Local Computer)Store.
On the Mac 10.4.x machine, the CA certificate goes into the X509Anchors keychain.
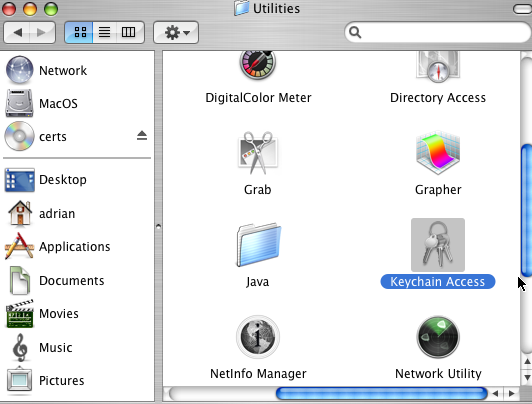
We can access the Keychain Access application from the Utilities panel, see Figure27. Note that my user account has admin privileges, see Figure28. The root account was not enabled on this Mac.

Figure27: Utilities - Keychain Access

Figure28: User Adrian
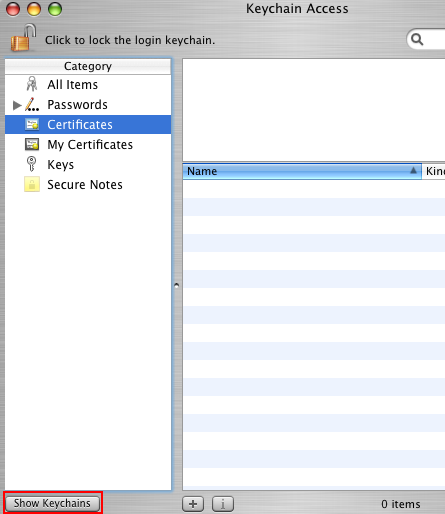
To reveal the Keychains, click Show Keychains, see Figure29.

Figure29: Keychain Access - Click Show Keychains
And in Figure30 we can view the two Keychains we are looking for, System and x509Anchors.

Figure30: Keychain Access - Keychains
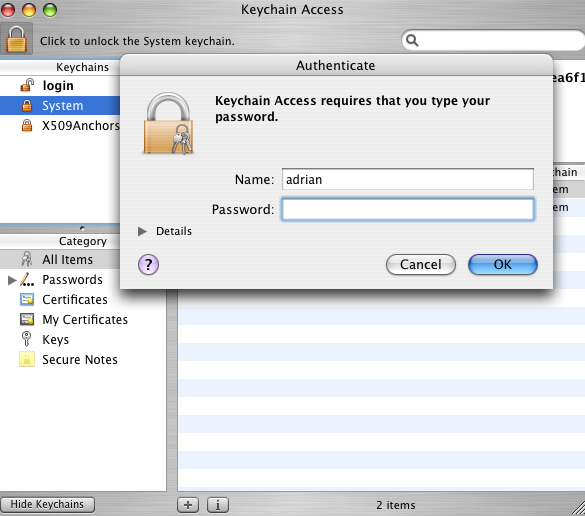
We can click the lock to unlock the System keychain, see Figure31.
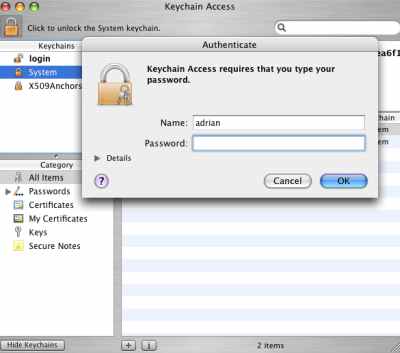
Figure31: Keychain Access - Unlock the System keychain
However this will not help, because I will not be able to import the certificate into the System keychain.
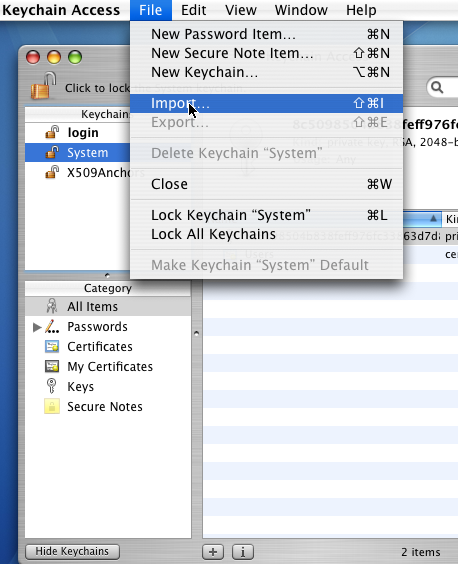
There are two quick ways to import a certificate here. While the System keychain is selected, click the File menu, and Import, see Figure32.
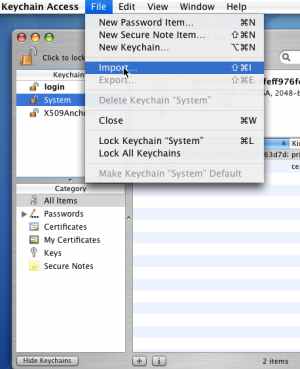
Figure32: Keychain Access - File/Import
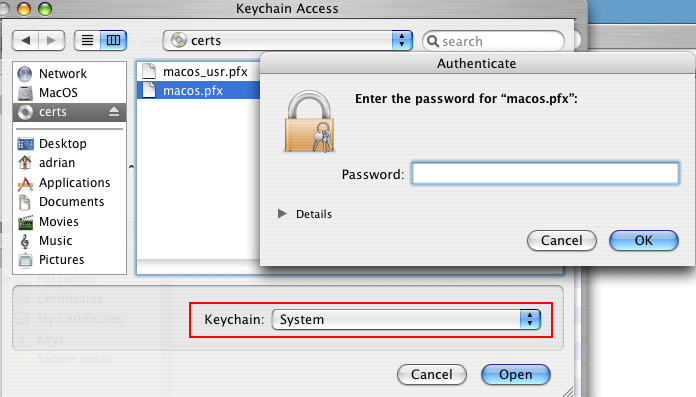
Then locate the certificate, and click Open. Enter the certificate password. See Figure33.
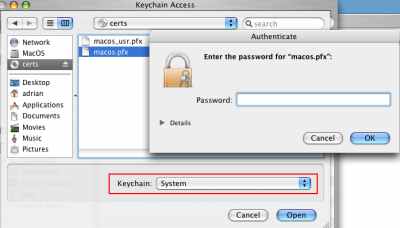
Figure33: Keychain Access - Enter the Certificate Password
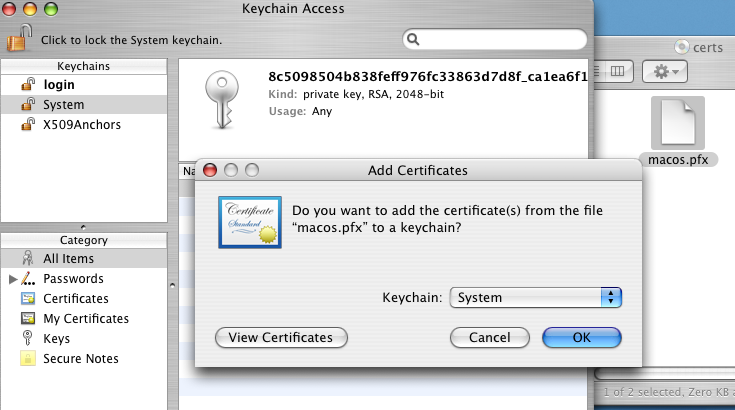
The other quick method is to simply double-click the certificate, and then specify the Keychain where you want to add the certificate, see Figure34. You will be prompted for the certificate password.
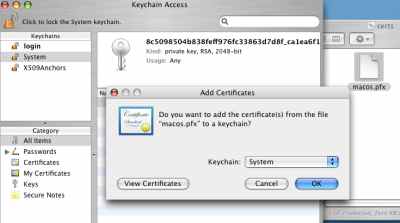
Figure34: Keychain Access - Double Click the Certificate to Import It
But, as said above, in my case, both attempts failed on Mac OS X 10.4.8 and on Mac OS X 10.4.10 too, with the error from Figure35 .

Figure35: Keychain Access - Import Error
A simple solution to this will be to launch the Keychain Access utility using sudo, seeFigure36.
sudo "/Applications/Utilities/Keychain Access.app/Contents/MacOS/Keychain Access"
Or, you may login as root, if the root account is enabled.
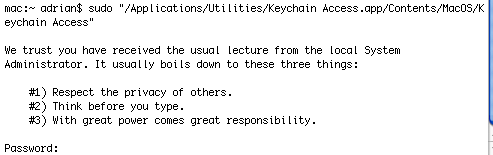
Figure36: sudo ".../Keychain Access"
Now I will simply double-click the .pfx file, I do not need to unlock the System keychain.
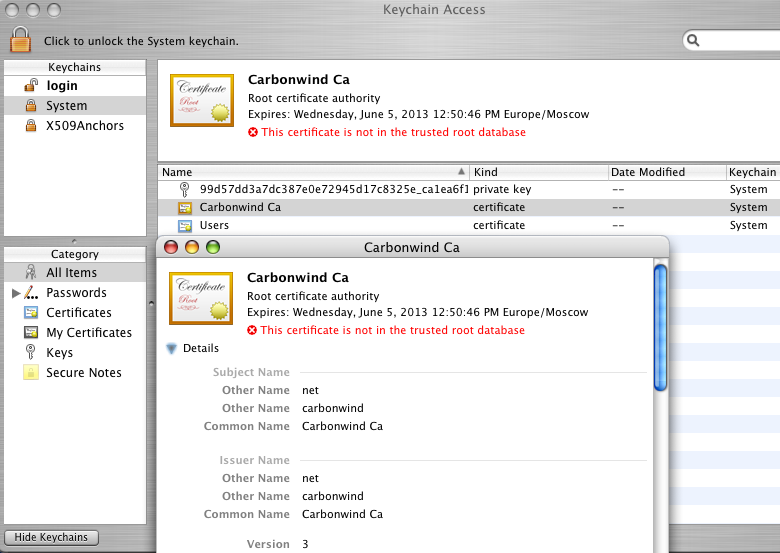
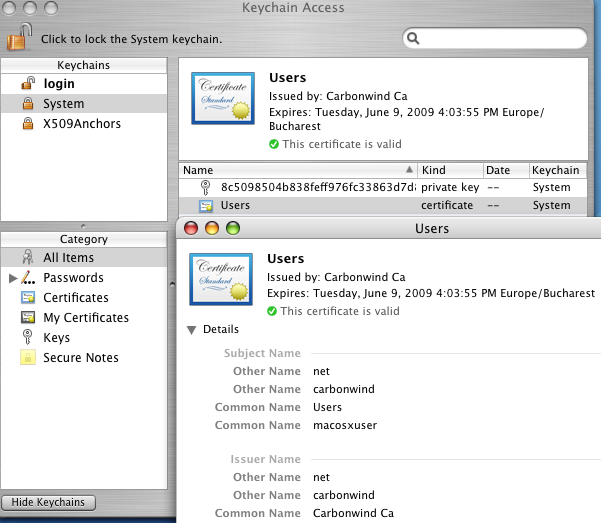
And as can be seen in Figure37, in the System keychain the certificate used for IKE authentication (Users) with its corresponding private key, and the CA certificate have been added. The Users certificate is shown as not valid yet.
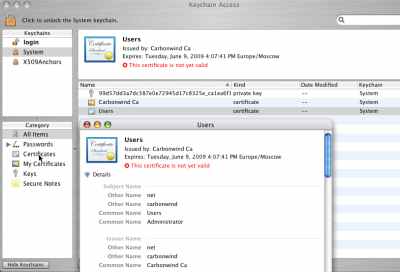
Figure37: Keychain Access - Imported Certificates: System Certificate Not Valid Yet
The CA certificate is shown as not in the trusted root database, see Figure38.
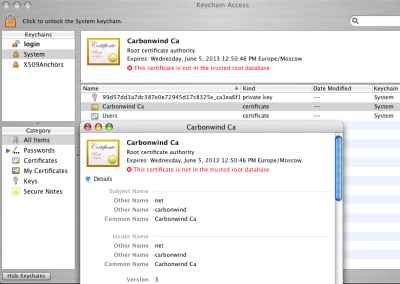
Figure38: Keychain Access - Imported CA Certificate
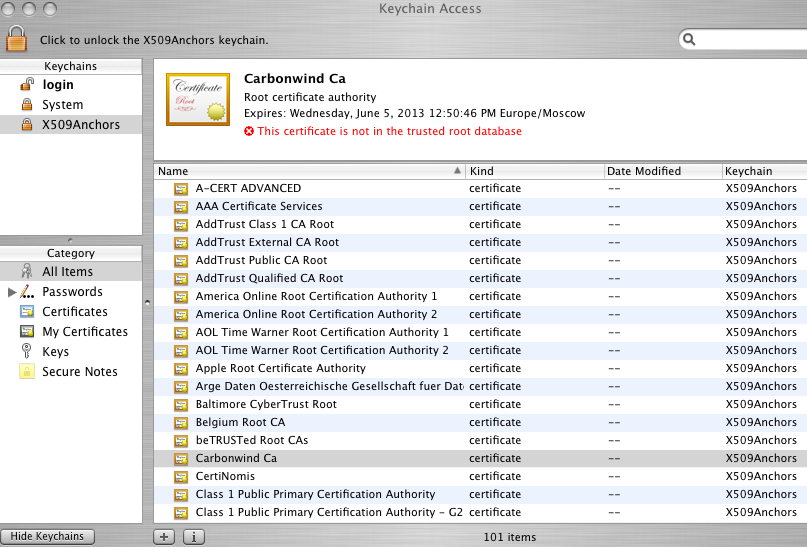
I will drag the CA certificate into the X509Anchors. A very interesting thing can be oberved, the CA certificate is in the X509Anchors but is shown as not in trusted root database, seeFigure39.
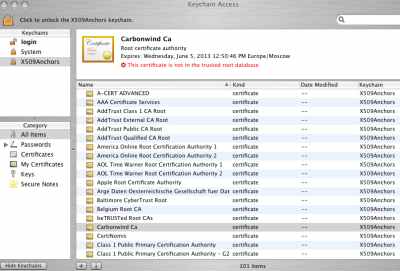
Figure39: Keychain Access - Imported CA Certificate - Is but Is Not
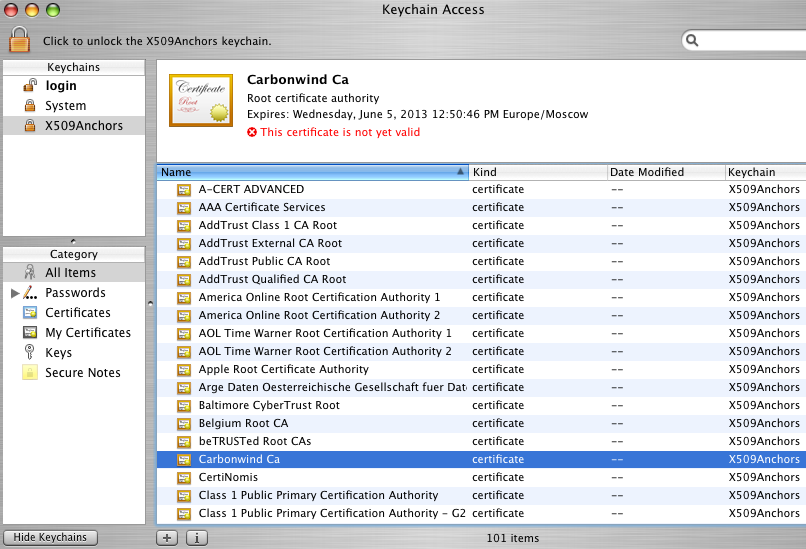
I've closed and open again the Keychain Access utility. Now on the Mac OS X 10.4.8 it says that the CA and the System certificate certificate are not yet valid, see Figure40. Interesting on the Mac OS X 10.4.10 it says that the certificates are valid.
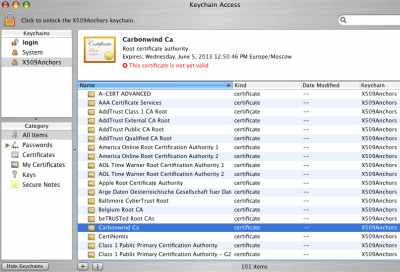
Figure40: Keychain Access - Imported CA Certificate - Not Yet Valid
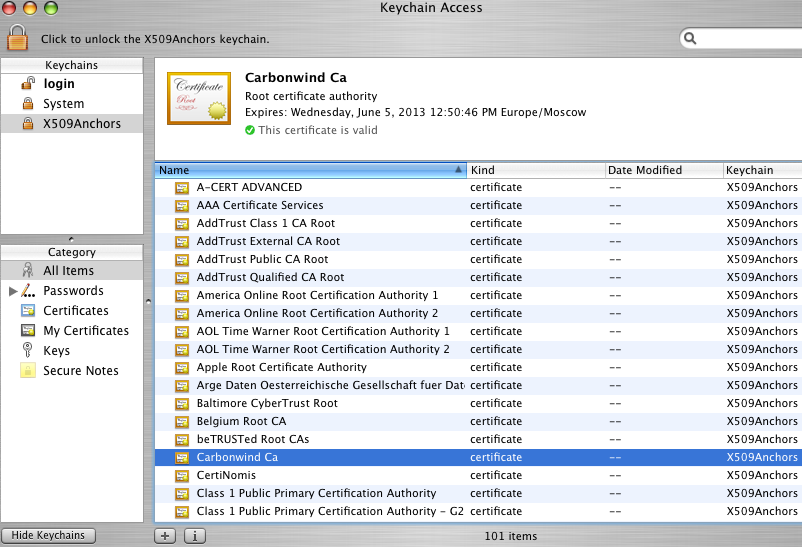
I've rebooted the Mac OS X 10.4.8 machine and now things look good, see Figure41 andFigure41.
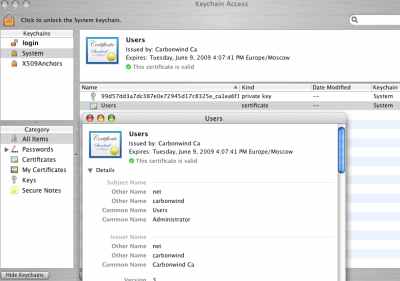
Figure41: Keychain Access - System (Imported Administrator Certificate) Certificate Valid

Figure42: Keychain Access - CA Certificate Valid
You can use the same steps to import the simple user certificate (if you don't use theAdministror Certificate Template), see Figure43.

Figure43: Keychain Access - System (Imported Simple User) Certificate Valid
And now we will create the VPN connection on the Mac OS X 10.4.8.
Launch the Internet Connect application, see Figure44.
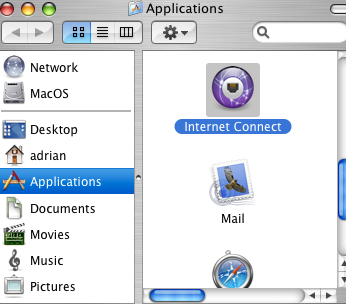
Figure44: Applications - Internet Connect
And click the VPN padlock or from the File menu, click New VPN Connection.
Select L2TP over IPSec.
And click Edit Configurations.
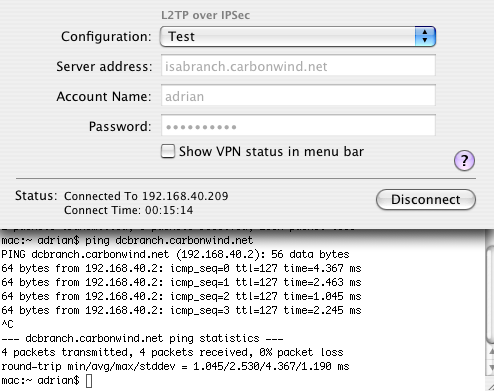
I've configured this VPN connection, see Figure45. I've selected the certificate used for IKE authentication using the Select button from Machine Authentication - Certificate.
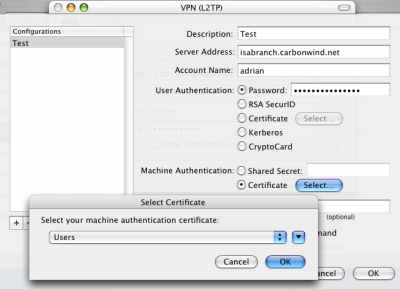
Figure45: VPN(L2TP) - Test
As can be seen I've entered in the Server Address field, the FQDN found in the SAN field of ISA's certificate.
If I will enter the IP address of ISA in this field, the connection will fail.
To be able to test without having a DNS server available to resolve the FQDN isabranch.carbowind.net, I've added the needed entry in the /etc/hosts on the Mac, see Figure46.
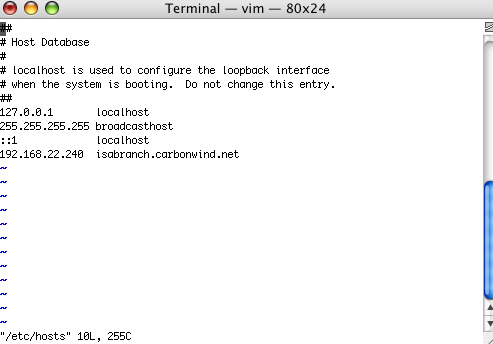
Figure46: etc/hosts
3. Test the VPN connection
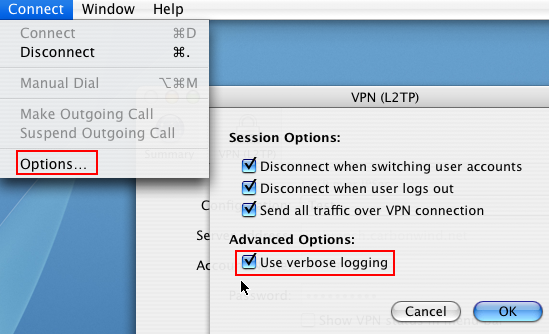
Before initiating the VPN connection, from the menu I've selected Connect and clicked Options, see Figure47. As can be noted I've checked the Use verbose logging checkbox. Also there are a couple of important settings there too. Split tunneling is disabled, the Send all traffic over VPN connection checkbox is selected.
Another checkbox, Disconnect when user logs out is selected too. On a Windows XP machine, there is a registry setting, so the VPN session is disconected when a user logs out if the user let it connected. If I modify this registry entry, when the user logs out, the VPN session is not terminated, thus when another users logs in, this user can use the existing VPN connection to access resources on the corporate network. I've made a quick test on the Mac, I've unchecked the Disconnect when user logs out and Disconnect when switching user accounts checkboxes, initiated the VPN connection and succesfully connected, logged out, and logged in with a different user. And I could use the existing VPN connection to access resources on the corporate network.
So, if your Mac is a multi-user machine, keep an eye on these settings.
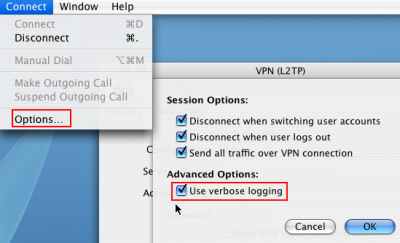
Figure47: Use verbose logging
Hit the Connect button.
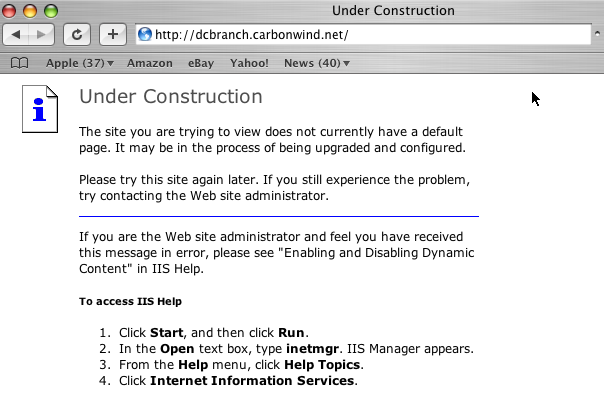
And we are connected and we have connectivity, see Figure48 and Figure49.
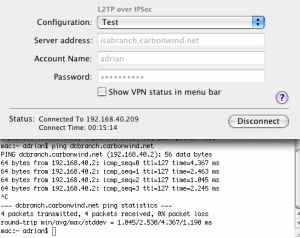
Figure48: VPN (L2TP) Test Successfully Connected
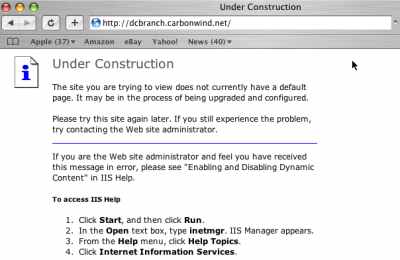
Figure49: Access a Web Site
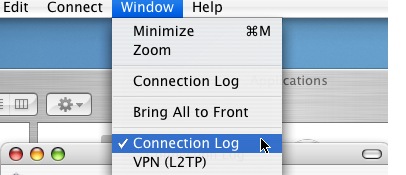
Let's look at the connection log, from menu, select Window, and Connection Log.
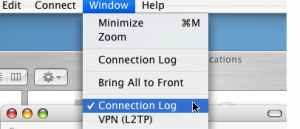
Figure50: Show Connection Log
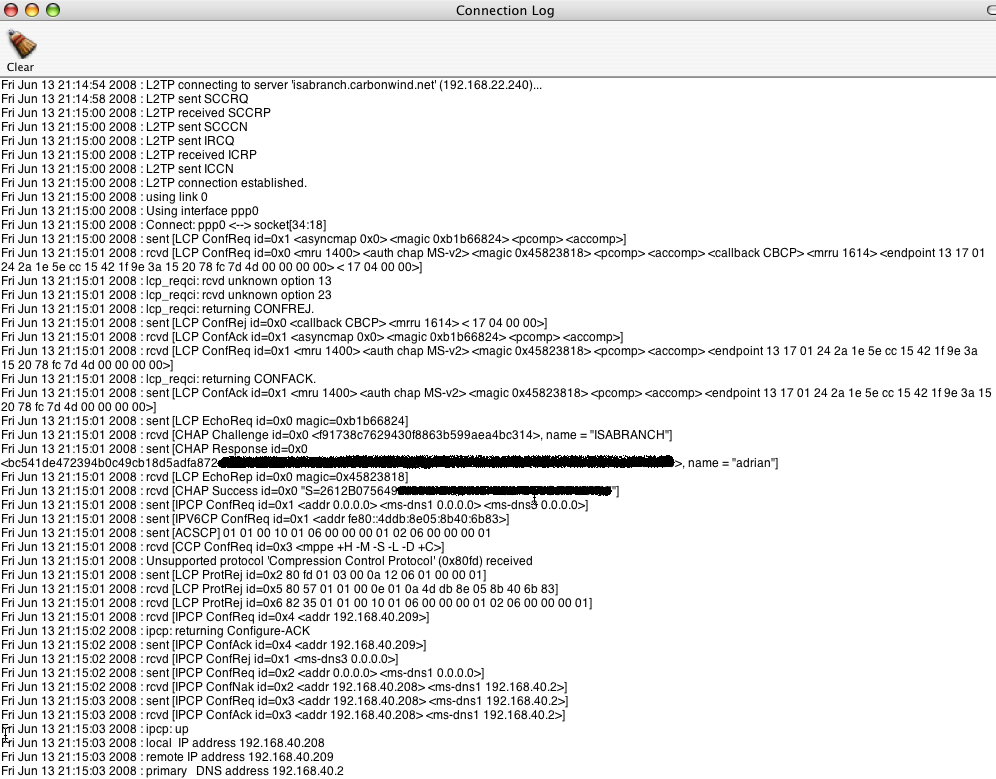
Unfortunetely the Connection Log only shows L2TP information, and no IPsec info, see Figure51. Anyway this is useful info.
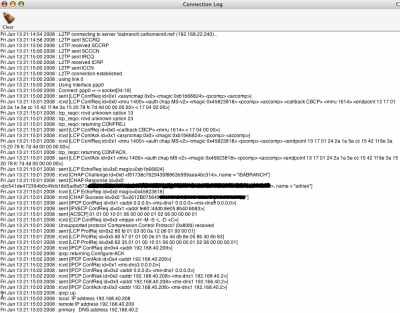
Figure51: Connection Log
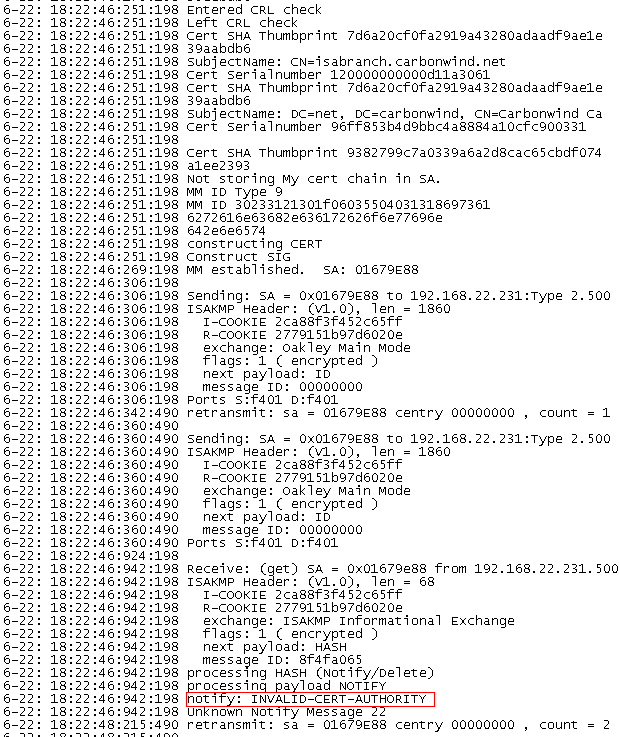
When I attempted to connect from the Mac OS X 10.4.10 machine, the L2TP/IPsec VPN connection failed. Looking at the Oakley.log on ISA, I've noticed that the Mac has sent a notify message, INVALID-CERT-AUTHORITY, see Figure52.
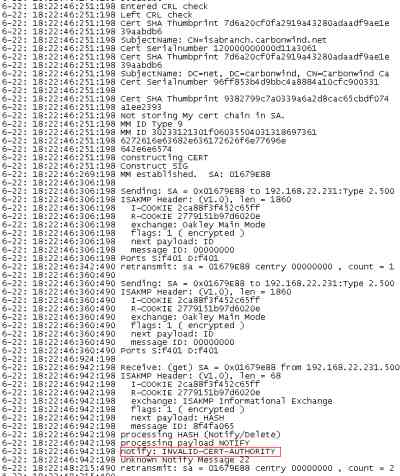
Figure52: ISA - Oakley.log: INVALID-CERT-AUTHORITY
According to this post:
https://lists.strongswan.org/pipermail/users/2007-July/001949.html
in order that the Mac OS X L2TP/IPsec client to accept the server's certificate, this certificate must not contain the "Extended Key Usage" field or contain within the "Extended Key Usage" field IKE Intermediate, otherwise we will get INVALID_CERT_AUTHORITY.
This looks like our case.
I just can stop wondering why it worked with the Mac OS X 10.4.8 when the EKU field only contained Server Authentication.
This not quite a smart move from Apple. Personal I cannot see the reason for having such a default server certification verification rule on the client side. Setting the EKU field to Server Authentication will do just fine, if we want to check that field. But to IKE Intermediate by default ?
And from where can we modify this ?
4. Re-configure the ISA L2TP/IPsec VPN server - sort of
So we need to obtain from our Enterprise CA a certificate that the Mac OS X L2TP/IPsec client will accept.
We can follow this Microsoft KB article in order to issue ISA such a certificate:
http://support.microsoft.com/kb/555281
But I've run into a problem, in the KB article it says that "you need a Microsoft Windows Server 2003 Enterprise edition to create the L2TP/IPSec template."
And I'm using Windows 2003 Standard Edition on my CA.
I can follow the steps from that article, however when, on the Certificate Server, I expand Certification Authority (Local), expand Carbonwind CA, right click Certificate Templates, select New, click Certificate Template to Issue, I do not see theL2TP/IPSec (Offline request) newly created template. This appear to be a limitation of Windows 2003 Server Standard Edition.
So now what ?
Well, if you read that KB article, you can notice that we do not need to do everything it says there, because we do not need to export the certificate. We can use the web enrollment process and request directly from ISA such a certificate. The Mac machine does not need such a certificate.
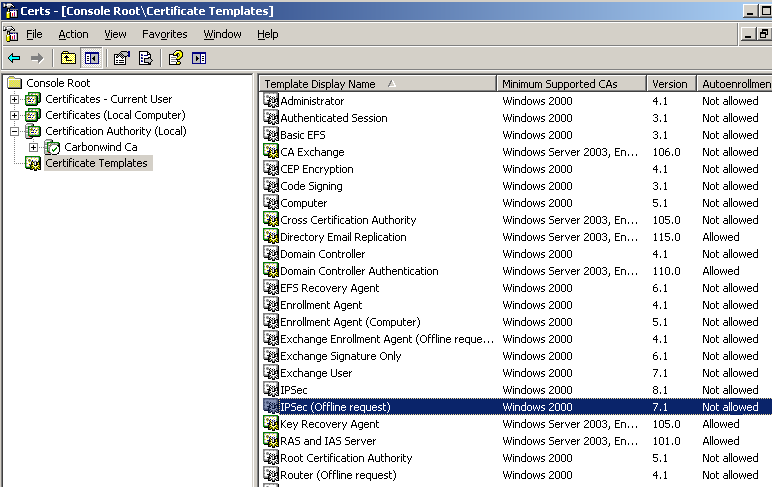
In Figure53 we can see the IPSec (Offline Request) certificate template, that accordingly to the KB doc we need to duplicate.

Figure53: CA - Certificate Templates - IPSec (Offline Request)
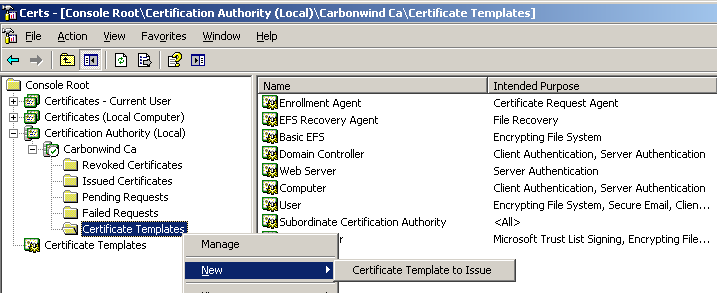
So, on my Certificate Server, I've expanded Certification Authority (Local), expanded Carbonwind CA, right clicked Certificate Templates, selected New, clicked Certificate Template to Issue, and selected the IPSec (Offline request) template, see Figure54 and Figure55.
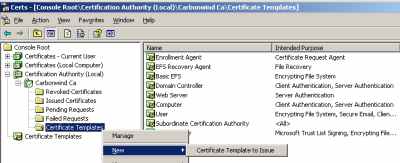
Figure54: CA(Local) - Carbonwind CA - Certificate Templates - New Certificate Template to Issue
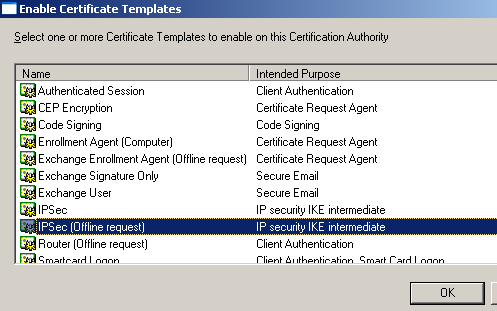
Figure55: Enable Certificates Templates - IPSec (Offline Request)
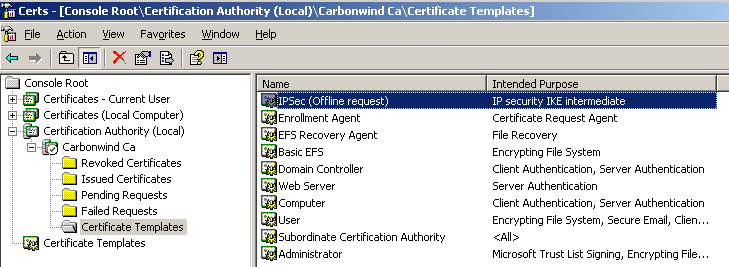
And now my CA can issue IPSec (Offline request) certificates, see Figure56.

Figure56: CA(Local) -Carbonwind CA - Certificate Templates - IPSec (Offline Request)
There are a couple of limitations with these certificates compared with the ones that we would have obtained if we had followed the KB article (assuming that the CA is running on Windows 2003 Enterprise). For example we cannot export the private key or modify the default Validity period.
On ISA, open Internet Explorer and enter the URL for your CA web enrollment site.
I will simply enter the administrator name and password.
Click Request a Certificate.
Select advanced certificate request.
Choose the IPSec (Offline request) certificate template.
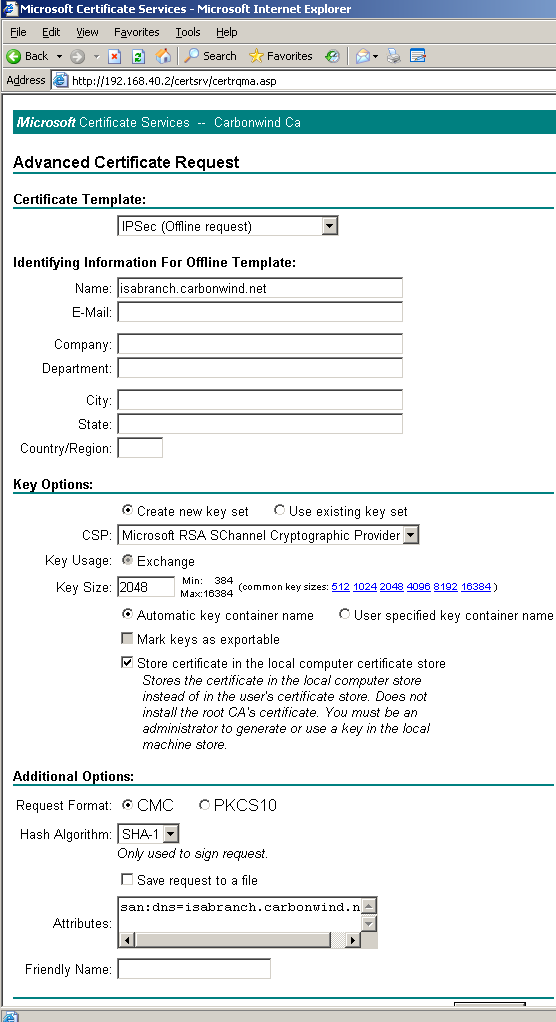
In the Name box I've entered ISA's name, isabranch.carbonwind.net.
Select the Key Size.
Put a checkmark within the Store certificate in the local computer certificate store checkbox.
In the Attributes box, type the desired SAN attribute, in my case isabranch.carbonwind.net. See Figure57. Note that I've already configured my CA to issue certificates that contain the SAN extension (see KB931351).
Click Submit.
And click Yes in the dialog box informing you that the web site is requesting a new certificate on your behalf.
Click Install this certificate.
And click Yes in the dialog box informing you that the web site is adding a certificate.
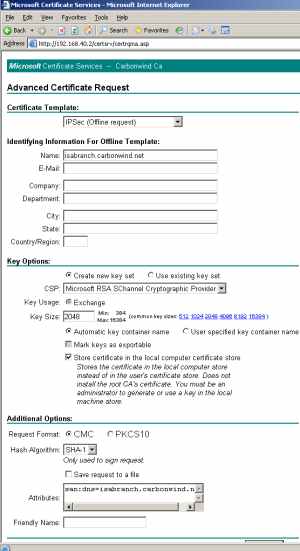
Figure57: Advance Certificate Request - IPSec (Offline Request)
Let's take a look at this certificate, see Figure58 and Figure59. Note the EKU and SAN fields.

Figure58: IPSec (Offline Request) Certificate - General Tab
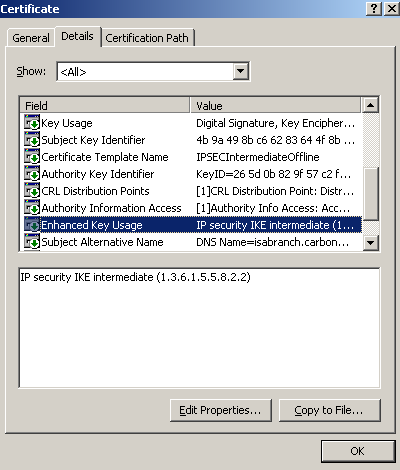
Figure59: IPSec (Offline Request) Certificate - Details Tab
5. Re-test the VPN connection
Now when I connect from the Mac OS X 10.4.10 machine, my L2TP/IPsec connection will succeed, see Figure60.
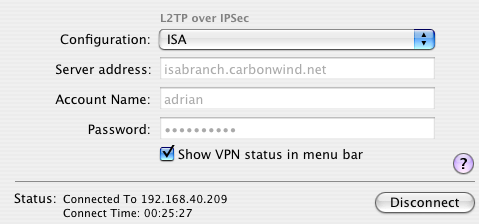
Figure60: Mac OS X 10.4.10 - L2TP over IPSec connected
But wait a minute, now I cannot connect with the Mac OS X 10.4.8 machine!!!
It's failing with the INVALID_CERT_AUTHORITY error. So the Mac OS X 10.4.8 machine does not like my new IPsec certificate from ISA.
This is becoming amusing.
But that's not a particular problem, since the Mac OS X can be updated.
I did not have the chance to use the latest Mac OS X 10.4.11 version(as writing). So I'm not sure what will happen with our L2TP/IPsec connection then.
I'm not aware of any guides from Apple, explaining what we need to do regarding IKE authentication with certificates.
Note that within the above tests, I've only had installed the Computer certificate on ISA or the IPsec (Offline Request) one.
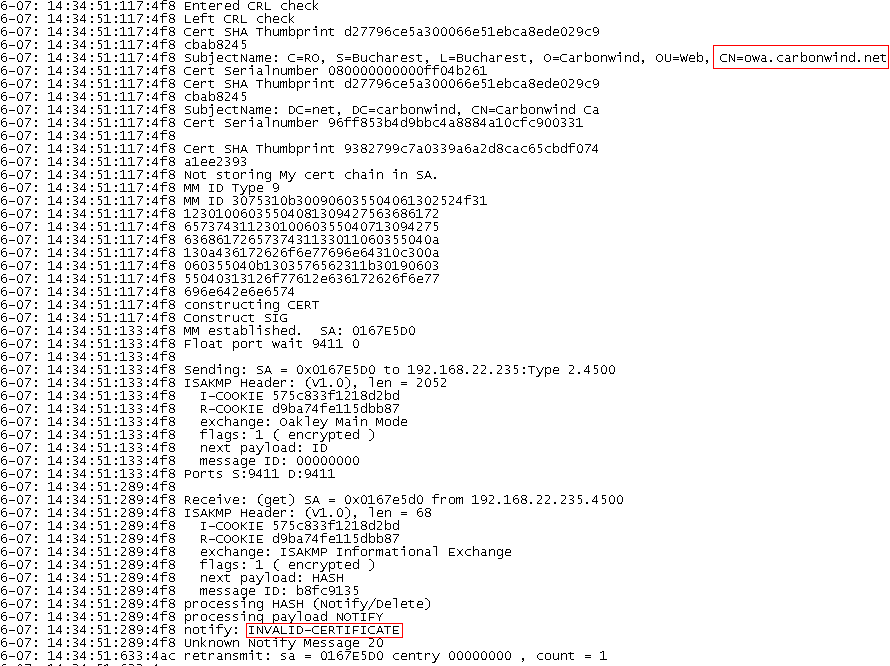
When I attempted to connect from a Mac OS X 10.4.8 machine to a ISA server which had installed also a web server certificate used for OWA, the connection failed. It was a certificate from the Enterprise CA, exported from the Exchange 2003 server and imported on ISA. Looking at the Oakley.log on ISA, I've noticed that ISA was picking the OWA certificate for IKE authentication instead of the computer certificate. And the Mac has sent a notify message, INVALID-CERTIFICATE, see Figure61. According to this post:
https://lists.strongswan.org/pipermail/users/2007-July/001949.html
this happens because the server certificate does not contain the SAN entry.
I'm not currently aware of a method to specify on ISA which certificate would be used for IKE authentication for L2TP/IPsec connections.
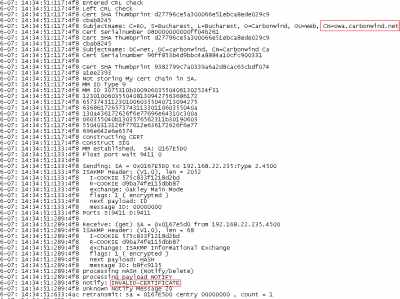
Figure61: ISA- Oakley.log: INVALID-CERTIFICATE
Thinking a little bit, I've decided to enable the Enterprise CA to issue certificates that contain the SAN extension, see KB931351. And to install a certificate on ISA for OWA which would contain a SAN entry(DNS name owa.carbonwind.net).
Done that, and it looked like ISA started to pick the Computer certificate for IKE authentication.
Interesting, after installing on ISA an IPsec Offline Request certificate(so now three certificates are installed on ISA in the Computer Store), ISA will pick this certificate for IKE authentication and not the Computer certificate.
For a moment I was starting to consider using a different CA for obtaining a certificate for ISA and Macs for IKE authentication(for example a Windows 2003 Standalone CA can issue IPsec certificates). I did not tried this posibility though.
Assuming that we are using an IPsec Offline Request certificate, and we have Windows Vista L2TP/IPsec VPN clients using the additional checks over the server certificate (see KB926182), these VPN clients will not be able to connect. Apparently, according to my tests, if the EKU field from the server certificate does not contain Server Authentication (1.3.6.1.5.5.7.3.1), the connection will fail, the log showing "CERT_E_WRONG_USAGE" error, see my L2TP/IPsec in Pictures - ISA Server 2006 - Part 2.
You may request a certificate from the Windows 2003 Enterprise CA(if installed on Windows 2003 EE) like here(I don't know/haven't tested yet if the Mac OS X L2TP/IPsec VPN clients accept such a certificate).
At least Microsoft documented the additional checks over the server certificate performed by Windows Vista during IKE authentication for L2TP/IPsec connections (see KB926182).
6. Miscellaneous
I did some tests when the Mac OS machine was behind a NAT device.
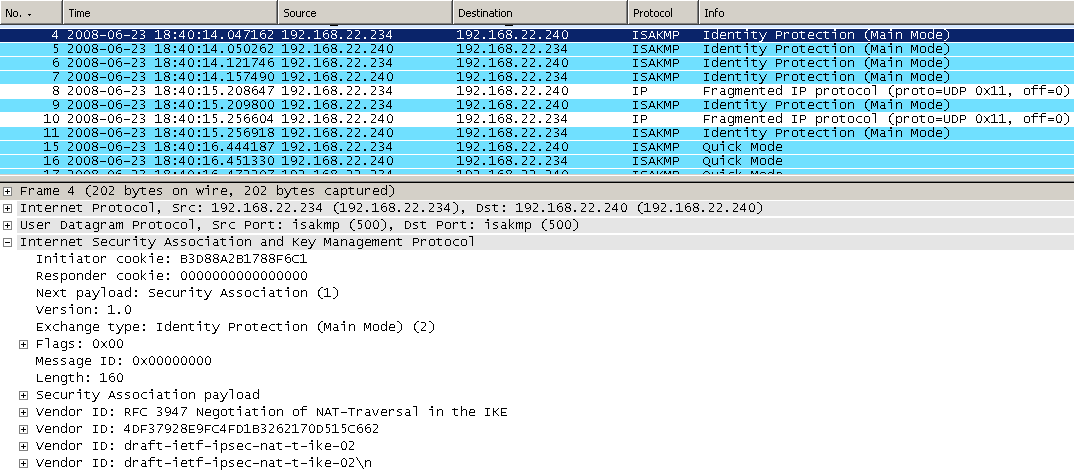
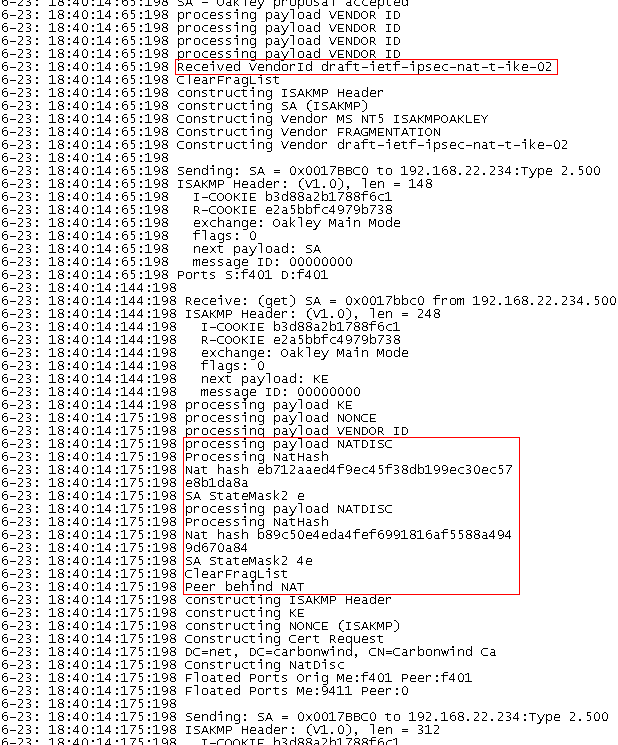
The Mac OS X 10.4.8 or 10.4.10 support the draft-ietf-ipsec-nat-t-ike-02. We can see that for example within a Wireshark capture or within the Oakley.log on ISA, see Figure62 andFigure63.
I did not encounter any problems when the Mac OS X machine was behind the NAT device with the L2TP/IPsec connections.
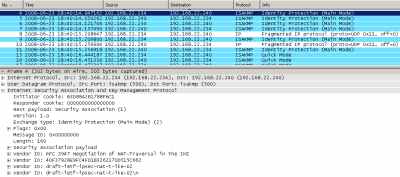
Figure62: Wireshark Trace - VIDs
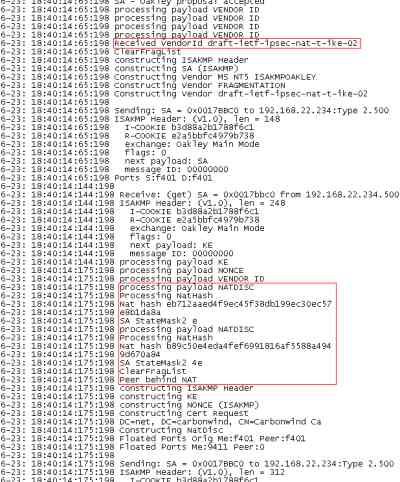
Figure63: ISA - Oakley.log - Peer Behind NAT
I had configured the DHCP relay on ISA, in order to be able to provide to the VPN clients through DHCP options for example the connection-specific DNS suffix. I did not observed either on the Connection Log on the Mac OS X 10.4.8/10.4.10 nor on ISA's log that the Mac is sending the DHCPINFORM packet.
As said above I did not have the chance to perform any VPN tests with Mac OS X 10.4.11 or Mac OS X 10.5.x.
If you need to support some Mac OS X as L2TP/IPsec VPN Clients when ISA is the L2TP/IPsec VPN server, and to use certificates for IKE authentication for the L2TP/IPsec connections, you may face a bumpy road. Luckily, you can have an ISA VMware lab for example, thus you can mess with various certificates types, keeping an eye on the Oakley.log on ISA, without affecting the live network.
Maybe Apple will document in the future what exactly checks performs the default L2TP/IPsec VPN client over the VPN server's certificate.
And maybe Apple will also give us the posibility of downloading a trial version of their OS X, and the posibility to install it in VMware for example. Apple is behind the Windows OS' or Linux OS' regarding this. Having a VM available for testing eases a lot the deployment phase.
|